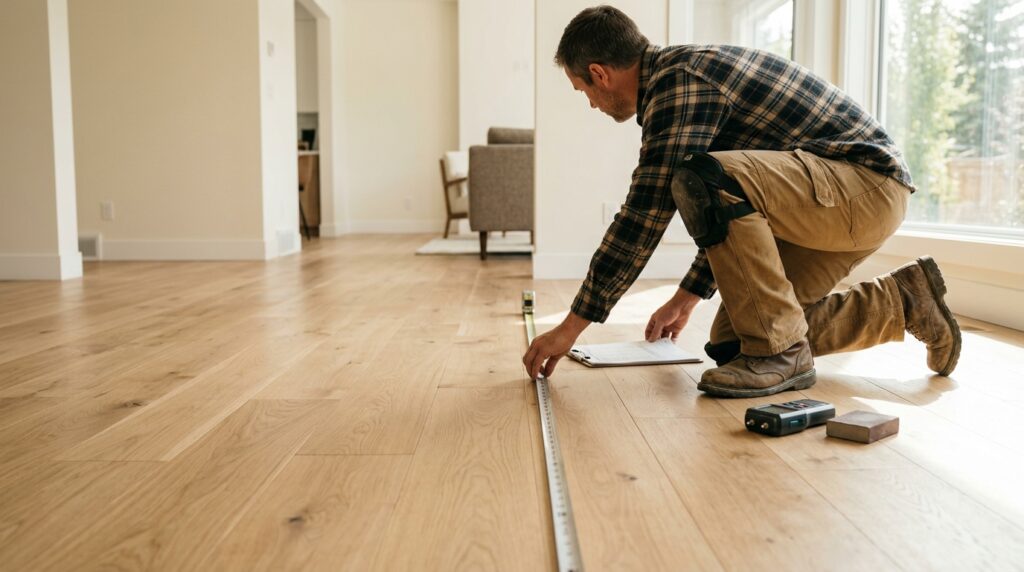
Your hardwood floors are scratched, dented, or maybe there’s a water stain near the kitchen sink that won’t go away. Now you’re stuck weighing DIY vs professional hardwood floor repair, and honestly, it’s not always an easy call.
Some damage is simple enough to fix on a Saturday afternoon with a stain marker and a little patience. Other damage can turn into a much bigger (and more expensive) problem if you get it wrong. The trick is knowing which category your floor falls into before you pick up a tool.
This guide walks through both options in plain language, so you can make a decision you won’t regret six months from now. And if you’d rather skip the guesswork entirely, ourprofessional hardwood floor repair team is always happy to take a look.
Understanding Common Hardwood Floor Damage
Before deciding how to fix a floor, it helps to actually understand what you’re dealing with. Not all hardwood damage is created equal, and the fix depends entirely on the type.
Types of Damage You Might Be Dealing With
Most hardwood floor problems fall into a handful of categories:
Surface scratches and scuffs : usually from shoes, pet claws, or furniture being dragged across the room
Dents : caused by dropped objects or heavy furniture legs
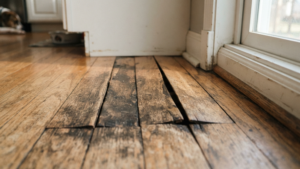
Water damage : cupping, buckling, or discoloration from spills, leaks, or humidity
Gaps between planks : common in older homes or during dry winter months
Loose or squeaky boards: often a sign of subfloor movement
Deep gouges or missing chunks of wood : usually from something heavy being dropped or dragged
If you’re not sure which category your damage falls into, our article onsigns you need hardwood floor repair breaks down what to look for room by room.
What Causes Hardwood Floor Damage
Most damage doesn’t happen overnight. It builds up over time from things like:
Moisture from spills, leaky appliances, or high indoor humidity (a bigger issue than most people realize in older Calgary-area homes with older HVAC systems)
Furniture and pet claws without protective pads
Direct sunlight causing fading in high-traffic living rooms
Everyday foot traffic wearing down the finish faster than expected
Water is one of the trickiest culprits because it’s not always obvious until the damage is already done. If you’ve noticed cupped boards or a dull, discolored patch near a window or appliance, it’s worth reading our guide onwater-damaged hardwood floors before deciding on a fix.
DIY Hardwood Floor Repair: What You Can (and Can’t) Handle
Let’s be honest, DIY isn’t for every repair. But for the right kind of damage, it can save you money and give you a bit of satisfaction too.
Repairs Suitable for DIY
Small, cosmetic issues are usually the safest bet for a DIY approach:
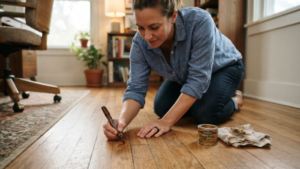
Light surface scratches : a matching stain marker or touch-up pen can hide these in minutes
Shallow dents : a damp cloth and a warm iron can sometimes swell the wood fibers back into place
Small gaps between boards : wood filler or colored putty can close minor gaps
Minor scuffs : often just need cleaning and a light coat of finish
If your floor only has one or two of these issues and the rest of the finish looks healthy, DIY is a reasonable place to start.
Tools and Materials You’ll Need
A basic DIY repair kit typically includes:
Item
Approximate Cost
Wood stain marker/touch-up pen
$10–$20
Wood filler or putty
$10–$25
Fine sandpaper
$5–$15
Protective finish (small can)
$20–$40
Soft cloths and applicators
$10–$15
For most small jobs, you’re looking at $50–$100 in materials, which is a fraction of what a professional callout might cost.
Risks and Common DIY Mistakes
Here’s where things can go sideways. The most common DIY mistakes we see are:
Color mismatch : stain markers rarely match the exact tone of an aged floor, leaving an obvious patch
Over-sanding a small area: which creates a dip that catches light differently than the rest of the floor
Using the wrong filler for the wood species: leading to it cracking or shrinking later
Treating water damage like a cosmetic problem: when the real issue is moisture trapped beneath the surface
That last one is the big one. A plank that looks fine after drying out can still warp again months later if the underlying moisture source wasn’t addressed. If you’re dealing with anything beyond a surface-level fix, it’s worth getting a second opinion before you start sanding.
We’ve seen this play out more than once. A homeowner notices a small water stain near the dishwasher, sands it down, and applies a fresh coat of finish. It looks great for a few weeks. Then the cupping comes back, sometimes worse than before, because the moisture underneath was never fully dried out or addressed. What started as a $50 touch-up job turns into a $400 repair once the boards actually need to be pulled up and replaced. This is exactly why understanding the type of damage matters more than the size of it.
There’s also a learning curve most people underestimate. Matching stain color sounds simple until you’re standing in the hardware store aisle holding three different “oak” stains that all look slightly different under store lighting than they will on your actual floor. Testing on a hidden section first, like inside a closet, can save you from a patch that stands out every time you walk through the room.
Professional Hardwood Floor Repair: When Expertise Matters
Some damage just isn’t a weekend project, and that’s okay. Knowing when to bring in a pro can actually save you money in the long run.
What Professional Repair Services Include
A professional repair typically covers a lot more ground than a DIY fix, including:
Full assessment of the damage and its root cause (not just the visible symptoms)
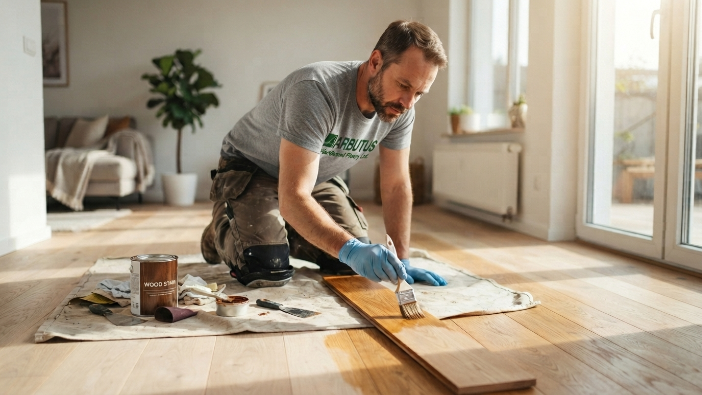
Board or plank replacement when wood is beyond saving
Precise color and stain matching using professional-grade products
Structural repairs for loose boards or subfloor issues
Moisture testing before any refinishing begins
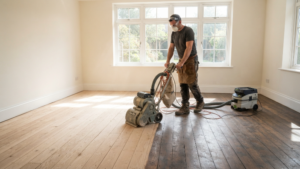
Many professional teams also use dustless sanding equipment, which contains airborne particles far better than a rented sander from the hardware store. If dust and mess are a concern for your household, our page ondustless hardwood floor refinishing explains how that process works.
Professionals also bring something you can’t rent at the hardware store: pattern recognition. After enough years on the job, an experienced technician can look at a warped board and tell within minutes whether it’s from a slow leak, seasonal humidity swings, or a one-time spill. That diagnosis matters, because fixing the symptom without fixing the cause just means you’ll be back here again next year. It’s the difference between patching a problem and actually solving it.
The same goes for wood species. Oak behaves differently than maple under a sander. Older reclaimed wood behaves differently than newer engineered planks. A professional adjusts technique and grit sequence based on what’s actually underfoot, which is nearly impossible to know without hands-on experience.
Benefits of Hiring a Professional
The advantages go beyond just “it looks nicer.” Professional repair usually means:
Longer-lasting results : properly sanded and sealed repairs tend to hold up for years, not months
Consistent color matching: especially tricky on older or sun-faded floors
Faster turnaround : most repairs are done in a day or two, not spread across several weekends
Warranty coverage: so if something isn’t right, it gets fixed at no extra cost
Fewer hidden surprises: since professionals know how to spot subfloor or moisture issues before they become bigger problems
Reputable flooring professionals also follow practices aligned with theNational Wood Flooring Association, which sets the benchmark for sanding, finishing, and repair standards across the industry. That’s not something a DIY job can replicate with a rented sander and a YouTube tutorial.
DIY vs Professional Hardwood Floor Repair: Cost Comparison
Cost is usually the first question homeowners ask, so let’s break it down honestly.
Factor
DIY Repair
Professional Repair
Small scratch/scuff fix
$50–$100
$150–$300 (service call minimum)
Dent repair
$20–$50
Included in service call
Plank replacement (per board)
$30–$80 (materials only, high risk of mismatch)
$80–$200 (materials + labor, matched finish)
Water damage repair
Not recommended DIY
$300–$1,500+ depending on extent
Risk of redo cost
High
Low
DIY looks cheaper on paper, and for small cosmetic fixes, it usually is. But once you factor in the cost of materials that don’t get used correctly, or a professional having to fix a botched DIY attempt, the savings shrink fast. We’ve seen homeowners spend more redoing a failed DIY dent repair than they would have spent calling a professional in the first place.
DIY vs Professional Hardwood Floor Repair: Pros and Cons
Time is another factor people tend to underestimate, especially with DIY projects that sound quick in theory.
Repair Type
DIY Timeline
Professional Timeline
Surface scratch touch-up
1–2 hours, plus drying time
Rarely booked alone, usually bundled with other work
Dent repair
30 minutes to 1 hour
Same day, included in service call
Single plank replacement
Half a day to a full day, plus trial and error
2–4 hours
Water damage repair
Not recommended, can take several failed attempts
1–3 days depending on drying and curing
Notice that even “quick” DIY jobs often come with hidden time costs, like a second trip to the hardware store for the right stain shade or extra drying time because the first coat didn’t cure evenly. Professionals build that buffer into their process from the start, so there are fewer surprises along the way.
How to Decide Between DIY and Professional Hardwood Floor Repair
At this point you’re probably wondering which camp your situation falls into. Here’s a simple way to think it through.
Questions to Ask Yourself
Is the damage purely cosmetic, or does it affect the wood’s structure?
Have you seen any signs of water involvement, even in the past?
Is the affected area larger than a couple of square feet?
Do you have prior experience with wood finishing or staining?
Would a mismatched patch bother you, or is this a low-visibility area like a closet?
If you answered “yes” to structural damage, water involvement, or a large affected area, professional repair is the safer route. Small, cosmetic, low-visibility fixes are where DIY tends to shine.
When to Call a Professional Right Away
Some situations shouldn’t wait for a DIY attempt at all:
Cupping, buckling, or visible warping
A musty smell near the damaged area (possible moisture trapped underneath)
Squeaking or movement when you walk across a section of floor
Damage that’s already been “fixed” once and has come back
Older homes where the finish history or wood species is unknown
Hardwood Floor Repair vs Refinishing: What’s the Difference?
It’s worth mentioning that repair and refinishing aren’t always the same thing, and sometimes one leads to the other. Repair fixes specific damaged spots. Refinishing sands and recoating the entire floor for a uniform, like-new look.
If your damage is spread across multiple rooms or the finish is worn through in several places, a fullhardwood floor refinishing might actually be the more cost-effective option compared to patching multiple spots individually. We’ve also put together a breakdown ofhardwood floor polishing vs refinishing if you’re trying to figure out which service actually matches your floor’s condition.
Preventing Future Hardwood Floor Damage
Whichever route you choose this time, a little prevention goes a long way toward avoiding a repeat repair:
Use felt pads under furniture legs
Keep humidity levels stable, especially through Alberta’s dry winters
Wipe up spills immediately instead of letting them sit
Place mats at entryways to catch grit before it scratches the finish
Trim pet nails regularly if you have dogs or cats on hardwood
Small habits like these can add years to the life of a repair, whether it was done by you or a professional.
It’s also worth doing a quick seasonal check twice a year. Walk through your home and look for early warning signs: a slightly raised board near a window, a dull patch that never seems to shine no matter how much you clean it, or a faint musty smell in one corner of a room. Catching these early almost always means a smaller, cheaper fix. Waiting until the damage is obvious usually means a bigger repair bill later, regardless of whether you go the DIY or professional route.
Final Thoughts
Choosing between DIY vs professional hardwood floor repair really comes down to the size and type of damage you’re dealing with. Small scratches and shallow dents are usually safe to handle yourself. Water damage, structural issues, and larger repairs are best left to people who do this every day.
If you’re still not sure which category your floor falls into, that’s exactly what we’re here for. Our team offers honest assessments, so you’re never guessing whether a repair will hold up. We also serve homeowners in nearby communities, includinghardwood floor repair in Priddis, so help is closer than you might think.
Ready to get your floors looking their best again?Reach out to our hardwood floor repair team for a free assessment and honest recommendation, no pressure, just an expert opinion on what your floor actually needs.
It can be, especially for small cosmetic touch-ups before a tenant moves in. Just keep in mind that landlords often want a quicker, more uniform result, which usually favors a professional fix for anything beyond a light scratch.
Yes, in most cases. Spot repairs and single-plank replacements are common and don't require refinishing the entire room, as long as the surrounding boards are in good shape.
Water damage usually shows as cupping (edges higher than the center of the board), discoloration, or a slightly soft feel underfoot. General wear tends to look more like dullness or fine scratching spread evenly across the floor.
It can, depending on the manufacturer. Many hardwood warranties require that repairs and refinishing be performed by a certified professional, so it's worth checking your paperwork before attempting a DIY fix on a newer floor.
Most spot repairs are completed in a single day. Larger jobs involving plank replacement or water damage restoration may take two to three days, depending on drying and curing time for the finish.
Repair is almost always cheaper than replacement, unless the damage covers a large percentage of the floor or the subfloor itself is compromised. A professional assessment can tell you which option makes more financial sense for your specific situation.
How to choose a hardwood flooring contractor in Calgary Learn how to choose a hardwood flooring contractor in Calgary by checking experience, insurance, past projects and written quotes before you hire. Contact Us Your floors will be under your feet for 20 years or more. The person you hire to…
Hardwood Flooring Cost in Calgary: What You’ll Actually Pay Planning your project but unsure about hardwood flooring cost in Calgary? This guide explains installation, refinishing, and repair expenses to help you plan your flooring budget. Contact Us If you’re planning to install, repair, or refinish hardwood flooring in Calgary, understanding…
Matte vs gloss hardwood flooring: which finish is right for your home? Matte vs gloss hardwood flooring, see which finish suits Calgary homes best for durability, style & upkeep. Get expert advice from Arbutus Hardwood. Contact Us Matte vs gloss hardwood flooring feels like a small decision until you’re standing…