How to Repair Water-Damaged Hardwood Floors: A Step-by-Step Guide
Need reliable water damaged hardwood repair? Our flooring specialists can assess the damage, recommend the most effective repair solution, and restore your hardwood floors to their original beauty. From minor water stains and cupping to warped boards and extensive moisture damage, we use proven restoration techniques and premium materials to deliver durable, long-lasting results.
Hardwood floors are one of the most valuable features in a home, but they don’t react well to standing water. A burst pipe, leaking appliance, overflowing sink, or flooding can leave your flooring swollen, stained, warped, or even structurally damaged. The good news is that water damage doesn’t always mean you have to replace the entire floor.
In many cases, hardwood flooring can be restored if you act quickly and use the right repair methods. The key is understanding how deeply the moisture has penetrated, whether the boards are still structurally sound, and which repair approach fits the type of damage.
This guide explains how to repair water-damaged hardwood floors, when a DIY repair makes sense, when professional restoration is the better investment, and how to prevent the same problem from happening again. If you’d rather skip the guesswork, our team at Arbutus Hardwood Floors handles everything from moisture assessment to full hardwood floor repair but this walkthrough will help you understand exactly what’s happening to your floor either way.
Can Water-Damaged Hardwood Floors Be Repaired?
Yes, hardwood floors can often be repaired if the damage is addressed before the wood begins to rot or permanently deform.
Minor issues like light cupping, small stains, or slight swelling usually improve after the floor dries completely. Moderate damage may require sanding, refinishing, or replacing a few boards. Severe flooding that causes buckling, mold growth, or widespread structural damage often calls for partial or full floor replacement.
The faster you remove moisture, the better the chances of saving your hardwood floor.
Signs Your Hardwood Floor Has Water Damage
Water affects wood in different ways depending on how long it remains wet and how much moisture the boards absorb. For a full visual breakdown of what to look for, see our detailed guide on signs you need hardwood floor repair.
Look for these warning signs:
Boards that feel raised or uneven
Edges curling upward (cupping)
Centers higher than edges (crowning)
Loose or separated floorboards
Buckling or lifting from the subfloor
Dark water stains
Soft spots underfoot
Squeaking that wasn’t there before
Musty odors indicating trapped moisture
Mold around joints or baseboards
Even if the floor looks dry, moisture can remain trapped underneath for weeks.
Common Causes of Water Damage
Understanding what caused the damage helps determine how extensive repairs need to be.
Plumbing Leaks: Hidden pipe leaks often damage hardwood slowly. Since the leak may continue for weeks before being discovered, moisture frequently reaches the subfloor.
Appliance Failures: Dishwashers, washing machines, refrigerators, and water heaters are common sources of hardwood floor damage.
Roof Leaks: Rainwater entering through a damaged roof may stain hardwood while also affecting ceilings and wall framing.
Flooding: Floodwater usually causes the most serious damage because it saturates both the flooring and the subfloor.
High Indoor Humidity: Poor ventilation or excessive indoor humidity can gradually cause hardwood to expand, cup, and develop gaps as seasons change. The EPA recommends keeping indoor relative humidity between 30–50% to limit moisture-related damage and mold growth.
Assess the Severity Before Starting Repairs
Not every damaged floor needs to be torn out. Use this simple assessment:
One important mistake homeowners make is repairing the surface before confirming the floor is dry underneath. Sanding wet hardwood often makes the problem worse.
Step 1: Stop the Water Source
Repair begins by eliminating the source of moisture. That may involve:
Turning off the main water supply
Fixing leaking plumbing
Repairing a roof leak
Replacing a damaged appliance hose
Removing standing floodwater
Unless the source is fixed first, repairs won’t last.
Step 2: Remove Standing Water Immediately
Time is the biggest factor in determining whether hardwood survives. Use:
Wet/dry vacuum
Towels
Mop
Water extraction equipment
Avoid letting water sit longer than necessary. Hardwood starts absorbing moisture almost immediately. If flooding affects multiple rooms, professional extraction equipment removes water much faster than household tools.
Step 3: Dry the Hardwood Floor Properly
Drying is the most important part of the restoration process.
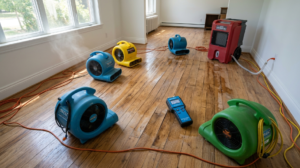
Open windows if outdoor humidity is low. Use:
High-volume fans
Commercial air movers
Dehumidifiers
HVAC system
Leave the equipment running continuously until moisture readings return to normal. Depending on the amount of water involved, drying may take anywhere from several days to several weeks. Never assume the floor is dry simply because the surface feels dry.
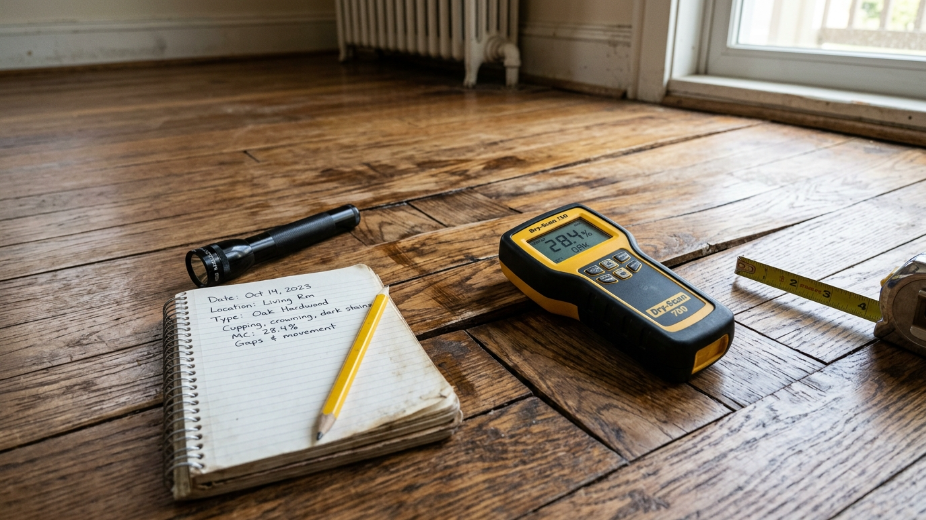
Step 4: Measure Moisture Before Making Repairs
Professional flooring contractors use moisture meters rather than guessing.
Generally, hardwood flooring should return close to its normal moisture content before sanding or refinishing begins. If moisture remains trapped inside the boards or subfloor, repairs performed too early often fail as the wood continues moving during the drying process.
This step alone prevents many costly mistakes.
How to Repair Minor Water Damage
Minor water damage is usually repairable without replacing flooring.
Remove Surface Stains:
Light stains can sometimes be cleaned using hardwood-safe cleaners designed for finished wood surfaces. For darker discoloration, gentle sanding followed by refinishing may restore the wood’s appearance. Avoid using bleach or harsh chemicals unless recommended for unfinished hardwood, as they may permanently damage the finish.
Fix Small Areas of Cupping:
Cupping happens when the bottom of a board contains more moisture than the top, causing the edges to rise. In many situations, the boards flatten naturally after drying.
If slight cupping remains after moisture levels stabilize:
Sand high edges
Apply fresh stain if needed
Refinish the repaired section
Sanding before the floor finishes drying may cause the opposite problem — crowning.
Repair Surface Scratches:
Water sometimes softens finishes, making scratches more visible. Small scratches can often be repaired using:
Hardwood repair markers
Wax filler sticks
Color-matched repair kits
These cosmetic repairs blend minor imperfections until the floor is refinished.
Repairing Warped Hardwood Boards
Warped boards don’t always need replacement.
First, determine whether the boards remain securely attached. If the wood has only slightly distorted, drying followed by sanding may restore a flat surface. If boards remain permanently twisted or separated from neighboring planks, replacement becomes the better long-term solution.
Professionals typically remove only the damaged boards rather than replacing the entire room. This approach preserves matching flooring while reducing repair costs.
How to Replace Individual Hardwood Boards
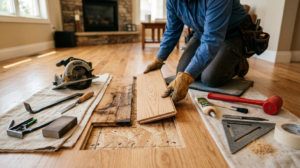
Localized damage is often easier to repair than many homeowners expect. The general process includes:
Mark the damaged board.
Cut through the center using a circular saw set to the correct depth.
Remove the damaged sections carefully.
Clean the opening.
Fit a matching replacement board.
Secure it with flooring adhesive or nails, depending on the installation method.
Sand, stain, and refinish the repaired area until it blends with the surrounding floor.
Finding an exact match may require using leftover flooring from the original installation or sourcing the same wood species and width from a flooring supplier.
How to Repair Buckled Hardwood Floors
Buckling is one of the most severe forms of water damage. Instead of simply swelling, the boards lift away from the subfloor, creating raised sections or large gaps. This usually happens after prolonged exposure to water or flooding.
Before replacing anything, make sure the flooring is completely dry. In some cases, slight buckling settles as moisture levels return to normal.
If the boards remain lifted:
Inspect the subfloor for moisture or rot.
Remove damaged planks without disturbing the surrounding flooring.
Replace any compromised underlayment.
Install matching hardwood boards.
Sand and refinish the repaired area so it blends with the rest of the floor.
If buckling affects a large portion of the room, replacing the entire floor may be more cost-effective than patching dozens of individual boards.
Can Swollen Hardwood Floors Shrink Back?
Yes, sometimes.
Wood naturally expands when it absorbs moisture and contracts as it dries. If the water exposure was brief and the flooring hasn’t been permanently distorted, the boards often return close to their original shape after proper drying.
Patience is important. Depending on humidity levels and the amount of water involved, hardwood may need several weeks to stabilize. If swelling remains after the floor reaches normal moisture content, sanding or replacing affected boards may be necessary.
Removing Dark Water Stains
Dark stains usually indicate that water has penetrated below the finish and reacted with the wood. The right repair depends on the depth of the stain.
Stain Type
Best Repair Method
Surface discoloration
Hardwood cleaner and light buffing
Finish damage
Sand and refinish
Deep black stains
Replace affected boards if sanding won’t remove discoloration
Avoid aggressively sanding one small spot. Removing too much material can leave a visible low area in the floor. For older hardwood, feathering the repair into surrounding boards creates a more natural appearance a technique covered in more depth in our hardwood floor refinishing services guide.
Watch for Mold Beneath the Floor
One problem many homeowners overlook is hidden mold. Even if the surface looks dry, moisture trapped between the hardwood and subfloor creates ideal conditions for mold growth.
Possible warning signs include:
Persistent musty odors
Black or green discoloration
Allergy symptoms that worsen indoors
Soft subflooring
Moisture readings that remain high
If mold has spread beneath the flooring, removing the affected boards is usually the safest solution. Simply drying the surface won’t eliminate mold growing underneath. For guidance on assessing indoor mold risk, the EPA’s mold resource center is a helpful reference.
Solid Hardwood vs. Engineered Hardwood Repairs
Not all wood flooring responds to water the same way.
Solid Hardwood:
Solid hardwood is generally easier to restore because it can be sanded and refinished multiple times. Individual boards are also easier to replace.
Engineered Hardwood:
Engineered hardwood has a thin hardwood veneer over a plywood core. While it handles humidity better than solid wood, severe water damage often affects the inner layers, causing them to separate. Minor surface damage may be repairable, but delamination usually requires replacing the damaged planks.
DIY Repair vs. Hiring a Professional
Some repairs are well within reach of an experienced DIY homeowner. Others require specialized drying equipment and flooring expertise.
DIY Repairs
Professional Repairs
Drying small spills
Flood restoration
Cleaning surface stains
Extensive buckling
Replacing one or two boards
Large-scale board replacement
Minor refinishing
Subfloor repairs
Cosmetic touch-ups
Mold remediation
A professional restoration company also uses moisture meters and commercial dehumidifiers to confirm the floor is dry before repairs begin. That reduces the risk of future movement or hidden damage.
How Much Does Water-Damaged Hardwood Floor Repair Cost?
Costs vary depending on the extent of the damage, the wood species, and whether refinishing or replacement is required.
Repair
Typical Cost
Drying and moisture testing
$300–$1,000
Sanding and refinishing
$3–$8 per sq. ft.
Replacing a few boards
$200–$800
Partial floor replacement
$8–$20 per sq. ft.
Full hardwood replacement
$10–$25+ per sq. ft.
If the damage was caused by a sudden event such as a burst pipe or appliance failure your homeowner’s insurance may cover part or all of the restoration costs. Damage caused by long-term neglect or unresolved leaks is less likely to be covered.
When Should You Replace Instead of Repair?
Repair isn’t always the most practical option. Replacement is usually the better choice if:
Mold has spread beneath the flooring
The subfloor is rotting
Most boards are buckled
Water has remained for several days
The flooring cannot be matched
The wood has started to decay
The floor has already been sanded multiple times and has little wear layer remaining
Trying to save severely damaged flooring often leads to repeated repairs that cost more over time than replacing the affected area.
How to Prevent Future Water Damage
While accidents can’t always be avoided, a few preventive measures can significantly reduce the risk of water damage:
Clean up spills immediately
Keep indoor humidity between 35% and 55%
Inspect plumbing connections regularly
Replace aging appliance hoses
Use mats near exterior doors and sinks
Maintain your roof and gutters
Install leak detectors near water heaters, dishwashers, washing machines, and refrigerators
Refinish hardwood floors when the protective coating begins to wear
Heating sources near hardwood flooring also deserve attention. Fireplaces and wood stoves can dry out or stress nearby boards if humidity swings too far in the other direction, so proper installation and clearance matter just as much as moisture control. If you’re upgrading or maintaining a fireplace near hardwood flooring, Classic Fireplace offers a range of options worth reviewing before installation.
Expert Tips for Better Long-Term Results
Small decisions during the repair process can have a big impact on the final outcome:
Don’t sand hardwood until moisture levels have stabilized
Photograph the damage before beginning cleanup if you plan to file an insurance claim
Save leftover flooring from renovations for future repairs
Replace damaged underlayment when installing new boards
Blend stains across multiple boards instead of repairing only one visible plank
If flooding involved contaminated water, prioritize safety and sanitation before restoration
These steps help produce repairs that look better and last longer.
Final Thoughts
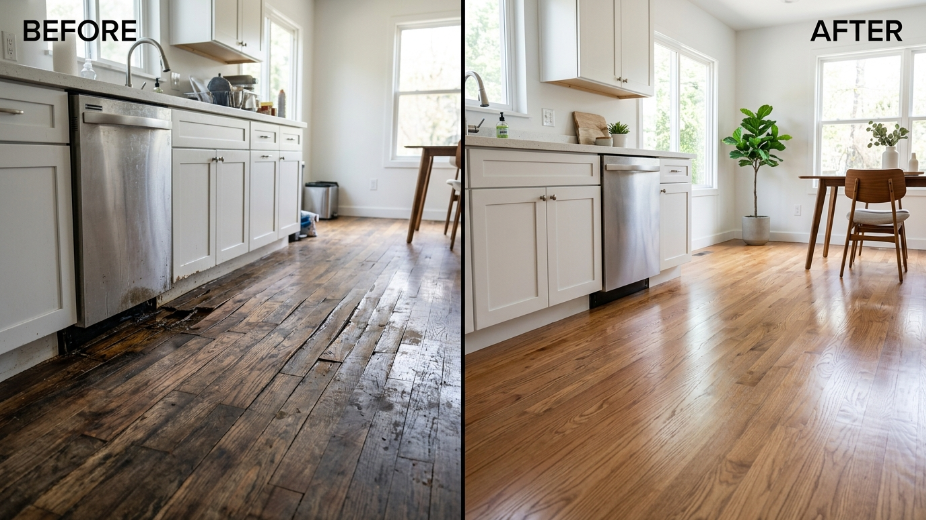
Water damage doesn’t automatically mean your hardwood floor is beyond repair. Many floors recover well when moisture is removed quickly and repairs are performed only after the wood has fully dried.
The biggest mistakes homeowners make are rushing into sanding, ignoring hidden moisture beneath the flooring, and overlooking damage to the subfloor. Taking the time to assess the severity, dry the floor properly, and choose the right repair method can extend the life of your hardwood flooring for many years.
When damage is limited to a few boards, targeted repairs often restore the floor with little evidence of the problem. For widespread flooding, professional restoration provides the best chance of protecting both the flooring and the structure beneath it.
Minor water exposure may dry within several days, while major flooding can require several weeks. Moisture should be confirmed with a meter before repairs begin.
Often, yes. As the flooring returns to its normal moisture content, slight cupping may improve naturally. Permanent deformation may require sanding or board replacement.
It often does when the damage results from a sudden, accidental event such as a burst pipe. Coverage varies by policy, so review your insurance documents or contact your provider.
How to choose a hardwood flooring contractor in Calgary Learn how to choose a hardwood flooring contractor in Calgary by checking experience, insurance, past projects and written quotes before you hire. Contact Us Your floors will be under your feet for 20 years or more. The person you hire to…
Hardwood Flooring Cost in Calgary: What You’ll Actually Pay Planning your project but unsure about hardwood flooring cost in Calgary? This guide explains installation, refinishing, and repair expenses to help you plan your flooring budget. Contact Us If you’re planning to install, repair, or refinish hardwood flooring in Calgary, understanding…
Matte vs gloss hardwood flooring: which finish is right for your home? Matte vs gloss hardwood flooring, see which finish suits Calgary homes best for durability, style & upkeep. Get expert advice from Arbutus Hardwood. Contact Us Matte vs gloss hardwood flooring feels like a small decision until you’re standing…
Dealing with water damage doesn’t always mean replacing your entire hardwood floor. Our water damaged hardwood repair specialists can assess the extent of the damage, recommend the most effective repair solution, and restore your floors with lasting results. Whether you’re facing cupping, buckling, stains, or warped boards, contact us today for expert repairs that protect your investment and bring your hardwood floors back to life.