Restore the natural beauty of your floors with our expert hardwood floor polishing service in Calgary. We remove dullness, scratches, and wear to bring back a smooth, rich finish that looks like new. Using professional grade products and proven techniques, we deliver long-lasting shine and protection.
So you’ve picked your hardwood. Spent way too long choosing between white oak and hickory. Finally settled on something. And now someone, your contractor, a YouTube video, and a flooring salesperson throws a new question at you: “Do you want it nailed down or glued down?”
And you’re like… wait, that’s a whole separate decision?
Yeah. It is. And honestly, it matters more than most people realize. The nail down vs glue down hardwood flooring debate isn’t just contractor jargon. It affects how your floor feels, how long it lasts, how much it costs, and what happens years later if something goes wrong. If you’re already thinking about hardwood floor installation, understanding this upfront saves a lot of headache down the road. This guide walks through both methods not in a textbook way, but the way you’d explain it to a friend who just bought their first house.
Whether you’re starting from scratch or looking into custom hardwood flooring options for a specific room, the installation method you choose plays a bigger role than most people expect. Let’s get into it.
What Are the Main Hardwood Flooring Installation Methods?
Before getting into the specifics, it’s worth knowing what your actual options are when it comes to hardwood flooring installation methods. There are three:
Nail Down: planks are fastened to a wood subfloor using nails or staples driven through the tongue of each board. Traditional. Time-tested. Still the default for solid hardwood in a lot of North American homes.
Glue Down:planks are bonded directly to the subfloor using a professional-grade adhesive. No nails. The whole board sits in a layer of glue. Works on both wood and concrete subfloors.
Float: boards aren’t attached to the subfloor at all. They click or lock together and just float. Common for engineered wood in DIY projects.
This article focuses on the first two. The floating method is a whole separate conversation, though we’ll touch on glue down vs floating hardwood briefly because it comes up a lot.
Nail Down Hardwood Flooring and How It Actually Works
This is the classic method. Has been around forever. When your grandparents’ house had gorgeous oak floors, they were almost certainly nailed down.
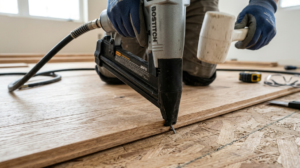
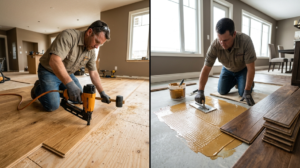
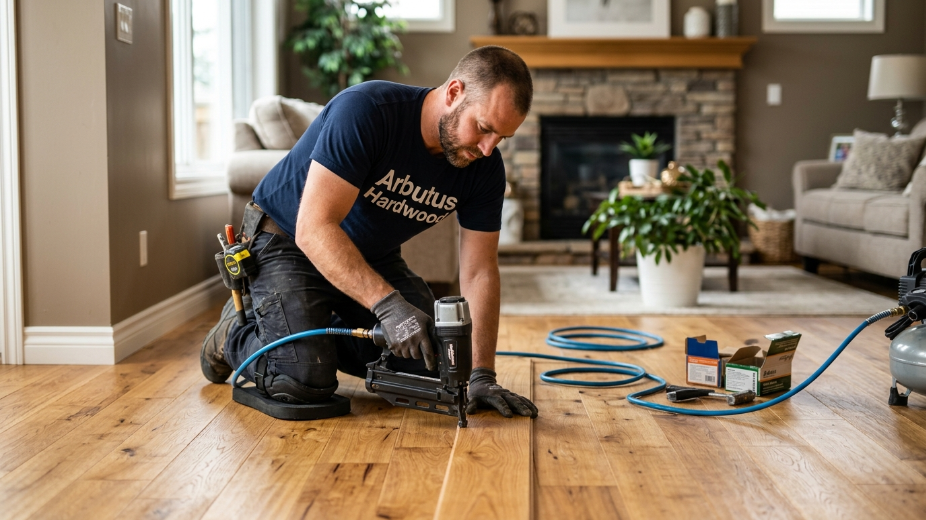
The process: a flooring nailer or stapler drives fasteners at a 45-degree angle through the tongue of each plank into the subfloor below. Because the nail goes through the tongue and not the face of the board, you can’t see them once the next plank is laid. That’s what people mean by blind nailing hardwood floors the fasteners are hidden.
You work row by row across the room. The first couple of rows near the wall usually get face-nailed (and those holes filled), because there’s not enough room to swing the nailer. Then from the third row onward, it’s all blind nailing.
Tools you need: a pneumatic flooring nailer or stapler, a compressor, a rubber mallet, a pull bar, probably a table saw for cutting. Not exactly a simple setup. But experienced contractors work fast with it.
When Nail Down Makes Sense
Plywood subfloor for hardwood is the key phrase here. Nail down only works when there’s something solid for the fasteners to grip. That means plywood or OSB (oriented strand board), usually at least 3/4 inch thick. Joists work too, though that’s less common in modern homes.
It does NOT work directly on concrete. No amount of determination changes that. Nails have nothing to grip in a concrete slab.
So if you have:
A wood-framed house with plywood subfloor
Solid hardwood planks
Boards that are at least 18mm thick
Nail down is probably your method.
The Solid Hardwood Floor Installation Standard
For solid hardwood floor installation, nail down is still the professional standard. Solid wood is thick and rigid typically 3/4 inch and it handles the fasteners without splitting. It also needs room to breathe. Wood expands and contracts with humidity changes throughout the year. Nail down allows that natural movement because the planks aren’t locked in place by adhesive; they’re just pinned at intervals, so there’s some flex.
That said, Wide planks are a different story. Once you get into boards 5 inches or wider sometimes called wide plank hardwood installation nail alone isn’t always enough. Wider boards have more surface area exposed to humidity swings, and without extra support, they can cup, bow, or develop gaps. A lot of installers in that scenario will do a combination: nail plus a glue assist. Basically adding a thin bead of adhesive along the subfloor as they nail. More on that later.
Glue Down Hardwood Flooring and What It Involves
Glue down is messier. More involved. Also more versatile.
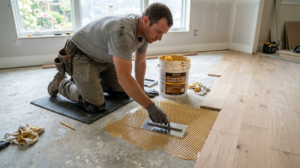
The process: the installer spreads a flooring adhesive across a section of the subfloor using a notched trowel, then lays planks into it. Work in sections maybe a square meter at a time because the adhesive has an open time before it starts to set. Push planks together, check alignment, keep going. Flooring straps or tape can hold boards in place while the glue cures.
The adhesive isn’t like wood glue or construction adhesive. It’s specifically formulated for flooring. The most common type used by professionals is urethane adhesive for hardwood floors it’s flexible after curing, which matters because wood still needs some ability to move with moisture changes. A rigid adhesive would just crack or cause the planks to buckle.
Engineered Hardwood Glue Down
This is where glue down really shines. Engineered hardwood glue down is probably the most common application of this method today. Engineered wood has a plywood core with a real hardwood veneer on top. It’s more dimensionally stable than solid wood, handles moisture better, and is often thinner, sometimes only 1/2 inch. Thinner boards don’t hold nails as well. Gluing them down gives better results.
It’s also the method of choice when you’re dealing with hardwood floor over concrete subfloor. Can’t nail into concrete. But you can absolutely glue into it as long as the slab is properly prepped, dry, and level.
Glue Down on Concrete and What You Need to Know
Concrete is porous. And damp. That’s the reality. Even concrete that looks dry might have moisture vapor moving through it. If you glue hardwood down on a slab without dealing with moisture, the adhesive bond weakens over time and the floor starts to buckle or separate.
That’s why hardwood flooring moisture barrier products exist. Before gluing, you need to test the concrete for moisture vapor emission (there are simple tests for this). Depending on results, you might need a moisture vapor barrier or primer applied first. Some urethane adhesives have built-in moisture mitigation properties, which simplifies things.
Subfloor preparation for hardwood is not optional. Whether it’s concrete or plywood, the surface needs to be flat (within 3/16 inch over 10 feet), clean, dry, and structurally sound. Any low spots need to be filled. High spots ground down. Skip this step and you’ll pay for it later.
Nail Down vs Glue Down: A Side by Side Breakdown
Let’s just put it on a table. Sometimes that’s the clearest way.
Factor
Nail Down
Glue Down
Subfloor requirement
Wood only (plywood/OSB)
Wood or concrete
Best for
Solid hardwood
Engineered hardwood, wide planks
DIY-friendly
More accessible
Not recommended for DIY
Installation speed
Faster
Slower (adhesive open time)
Cost
Lower
Higher (adhesive + prep)
Sound/feel underfoot
Slightly hollow feel
Dense, solid feel
Moisture protection
Requires underlayment
Requires moisture testing/barrier
Repair ease
Easier (pop nails, replace board)
Harder (adhesive bonded)
Movement over time
Some flex allowed
More rigid/stable
Wide plank suitability
Needs glue assist
Excellent
Neither method is universally better. It really depends on the specifics of your project.
The One Thing Nobody Talks About: How It Feels Underfoot
This actually matters. Walk across a nail-down floor versus a glue-down floor and there’s a subtle difference.
Nail-down floors have a tiny bit of give. Not bouncy, but there’s a slight flex because the boards aren’t fully bonded to the surface below. Most people can’t describe what it is, they just say it feels like “wood floors.”
Glue-down floors feel denser. More solid. Like the floor is part of the building. High-traffic areas or commercial spaces often prefer this because there’s less chance of long-term movement or noise.
Speaking of noise, squeaky nails down hardwood floors are a real thing. Over time, as the wood expands and contracts through seasons, nails can work slightly loose. Or the wood rubs against the subfloor. The result is creaking or squeaking, especially in older homes. It’s not always a sign of a structural problem, but it is annoying. Using ring-shank nails instead of smooth-shank reduces the risk. So does good felt underlayment between the subfloor and the hardwood.
Glue-down floors don’t squeak in the same way. The adhesive eliminates that wood-on-wood friction. That’s one real advantage.
Hardwood Floor Expansion and Contraction and Why It Should Guide Your Choice
Wood moves. Always has. Always will. This is one of the most important things to understand before choosing an installation method.
Hardwood floor expansion and contraction happens with humidity. In dry winter months, wood loses moisture and contracts. Boards can develop gaps. In humid summers, the opposite boards absorb moisture and swell. If there’s nowhere for that expansion to go, you get cupping or buckling.
Every hardwood installation needs an expansion gap around the perimeter, usually at least 1/2 inch to allow for this seasonal movement. The gap gets covered by baseboards or quarter round, so you don’t see it. But skipping it is a rookie mistake that causes serious problems.
Nail down allows more natural movement. The planks are fastened at intervals, not bonded across their entire surface. So they can flex and breathe more freely.
Glue down restricts movement. The adhesive holds each plank flat against the subfloor. This is actually good for wide planks, which otherwise have a lot of surface area that can warp. But it means the adhesive has to be flexible enough to accommodate some movement without cracking. That’s why urethane adhesives are standard they stay elastic after curing.
Flooring Adhesive for Hardwood and Choosing the Right One
If you’re going glue down, the adhesive choice matters. There are a few categories:
Urethane-based adhesives: the gold standard for most hardwood glue-down jobs. Strong bond, flexible after cure, moisture-resistant. Most professional installers default to these. Moisture-cure urethanes work particularly well in high-humidity environments or over concrete.
Pressure-sensitive adhesives: used more for floating installations or some engineered products. Less common for full-spread glue down.
Epoxy adhesives: two-part systems. Very strong. Used in commercial settings or when you need extreme bond strength. Overkill for most residential projects.
The flooring adhesive for hardwood you choose should be compatible with both your subfloor type and your specific hardwood product. Always check the manufacturer’s recommendations. Some hardwood warranties require specific adhesives, and using the wrong one can void coverage.
One practical note: spreading adhesive is not like painting a wall. You need the right notched trowel (the notch size affects how much adhesive gets applied), the right coverage rate, and attention to working time. Too much adhesive creates problems. Too little and the bond fails. This is part of why glue down isn’t generally recommended as a DIY hardwood floor installation project.
DIY Hardwood Floor Installation and Which Method Is Actually Doable
Real talk. Nail down is more accessible for a skilled DIYer. The tools are available at rental centers. The process is logical and somewhat forgiving. If you’ve done other flooring projects and have a weekend, it’s manageable.
Glue down is a different story. The adhesive troweling technique takes practice. Working times are tight. You can’t rush it and you can’t really undo it if something goes wrong mid-install. Most flooring professionals strongly recommend hiring out glue-down installations, especially over concrete or for large areas.
If you’re a confident DIYer who wants to save money and has a plywood subfloor nail down is your method.
If you have concrete, wide planks, or are doing a herringbone/parquet pattern hire a professional and go glue down. A team that specializes in hardwood floor installation will know exactly how to handle subfloor prep and adhesive application so the finished result actually holds up long-term.
Glue Down vs Floating Hardwood and What the Difference Actually Is
Since it comes up: glue down vs floating hardwood is a different comparison than nail vs glue.
Floating means the planks lock together mechanically and sit over a foam or felt underlayment without being attached to the subfloor at all. It’s the fastest install method. Popular for rental properties, basements, and renovation projects where speed and cost matter most.
The tradeoff: floating floors feel hollow. They can shift over large areas. Wide planks (anything over about 5 inches) shouldn’t float because the movement becomes unmanageable over time. And in rooms with major humidity swings, floating floors are more prone to issues.
Floating is fine for the right situation. For most permanent hardwood installations in primary living areas, either nail down or glue down produces a better long-term result.
Hardwood Flooring Installation Cost and What to Expect
Cost is almost always part of the conversation. Here’s roughly how the methods compare:
Cost Factor
Nail Down
Glue Down
Materials (adhesive)
None
$1–2/sq ft
Labor
Moderate
Higher (more prep, slower install)
Tool rental (DIY)
$50–100/day for nailer
Not DIY-recommended
Subfloor prep
Basic leveling
More involved, especially concrete
Total installed cost (professional)
$3–7/sq ft (labor only)
$4–9/sq ft (labor + adhesive)
These are rough ranges. Region, contractor, and floor complexity all affect the final number. Hardwood flooring installation cost goes up significantly if the subfloor needs major work grinding high spots on concrete, adding a moisture barrier, or replacing damaged plywood.
One thing worth asking your contractor: does the quote for nail-down include a glue assist if your planks are wide? On boards 5 inches and wider, adding a glue assist is standard best practice. Some installers quote without it, which can cause problems down the line.
If you are planning a larger home renovation that includes updating your living room layout, it is worth looking at how your new floor meets existing focal points. For instance, if you are refreshing your hearth setup through a specialist like Classic Fireplace, the choice between nailing and gluing becomes critical at the transition point. Gluing down the boards immediately adjacent to a stone or brick hearth provides a cleaner, flush finish without the need for bulky transition moldings, keeping the focus on the masonry while still protecting the wood’s natural expansion needs.
Hardwood Floor Repair After Glue Down and Worth Thinking About Upfront
Here’s a thing most people don’t consider until it’s too late: what happens if one board gets damaged?
With nail-down floors, repairs are relatively straightforward. You pry up the damaged plank, replace it, and re-nail. A good flooring contractor can do it cleanly without disturbing the surrounding boards much.
Hardwood floor repair after glue down is more complicated. The boards are bonded to the subfloor. Getting one out without damaging adjacent boards takes careful work, usually a router to cut the damaged board into sections, then chiseling out the pieces, then scraping residual adhesive off the subfloor before gluing in the replacement. It’s doable, but it’s labor-intensive. If you need this kind of work done, it’s worth calling in a team that specifically handles hardwood floor repair rather than a general contractor who dabbles in flooring.
This isn’t a reason to avoid glue down, it’s just worth knowing going in. If your floors see a lot of heavy furniture moving, pets, or high-impact use, factor this into your thinking.
What About Refinishing Later?
One more thing that doesn’t get discussed enough in the nail vs glue debate: what happens to the floor five or ten years from now when it needs some love?
Both nail-down and glue-down solid hardwood can be refinished. The installation method doesn’t change that. But the condition of the floor after years of use might. Glue-down floors that have stayed perfectly flat and stable are easier to sand uniformly. Nail-down floors that have developed slight gaps or cupping between boards can be trickier.
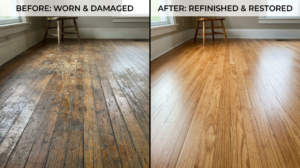
Either way, professional hardwood floor refinishing is one of the best investments you can make in an older floor. It adds years of life, restores the original color, and costs a fraction of full replacement. Worth planning for from the start, regardless of which installation method you go with.
So Which One Should You Actually Choose?
Here’s the short version.
Choose nail down if:
You have a plywood or OSB subfloor
You’re installing solid hardwood
You’re doing a DIY installation
Your planks are under 5 inches wide
Budget is a consideration
Choose glue down if:
You have a concrete subfloor
You’re installing engineered hardwood
You’re going with wide planks (5″+)
You want maximum stability and a dense feel underfoot
You’re doing a herringbone, parquet, or complex pattern layout
Consider both (glue assist + nail) if:
You have solid hardwood planks that are 5 inches or wider on a plywood subfloor
There’s no wrong answer as long as the method matches your subfloor, your wood, and your situation. The wrong answer is picking one without checking those basics first.
Most homeowners figure this out after one conversation with a decent flooring contractor. The issue is when you go in without knowing anything then it’s easier to get steered toward whichever method the installer is most comfortable with, rather than what’s actually best for your floor. Knowing the difference means you can ask the right questions and hold the right conversation before work begins.
If you’re looking for something a bit more tailored to your home maybe a specific species, finish, or layout custom hardwood flooring is worth exploring too. Not every project is a standard plank install, and sometimes the installation method follows the design choice rather than the other way around.
No. Nail-down installation requires a wood-based subfloor (plywood or OSB) for the fasteners to grip. You cannot nail directly into a concrete slab. For concrete subfloors, glue down is the correct method often with a moisture barrier or primer applied first depending on moisture vapor test results.
It depends on the subfloor. On a plywood subfloor, either method works for most engineered hardwood though thinner boards (under 1/2 inch) generally do better glued. On concrete, glue down is the only real option. For wide-plank engineered hardwood, glue down is typically recommended regardless of subfloor to prevent cupping and bowing.
Done correctly with quality adhesive and proper subfloor prep, glue-down hardwood can last as long as the wood itself 20, 30, even 50+ years. The lifespan depends heavily on subfloor preparation, the adhesive used, and moisture management. A floor glued over a damp concrete slab without proper moisture testing will fail much sooner.
Yes, for many engineered hardwood products. Floating works well for boards under about 5 inches wide in rooms with stable humidity. It's not recommended for wide-plank engineered hardwood, which benefits from the stability of a glued installation. Always check the manufacturer's installation guidelines; some products allow all three methods; others specify one.
Squeaking in nail-down floors usually comes from wood rubbing against the subfloor or fasteners that have worked slightly loose over time due to seasonal expansion and contraction. Using ring-shank nails (which grip better than smooth-shank) reduces the risk. An underlayment of rosin paper or 15-lb felt between the subfloor and hardwood also helps dampen friction. Squeaks can often be reduced after the fact by injecting construction adhesive from below through the subfloor, though full elimination sometimes requires pulling up the affected boards.
How to choose a hardwood flooring contractor in Calgary Learn how to choose a hardwood flooring contractor in Calgary by checking experience, insurance, past projects and written quotes before you hire. Contact Us Your floors will be under your feet for 20 years or more. The person you hire to…
Hardwood Flooring Cost in Calgary: What You’ll Actually Pay Planning your project but unsure about hardwood flooring cost in Calgary? This guide explains installation, refinishing, and repair expenses to help you plan your flooring budget. Contact Us If you’re planning to install, repair, or refinish hardwood flooring in Calgary, understanding…
Matte vs gloss hardwood flooring: which finish is right for your home? Matte vs gloss hardwood flooring, see which finish suits Calgary homes best for durability, style & upkeep. Get expert advice from Arbutus Hardwood. Contact Us Matte vs gloss hardwood flooring feels like a small decision until you’re standing…
Choosing the right hardwood flooring species is one of the most important steps in creating a durable and visually appealing home. Calgary’s climate requires careful consideration, making it essential to select a species that can handle environmental changes without compromising performance. If you’re planning to install hardwood flooring contact us today to get the best results from your investment.