Arbutus Hardwood Floors

Hardwood floor refinishing vs replacement: how to actually decide

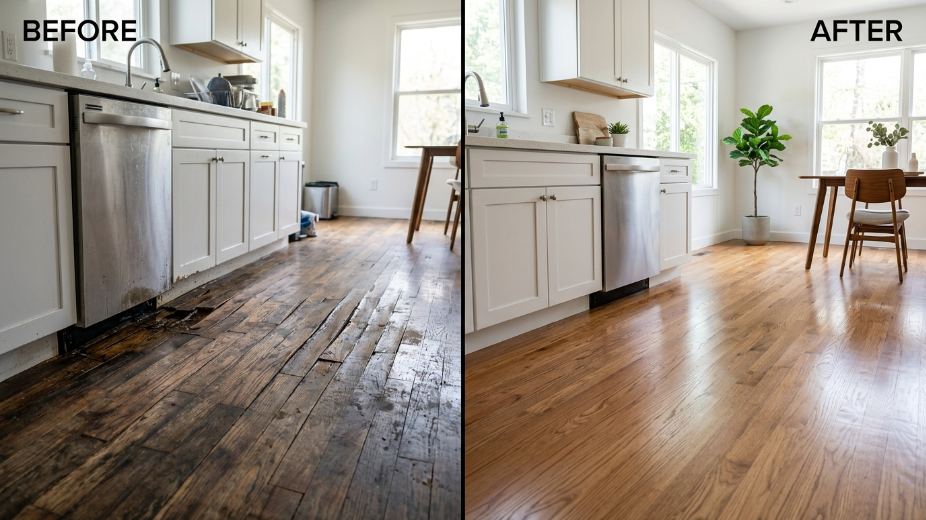
Deciding between hardwood floor refinishing vs replacement usually comes down to one thing: how much usable wood is actually left in the boards. This guide breaks down the real signs, costs, and timelines for each option, so you can tell which one your floor actually needs.

Hardwood floor refinishing vs replacement usually isn’t as close a call as it feels. Most floors can be refinished. Fewer actually need to be replaced than homeowners assume.

Quick answer: Refinishing is almost always the better option if the boards are structurally sound and there’s enough wood thickness left to sand. Replacement becomes the right call when boards are warped beyond flattening, water damage has reached the subfloor, or the floor has already been sanded down to the point where there’s nothing left to remove. For most homes, that means refinishing wins on both cost and value, with replacement reserved for genuinely damaged floors.

Here’s how to tell which situation you’re actually in, what each option costs, and what the process looks like for both.

What’s the real difference between refinishing and replacing

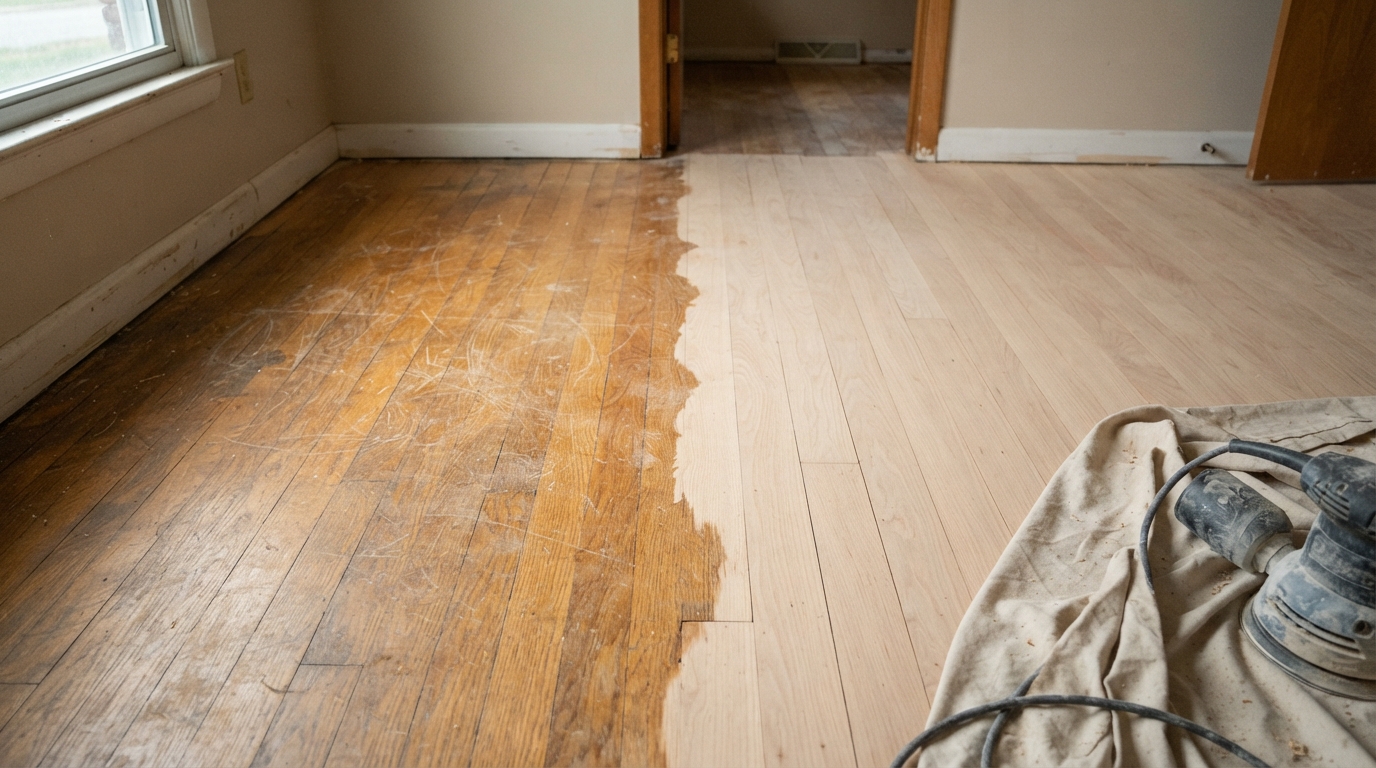
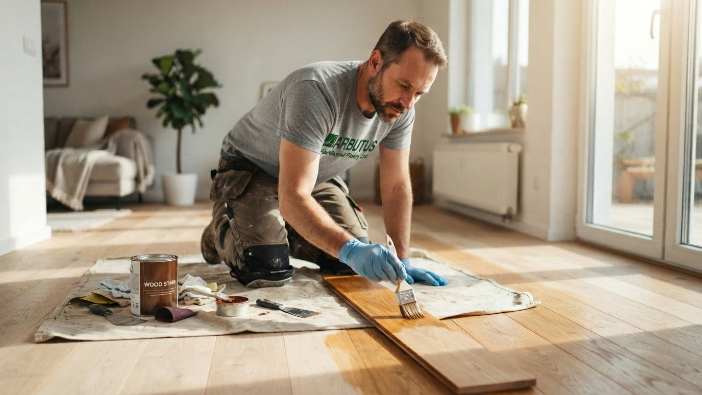
Refinishing means sanding down the existing wood surface and applying a new finish, working with the boards you already have. Replacement means removing the existing flooring entirely and installing new material.

The decision comes down to one core question: is the wood itself still good, or is the problem underneath the surface?

How many times can hardwood floors be refinished

Solid hardwood can typically be refinished 4 to 6 times over its lifetime, depending on the original thickness of the boards and how aggressively each sanding removes material. Engineered hardwood is more limited, usually good for 1 to 2 refinishes, since only a thin veneer layer sits on top of the plywood core.

This is the single biggest factor in the refinish vs replace decision. A 1990s solid oak floor that’s only been refinished once still has plenty of life left. A floor that’s already been sanded three or four times is getting close to its limit.

Signs your hardwood floors can be refinished

  • Surface scratches, scuffs, or dullness from years of foot traffic
  • Discoloration or an outdated stain color you want to change
  • Minor, shallow gouges that don’t go deep into the wood
  • Squeaks that come from finish wear rather than structural movement
  • A floor that still has visible wood thickness above the tongue and groove

Signs hardwood floors need replacing instead

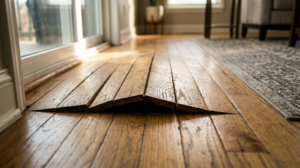
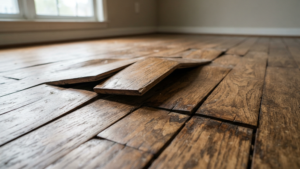
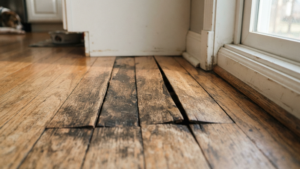
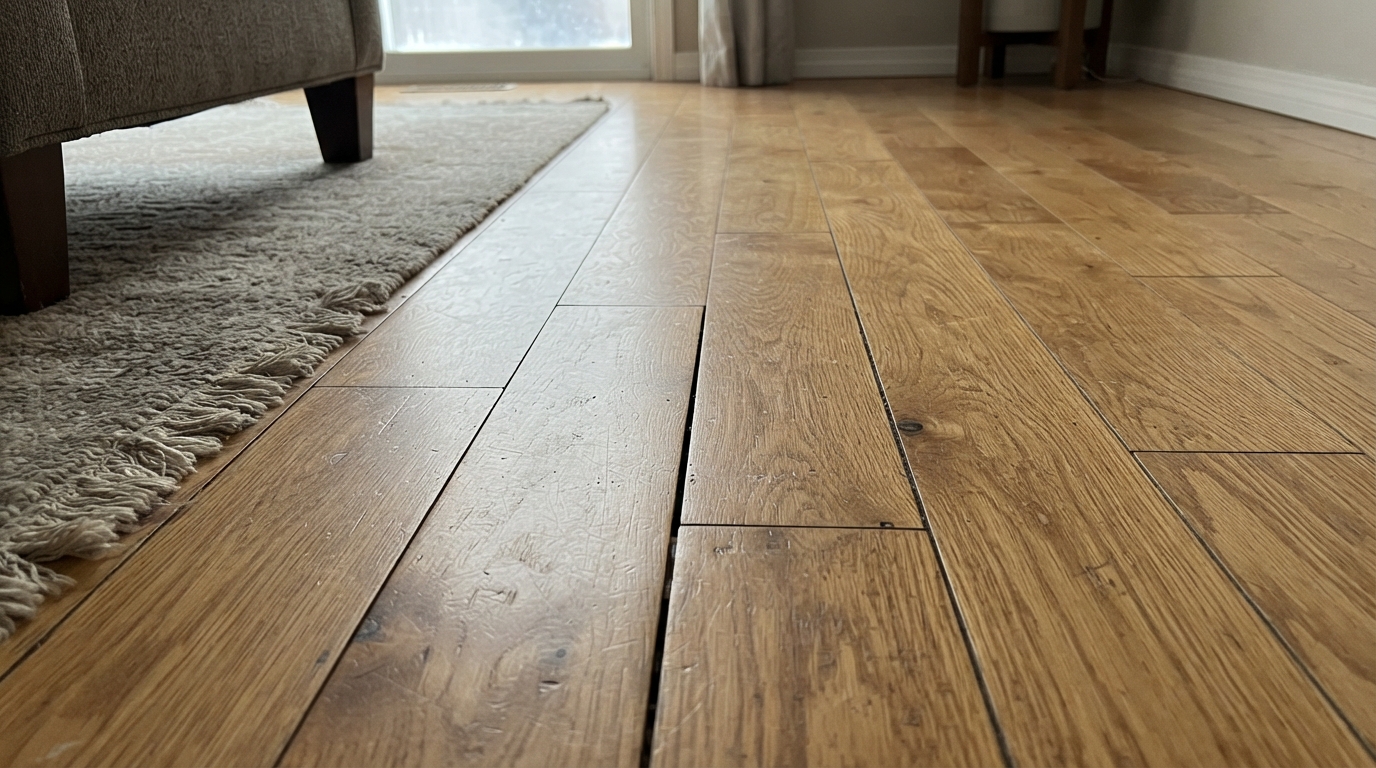
  • Boards that are warped, cupped, or buckled badly enough that sanding won’t flatten them
  • Water damage that reached the subfloor, not just the surface finish
  • Wood that’s been sanded down close to the nail line or tongue and groove, leaving little material left to remove
  • Rot, mold, or structural decay in the wood itself
  • Engineered hardwood with a veneer too thin to sand again

If your floor is showing signs closer to the second list, especially significant warping, it’s worth reading through our guide on hardwood floor buckling causes to understand whether the damage is something that formed gradually or points to an ongoing moisture problem that needs addressing either way.

How deep can you sand hardwood floors

Most solid hardwood has enough wear layer to be sanded roughly 1/8 to 3/16 of an inch total over its lifetime, spread across multiple refinishing jobs. Each refinish typically removes a small, controlled amount, which is why professional assessment matters. Sanding too aggressively, or sanding a floor that’s already near its limit, can expose nail heads or weaken the tongue and groove joints.

Pro Tip: Not sure if your floor has enough wood left to sand? Remove a floor vent cover in any room to inspect the cross-section of your floorboard directly. It’s one of the easiest ways to get a rough sense of remaining thickness without any tools.

Solid vs engineered hardwood: refinishing limits

Flooring typeTypical refinish limitWhy
Solid hardwood4 to 6 timesFull thickness of wood throughout the board
Engineered hardwood1 to 2 timesThin veneer layer over a plywood core

This table alone answers a lot of the refinish vs replace question. If you know which type of flooring you have and roughly how many times it’s been refinished, you already have a strong sense of which side of the decision you’re on.

Hardwood floor refinishing cost vs replacement cost

OptionTypical cost per sq ftWhat it includes
Refinishing$3 – $6Sanding, staining (optional), and new protective finish
Full replacement$8 – $22Removal of old flooring, new material, and full installation

Refinishing is almost always the more budget-friendly hardwood floor restoration route, often costing a third or less of full replacement for the same square footage. For a broader breakdown of installation, refinishing, and repair pricing across different scopes, see our hardwood flooring cost guide.

Does refinishing hardwood floors increase home value

Yes, generally. Refinished hardwood is one of the more reliable renovation investments for return on value, since original hardwood is a strong selling point for most buyers and refinishing costs far less than replacement while delivering a comparable visual result. In a market where homes are moving quickly, a freshly refinished floor can also make a property show better without the disruption of a full flooring replacement project.

How long does each option take

ProjectTypical timeline
Refinishing (single room)2 to 3 days
Refinishing (full main floor)4 to 7 days
Replacement (single room)3 to 5 days
Replacement (full main floor)1 to 3 weeks

Timelines shift based on drying time between coats, subfloor condition, and whether old flooring needs to be removed and disposed of before new material goes down.

Refinishing process steps

  1. Assess the floor’s current wood thickness and refinish history
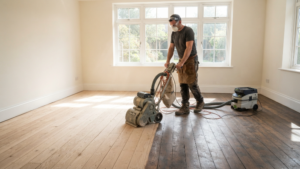
  2. Sand down the existing finish and surface
  3. Repair or replace any individual damaged boards before finishing
  4. Apply stain, if changing color
  5. Apply multiple coats of protective finish with drying time between coats

Replacement process steps

  1. Remove and dispose of the existing flooring
  2. Inspect and repair the subfloor as needed
  3. Allow new hardwood to acclimate to the home’s humidity
  4. Install using the appropriate method for the space
  5. Sand and finish on-site, or install prefinished material

Special situations: water damage, warping, and old floors

Water damaged hardwood floor: refinish or replace depends entirely on depth. Surface staining from a spill usually sands out fine. Water that soaked into the subfloor, causing warping across multiple boards, often points toward replacement of that section.

Discolored hardwood floor fix options: discoloration from sun exposure, old rugs, or pet stains is often correctable through refinishing and re-staining, unless the discoloration has penetrated deep into the wood grain.

Old hardwood floor in older Calgary homes: original hardwood in older neighborhoods is often solid wood with plenty of refinishing life left, even when it looks worn. Before assuming an old floor needs replacing, it’s worth having someone confirm the actual wood thickness remaining, since many older floors are better candidates for refinishing than newer, thinner engineered products.

Making the right call for your floor

The deciding factor almost always comes down to wood thickness and structural condition, not how old or worn the floor looks on the surface. A dull, scratched floor with plenty of wood left is a straightforward refinish. A warped or water-damaged floor with little material remaining is a replacement.

According to the National Wood Flooring Association’s general guidance on wood flooring lifespan, well-maintained solid hardwood can last several decades and go through multiple refinishing cycles before replacement is ever necessary, which is why a professional assessment before assuming the worst is almost always worth the time.

If you’re not sure which side of this decision your floor falls on, contact Arbutus Hardwood for a free assessment anywhere in Calgary and the surrounding area. We’ll tell you honestly whether refinishing will do the job or if replacement is genuinely the better move, and give you a clear, upfront quote either way.

Refinishing is almost always cheaper, typically costing a fraction of full replacement for the same area, as long as the existing wood is structurally sound enough to sand.

Not always. Surface-level water exposure often refinishes fine. Water that reached the subfloor or caused significant warping usually means the affected boards need replacing, even if the rest of the floor is fine to refinish.

A professional can check remaining wood thickness above the tongue and groove. Visible nail heads, a very thin-feeling surface, or a floor that's noticeably lower than surrounding transitions are signs it may be near its limit.

Squeaks usually come from loose boards or subfloor movement, not the wood itself, and are typically resolved through repair rather than full replacement. Persistent squeaking across a large area is worth having assessed, since the underlying cause matters more than the noise itself.


Yes. Since engineered hardwood can usually only be refinished once or twice, it reaches its replacement point sooner than solid hardwood, which can often go through several more refinishing cycles over the same number of years.

Yes, and it's fairly common. A main floor with solid hardwood in good condition might just need refinishing, while a water-damaged section or an outdated engineered floor elsewhere in the home might call for replacement. These decisions can be made room by room rather than all at once.
 

How to choose a hardwood flooring contractor in Calgary

How to choose a hardwood flooring contractor in Calgary

How to choose a hardwood flooring contractor in Calgary Learn how to choose a hardwood flooring contractor in Calgary by checking experience, insurance, past projects and written quotes before you hire. Contact Us Your floors will be under your feet for 20 years or more. The person you hire to…

Hardwood Flooring Cost Calgary: 2026 Price & Installation Guide

Hardwood Flooring Cost Calgary: 2026 Price & Installation Guide

Hardwood Flooring Cost in Calgary: What You’ll Actually Pay Planning your project but unsure about hardwood flooring cost in Calgary? This guide explains installation, refinishing, and repair expenses to help you plan your flooring budget. Contact Us If you’re planning to install, repair, or refinish hardwood flooring in Calgary, understanding…

Matte vs Gloss Hardwood Flooring | Arbutus Hardwood

Matte vs Gloss Hardwood Flooring | Arbutus Hardwood

Matte vs gloss hardwood flooring: which finish is right for your home? Matte vs gloss hardwood flooring, see which finish suits Calgary homes best for durability, style & upkeep. Get expert advice from Arbutus Hardwood. Contact Us Matte vs gloss hardwood flooring feels like a small decision until you’re standing…

    Hardwood floor refinishing vs replacement: how to actually decide 3

    Hardwood floor gaps Calgary winter: why they happen and what to do

    Hardwood floor gaps Calgary winter cases are almost always caused by furnace-dried air pulling moisture out of the wood, and most of them close back up on their own by summer. This guide breaks down what counts as normal seasonal movement, the humidity level that keeps gaps in check, and when a gap actually needs a professional look.

    Hardwood floor gaps in Calgary winters are almost always the same story: furnace-dried indoor air pulling moisture out of the wood faster than it can adjust.

    Quick answer: Small gaps between hardwood boards every winter are normal in Calgary and usually close back up on their own once spring humidity returns. They’re caused by the wood losing moisture to dry indoor air, most often from furnace heating, and shrinking slightly as a result. Gaps become a concern when they’re wider than a business card, appear suddenly, or stay open through summer, since that points to a bigger moisture or subfloor issue rather than normal seasonal movement.

    Here’s the full breakdown of why this happens every year, what’s actually a normal amount of gapping, and when it’s worth calling someone.

    What causes hardwood floor gaps in Calgary winter

    Hygrometer on wooden table

    Furnace dry air and low indoor humidity

    This is the main one. Calgary winters are already dry, and running a furnace for months on end strips even more moisture out of the air inside a home. Wood naturally releases moisture into dry air, and as it loses that moisture, the boards shrink slightly at the edges. Multiply that shrinkage across a whole floor, and you get visible gaps between boards.

    Wood expansion and contraction cycles

    Hardwood is always responding to the air around it. It swells slightly when humidity is higher, like in Calgary’s summer months, and shrinks when the air dries out in winter. This cycle is completely normal for solid hardwood. The gaps you see in January and the tighter seams you see in July are two sides of the same process.

    Species and cut type differences

    Some species and board cuts move more than others. Flatsawn boards, which are the most common and least expensive cut, tend to shrink and expand more than quartersawn boards. Wider planks also show gaps more noticeably than narrow strip flooring, simply because the same percentage of shrinkage is spread across more width per board.

    New floors that weren’t properly acclimated

    If hardwood was installed without enough time to adjust to the home’s actual humidity levels first, its first winter often brings more dramatic gapping than it should. This is one of the most preventable causes, and it’s a step some lower-cost installers skip to save time.

    Indoor humidity standards for hardwood floors in Calgary

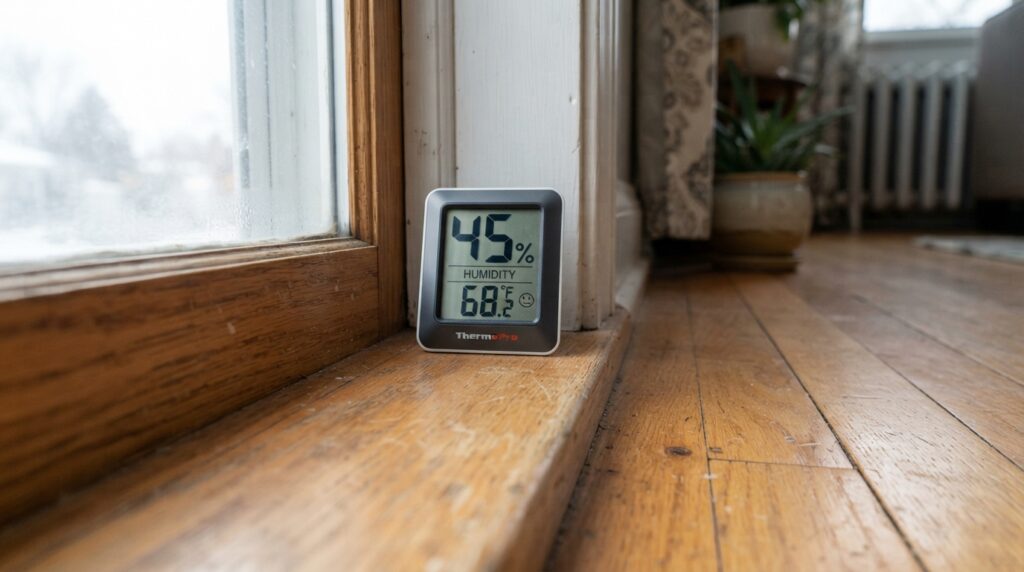
    The standard target range for indoor humidity with hardwood flooring is 30 to 50 percent relative humidity year-round. Many Calgary homes drop well below that in the coldest months, sometimes into the teens or low twenties, especially in homes without a whole-home humidifier.

    Keeping humidity within that range doesn’t eliminate seasonal movement entirely, but it keeps gaps to a minor, normal amount instead of something dramatic enough to notice from across the room.

    Gaps vs cupping vs buckling: how winter gaps differ

    Gaps aren’t the only seasonal issue Calgary hardwood deals with, and it helps to know which one you’re looking at. Gaps happen from the wood shrinking in dry air. Cupping happens from the opposite problem, excess moisture hitting the underside of a board. Buckling is the most severe of the three and usually points to sustained water exposure rather than normal seasonal dryness.

    If your floor shows raised or curled boards rather than simple gaps between them, that’s a different problem with a different cause, and it’s worth reading through those specific symptoms rather than assuming it’s just winter shrinkage.

    Should you fill hardwood floor gaps in winter

    Generally, no. Filling gaps while they’re at their widest, during peak winter dryness, means the filler gets compressed and can pop out or crack once the wood swells back in summer humidity. Gap filling is usually done in late spring or summer, when the boards are at their most expanded and the gaps are naturally at their smallest.

    Wood floor gap filler: winter vs summer

    Season

    What’s happening to the wood

    Best time to fill gaps?

    Winter

    Boards shrunk, gaps at widest

    No, filler will be pushed out when wood expands

    Summer

    Boards swollen, gaps at smallest

    Yes, this is the ideal window for filling

    If gaps are large enough that you’re considering filler, it’s worth having someone assess whether the humidity issue is the actual cause first, rather than filling gaps that may close up naturally anyway.

    How to fix hardwood floor gaps this winter

    • Run a humidifier. A whole-home humidifier attached to your furnace is the most consistent fix. Portable room humidifiers help too, especially in bedrooms or living areas where you spend the most time.
    • Monitor humidity with a simple hygrometer. These are inexpensive and give you a real number instead of guessing.
    • Avoid over-humidifying. Pushing humidity too high in winter can cause condensation on windows and, in extreme cases, contribute to cupping instead. Stay within the 30 to 50 percent range.
    • Don’t panic over small, seasonal gaps. A hairline gap that closes up by summer is normal wear for solid hardwood, not damage.

    When to call a professional for floor gap repair

    Most seasonal gapping doesn’t need repair, just humidity management. It’s worth having a professional look at your floor if gaps are wider than a credit card, if they don’t close up by mid-summer, if they’re only happening in one section rather than across the room, or if you notice gaps alongside other signs like squeaking or soft spots. Those patterns can point to a subfloor issue rather than simple seasonal movement.

    How to prevent gaps next winter

    • Have new hardwood properly acclimated before installation, matched to the season it will live in long-term
    • Install or service a whole-home humidifier before the dry season hits, typically by early fall
    • Choose engineered hardwood in rooms where humidity swings are hardest to control, since it resists movement better than solid wood
    • Keep up with regular refinishing, since a well-sealed floor manages moisture exchange more evenly than one with a worn or damaged finish

    This applies across Calgary and the surrounding communities we serve, including Airdrie, Cochrane, Chestermere, and Okotoks. The dry winter air causing these gaps doesn’t stop at city limits, and homes in outlying areas often deal with the same furnace-driven humidity drop.

    Keeping your floors steady through the season

    A little seasonal gapping is just how solid hardwood behaves in a climate like ours, and it’s rarely something to worry about on its own. According to guidance from Natural Resources Canada on indoor humidity and home comfort, keeping winter humidity in a moderate range benefits more than just flooring, it also affects energy efficiency and overall indoor air quality.

    If your gaps look wider than normal, won’t close, or you’d rather have a professional confirm what’s going on before winter sets in, contact Arbutus Hardwood for a free assessment anywhere in Calgary, Airdrie, Cochrane, Okotoks, Chestermere, and the surrounding area.

    Small, uniform gaps that show up every winter and close by summer are normal seasonal movement, not a defect. Gaps that are unusually wide, appear suddenly, or don't close up are worth having checked.

    As a general guide, gaps under about 1/8 inch, roughly the width of a credit card, are typically considered normal seasonal movement. Wider than that is worth a professional look.

    Occasional seasonal dryness usually doesn't cause lasting damage. Chronic, severe dryness over many years can eventually lead to more noticeable long-term gapping or finish problems, which is why consistent humidity control matters more than a one-time fix.

    Engineered hardwood generally shows less seasonal gapping than solid wood, thanks to its layered construction, but it isn't completely immune, especially in homes with very low winter humidity.


    Often yes, as outdoor humidity rises in spring and summer and makes its way indoors. A humidifier just makes the swing smaller and more comfortable for both the floor and the people living on it.

    Some seasonal movement in year one is normal, but new floors that gap dramatically in their first winter often point to acclimation that wasn't done properly before installation.

    How to choose a hardwood flooring contractor in Calgary

    How to choose a hardwood flooring contractor in Calgary

    How to choose a hardwood flooring contractor in Calgary Learn how to choose a hardwood flooring contractor in Calgary by checking experience, insurance, past projects and written quotes before you hire. Contact Us Your floors will be under your feet for 20 years or more. The person you hire to…

    Hardwood Flooring Cost Calgary: 2026 Price & Installation Guide

    Hardwood Flooring Cost Calgary: 2026 Price & Installation Guide

    Hardwood Flooring Cost in Calgary: What You’ll Actually Pay Planning your project but unsure about hardwood flooring cost in Calgary? This guide explains installation, refinishing, and repair expenses to help you plan your flooring budget. Contact Us If you’re planning to install, repair, or refinish hardwood flooring in Calgary, understanding…

    Matte vs Gloss Hardwood Flooring | Arbutus Hardwood

    Matte vs Gloss Hardwood Flooring | Arbutus Hardwood

    Matte vs gloss hardwood flooring: which finish is right for your home? Matte vs gloss hardwood flooring, see which finish suits Calgary homes best for durability, style & upkeep. Get expert advice from Arbutus Hardwood. Contact Us Matte vs gloss hardwood flooring feels like a small decision until you’re standing…
      Hardwood floor gaps Calgary winter: why they happen and what to do 7

      Cupping Hardwood Floors: Causes, Signs, and How to Fix It

      Cupping hardwood floors causes almost always trace back to a moisture imbalance between the top and bottom of the board. This guide breaks down what’s actually causing it, how to tell mild cupping from severe, and whether your floor can be repaired or needs replacing.

      Cupping hardwood floors usually comes down to one thing: moisture hitting the bottom of the board faster than the top can release it.

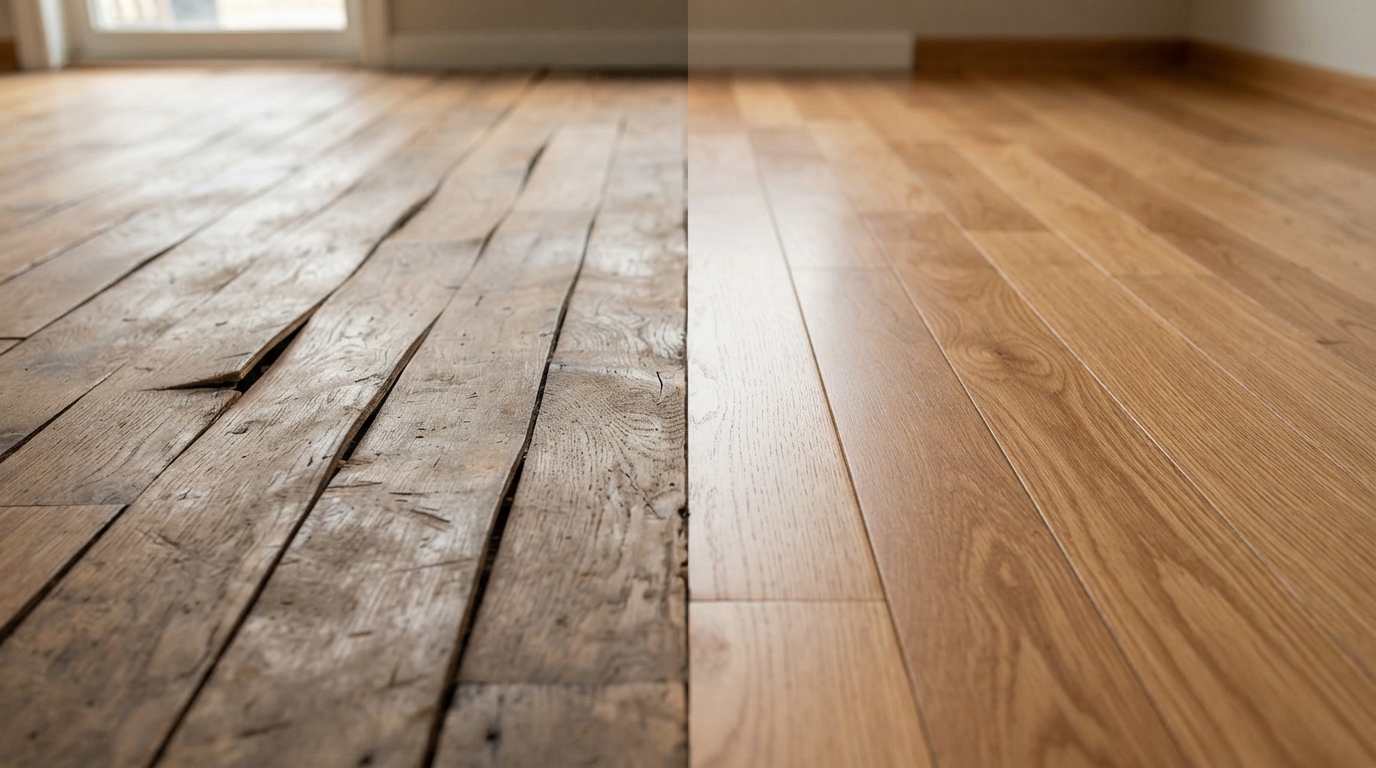
      Quick answer: Cupping is when the edges of a hardwood board rise higher than the center, giving the board a slightly concave, cup-like shape. It’s almost always caused by a moisture imbalance, most often moisture coming up from underneath the floor, whether that’s a humid crawl space, a subfloor leak, or seasonal humidity swings. Mild cupping often corrects itself once the moisture source is fixed. Severe cupping usually needs sanding and refinishing.

      That’s the short version. Here’s the full picture, including what’s actually causing it in your home, how to tell how bad it is, and what to do next.

      What is cupping in hardwood floors

      Cupping is one of three common ways hardwood boards distort. The edges of the board pull upward while the center stays lower, so if you run your hand across the plank, you can actually feel the dip in the middle.

      It’s different from crowning, where the center of the board rises above the edges, and different from buckling, where entire boards lift off the subfloor. Cupping is usually the mildest of the three and the most common, especially in homes with older solid hardwood.

      Cupping hardwood floors causes

      subfloor moisture

      Moisture imbalance between the top and bottom of the board

      Wood absorbs and releases moisture constantly. When the underside of a board takes on more moisture than the top, it expands more than the top does, and the board bows upward at the edges. This is the mechanical reason behind almost every case of cupping, no matter what’s actually feeding the moisture.

      High humidity or seasonal humidity changes

      Calgary’s climate swings hard between a dry winter and a more humid summer stretch. That swing alone is enough to cause mild, seasonal cupping in solid hardwood, especially in homes without a humidifier or dehumidifier keeping indoor air consistent. This kind of cupping often reduces on its own once humidity levels settle back down.

      Subfloor moisture problems

      A slow plumbing leak, a spill that seeped through instead of being wiped up, or moisture trapped under the flooring during installation can all raise the moisture content of the subfloor. Since the underside of the board sits directly against that subfloor, it absorbs the excess moisture first, which is exactly the imbalance that causes cupping.

      Crawl space moisture

      Homes with a crawl space underneath, more common in some of Calgary’s older neighborhoods and in acreage properties around Bragg Creek, Springbank, and Priddis, can develop cupping from ground moisture rising into the space below the subfloor. A poorly ventilated or uninsulated crawl space makes this worse.

      Missing or damaged vapor barrier

      Hardwood installed over concrete needs a proper vapor barrier. Without one, or with one that’s damaged or was installed incorrectly, moisture from the slab works its way into the wood from below over time. This is a common, often overlooked cause in basements and homes built on slab foundations.

      Improper acclimation before installation

      Hardwood needs to sit in the home and adjust to its actual humidity and temperature before installation. Skipping this step means the wood settles into the room’s real conditions after it’s already down, and cupping is one of the most common results. This shows up more in Calgary and the surrounding communities like Airdrie, Chestermere, and Okotoks than in more humidity-stable climates, simply because the gap between summer and winter indoor conditions is wider here.

      Cupping vs buckling vs crowning

      ProblemWhat it looks likeUsually caused by
      CuppingBoard edges rise, center stays lowerMoisture from below, seasonal humidity
      CrowningCenter rises above the edgesOver-drying, or moisture reaching the top surface
      BucklingEntire boards lift off the subfloorSevere, prolonged moisture exposure

      If your floor is showing more than mild edge-curling, it’s worth confirming which of these you’re actually dealing with. We cover buckling in more detail in our guide to hardwood floor buckling causes, since the fix is different once boards have fully lifted rather than just curled at the edges.

      Mild cupping vs severe cupping

      Mild cupping is subtle. You might only notice it by running a hand across the floor or seeing it under angled light. It’s often seasonal and can resolve once humidity levels normalize.

      Severe cupping is visible without touching the floor, sometimes dramatic enough to catch a shoe edge when walking across it. This level usually means the moisture source has been present for a while and typically needs sanding and refinishing once the wood dries back out and flattens.

      Can cupped hardwood floors be repaired

      Yes, in most cases. The fix depends on severity and, more importantly, on finding and fixing the moisture source first. Sanding a cupped floor before the wood has fully dried and settled is a common mistake that leads to an uneven or crowned floor later, once the wood finishes drying after the sanding is done.

      Does cupped hardwood floor go back to normal

      Sometimes, yes, especially with mild, humidity-driven cupping. Once indoor humidity stabilizes, boards can flatten back out on their own over a period of weeks. Severe cupping, or cupping caused by a sustained moisture problem like a subfloor leak, usually doesn’t fully self-correct and needs professional sanding and refinishing after the underlying issue is resolved.

      How to fix cupped hardwood floors

      Humidity control

      1. Identify and fix the moisture source. Sanding a floor without addressing the cause means the cupping, or worse, will come back.
      2. Let the wood dry and stabilize. This can take anywhere from a few days to several weeks, depending on severity. Sanding too early is one of the most common mistakes made on cupping repairs.
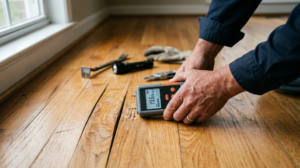
      3. Confirm the board has flattened before sanding. A moisture meter reading helps confirm the wood has returned to a stable range.
      4. Sand and refinish. Once the boards are flat and dry, refinishing restores an even surface and protective finish.
      5. Replace any boards that don’t recover. Some boards, especially with long-term moisture exposure, stay permanently distorted and need individual repair rather than sanding alone.

      How long does it take for hardwood floors to un-cup

      Mild cupping can start improving within a week or two once humidity stabilizes. More significant cupping, particularly from a subfloor moisture issue, can take four to six weeks or longer to fully dry out before it’s safe to sand. Rushing this timeline is the most common reason a cupping repair doesn’t hold.

      Hardwood floor cupping repair cost

      Cost depends on whether the floor just needs sanding and refinishing or whether individual boards need replacing.

      Scope of repairTypical cost
      Sanding and refinishing (per room)$3 – $6 per sq ft
      Individual board replacement$50 – $150 per board
      Combined with subfloor moisture repair$1,000 – $3,000+

      For a full breakdown across installation, refinishing, and repair pricing, see our hardwood flooring cost guide.

      How to prevent hardwood floor cupping

      • Keep indoor humidity in a stable range year-round, roughly 35 to 55 percent, using a humidifier in winter and a dehumidifier in humid summer stretches
      • Wipe up spills immediately and check under appliances and near exterior walls for slow leaks
      • Make sure crawl spaces are properly vented and insulated, especially on acreage properties around Bragg Creek, Springbank Hill, and Priddis
      • Confirm a proper vapor barrier is in place under hardwood installed over concrete
      • Have new hardwood fully acclimated before installation, matched to the season it will actually be living in
      • Get hardwood professionally assessed at the first sign of edge curling, rather than waiting to see if it worsens

      This applies whether you’re in Calgary proper or the surrounding communities we serve, including Airdrie, Cochrane, Chestermere, Okotoks, De Winton, and Crossfield. The humidity swings that cause cupping don’t stop at the city limits.

      Getting it looked at

      Cupping is usually fixable, but the timeline matters more than most homeowners expect. Sanding too early, or ignoring the actual moisture source, is what turns a simple fix into a repeat problem. According to general guidance from the Canadian Wood Council on wood’s response to moisture, dimensional movement like cupping is a normal reaction to humidity change, which is exactly why identifying and controlling the source matters more than the cupping itself.

      If you’re seeing edge curling in your hardwood anywhere in Calgary, Airdrie, Cochrane, Okotoks, Chestermere, or the surrounding area, contact Arbutus Hardwood for a free assessment and quote.

      Not exactly. Water damage is often the source, but cupping is the specific way the wood reacts to that moisture imbalance. A board can cup from a major spill or from something as gradual as normal seasonal humidity changes, without any obvious water event at all.

      It's not recommended. Sanding before the wood has fully dried and flattened often leads to an uneven floor once the boards finish settling, sometimes creating a crowned surface instead of a flat one. Confirming moisture levels before sanding takes equipment most homeowners don't have on hand.

      A humidifier can help stabilize humidity and support recovery from mild, seasonal cupping, but it won't correct cupping caused by a subfloor leak or crawl space moisture. Those need the actual source fixed first.

      Engineered hardwood generally resists cupping better than solid hardwood, since its layered construction is more dimensionally stable. It's not immune, but it holds up better against the kind of humidity swings that affect Calgary homes.

      Compare the depth of the curl over a few weeks, ideally with a photo for reference. If it's stable or improving, it may just be seasonal. If it's deepening or spreading to more boards, that usually points to an ongoing moisture source that needs attention.

      Full replacement is rarely necessary for cupping alone. Even severe cases are usually resolved with sanding, refinishing, or targeted board replacement once the moisture source is addressed. Full replacement tends to come up only when cupping has progressed into buckling or when boards are structurally compromised beyond repair. For older or discontinued flooring, matching replacement boards can sometimes turn into a custom hardwood flooring project rather than a simple swap.

      How to choose a hardwood flooring contractor in Calgary

      How to choose a hardwood flooring contractor in Calgary

      How to choose a hardwood flooring contractor in Calgary Learn how to choose a hardwood flooring contractor in Calgary by checking experience, insurance, past projects and written quotes before you hire. Contact Us Your floors will be under your feet for 20 years or more. The person you hire to…

      Hardwood Flooring Cost Calgary: 2026 Price & Installation Guide

      Hardwood Flooring Cost Calgary: 2026 Price & Installation Guide

      Hardwood Flooring Cost in Calgary: What You’ll Actually Pay Planning your project but unsure about hardwood flooring cost in Calgary? This guide explains installation, refinishing, and repair expenses to help you plan your flooring budget. Contact Us If you’re planning to install, repair, or refinish hardwood flooring in Calgary, understanding…

      Matte vs Gloss Hardwood Flooring | Arbutus Hardwood

      Matte vs Gloss Hardwood Flooring | Arbutus Hardwood

      Matte vs gloss hardwood flooring: which finish is right for your home? Matte vs gloss hardwood flooring, see which finish suits Calgary homes best for durability, style & upkeep. Get expert advice from Arbutus Hardwood. Contact Us Matte vs gloss hardwood flooring feels like a small decision until you’re standing…
        Cupping Hardwood Floors: Causes, Signs, and How to Fix It 11

        Hardwood floor buckling causes: why it happens and what to do

        If your hardwood floor is lifting off the subfloor in visible ridges or waves, that’s buckling, and it’s one of the more serious problems a wood floor can have. Understanding hardwood floor buckling causes early can mean the difference between a small repair and replacing an entire section.

        If your hardwood floor is lifting off the subfloor in visible ridges or waves, that’s buckling, and it’s one of the more serious hardwood floor repair issues a wood floor can have.

        It’s also one of the most misunderstood. A lot of Calgary homeowners assume buckled boards mean the whole floor needs replacing. Sometimes that’s true. Often it isn’t, especially when the cause gets caught early.

        Calgary’s swings between bone-dry winters and humid summer stretches put extra stress on hardwood that homes in milder climates don’t deal with. Add in older housing stock in neighborhoods like Inglewood and Bridgeland, where original subfloors and plumbing weren’t built with today’s hardwood in mind, and buckling shows up here more often than people expect.

        Here’s what actually causes hardwood floors to buckle, how to tell how bad it is, and what your realistic options are.

        Hardwood floor buckling damage

        What is hardwood floor buckling

        Buckling happens when wood planks pull away from the subfloor and rise upward, sometimes in a small section, sometimes across an entire room. In severe cases, boards separate from each other and stand up at the edges.

        It’s different from cupping, where the edges of a board curl upward but the board stays attached to the subfloor, and different from crowning, where the center of the board rises higher than the edges. Buckling is the most extreme of the three, and it usually means moisture has been sitting somewhere for a while.

        Hardwood floor buckling causes

        Almost every case of buckling traces back to one thing: moisture the wood wasn’t built to handle. Here’s where that moisture usually comes from.

        Water damage

        Moisture Damage & Buckling

        This is the most common cause by far. A burst pipe, an overflowing washing machine, a slow leak under a dishwasher, or flooding from outside can all soak the wood from below or above. Wood absorbs water and expands. When it has nowhere to expand into, it pushes up and buckles.

        Even a leak you cleaned up quickly can cause buckling days later, once water has worked its way into the subfloor.

        High humidity or poor ventilation

        Wood is constantly reacting to the moisture in the air around it. In a home with poor ventilation, especially basements or additions with limited airflow, humidity can build up enough to swell the wood over time. This tends to happen more gradually than water damage, so it’s easy to miss until the buckling is already visible.

        Calgary homes see this less often than gapping and cupping, since our winters run dry rather than humid. But summer humidity spikes, a poorly vented bathroom, or a basement with limited airflow can still push moisture levels high enough to cause problems, particularly in newer builds in areas like Mahogany and Seton where basements are finished quickly and ventilation sometimes gets overlooked.

        Missing or damaged vapor barrier

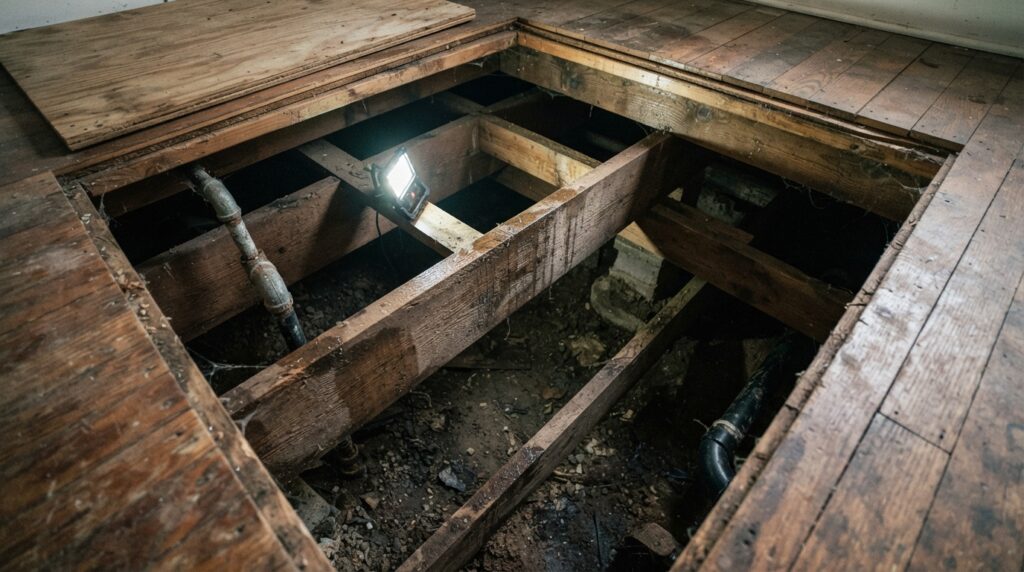
        Hardwood installed over concrete needs a proper vapor barrier between the subfloor and the wood. If that barrier is missing, damaged, or installed incorrectly, moisture from the concrete slab can seep upward into the wood for months without anyone noticing, until the floor starts to lift.

        Improper acclimation before installation

        Hardwood needs time to adjust to a home’s humidity and temperature before it’s installed. Skipping or rushing this step is a common mistake, especially with lower-cost installs. Wood that goes down before it’s acclimated will expand or contract once it settles into the room’s actual conditions, and buckling is one of the ways that shows up.

        This matters more in Calgary than in a lot of other markets. A floor acclimated in summer humidity and then hit with our dry winter indoor air, or installed in winter and then exposed to a humid August, moves more than wood installed in a climate with less seasonal swing.

        Subfloor moisture problems

        Contractor checking hardwood floor

        If the subfloor itself was wet or damp during installation, or develops a moisture issue afterward from a slow plumbing leak or grading problem outside the home, that moisture transfers directly into the hardwood above it.

        Extreme heat exposure

        Less common, but worth knowing: prolonged direct heat, like sunlight through a window for years or a floor installed too close to a heat vent, can also stress the wood enough to contribute to buckling, particularly when combined with humidity swings.

        Buckling vs cupping vs crowning

        These three problems get mixed up constantly, and the fix is different for each one.

        ProblemWhat it looks likeUsually caused by
        CuppingBoard edges curl up, center stays lowerMoisture from below, seasonal humidity
        CrowningCenter of the board rises above the edgesOver-drying after a cupping repair, or moisture from above
        BucklingBoards lift entirely off the subfloorProlonged water exposure, major moisture intrusion

        If you’re not sure which one you’re dealing with, that’s a reasonable thing to have someone confirm in person before you decide on a fix.

        Signs your hardwood floor is buckling

        Catching it early makes a real difference in cost and repair options. Watch for:

        • Boards that feel loose or springy underfoot
        • Visible gaps or ridges between boards
        • A section of floor that looks higher than the rest
        • Boards separating at the seams
        • A musty smell, which often points to moisture sitting underneath

        If you notice any of these, especially after a known water event, don’t wait to see if it gets better on its own. It won’t.

        Can a buckled hardwood floor be repaired

        Often, yes. Hardwood floor repair depends on how long the moisture was present and how many boards are affected.

        Mild to moderate buckling, caught within the first day or two of a water event, can sometimes be corrected by removing the affected boards, thoroughly drying the subfloor, and reinstalling or replacing just that section. This is where a fast response really pays off.

        Severe buckling, where boards have been sitting in moisture for an extended period, often means those specific boards are warped beyond saving and need full replacement. That’s still usually a repair to a section of the floor, not a full floor replacement, unless the water damage was widespread. On older homes with discontinued or unusual species, matching replacement boards can turn into a custom hardwood flooring job rather than a straightforward swap.

        How to fix a buckled hardwood floor

        1. Find and stop the moisture source. Fixing the floor without fixing the leak or humidity problem means you’ll be back here again.
        2. Remove the affected boards. Trying to flatten buckled boards back into place rarely works long-term.
        3. Dry the subfloor completely. This step gets skipped more than it should. Industrial fans or dehumidifiers are often needed, not just open windows.
        4. Check the subfloor for damage. Water that reached the hardwood may have also affected the subfloor underneath.
        5. Replace boards and refinish to match. New boards need to be matched in species, width, and stain, then blended into the surrounding finish so the repair isn’t visible.

        This isn’t usually a DIY-friendly repair. Matching stain and finish on a small section so it blends with surrounding, aged flooring takes experience, and drying a subfloor properly requires more than a fan and a few days.

        How much does hardwood floor buckling repair cost

        Cost depends heavily on how many boards are affected and whether the subfloor also needs repair.

        Scope of repairTypical cost
        Small section (a few boards)$300 – $800
        Moderate section (one room)$800 – $2,500
        Subfloor damage included$1,500 – $4,000+

        For a broader breakdown of flooring costs across installation, refinishing, and repair, see our hardwood flooring cost guide.

        How to prevent hardwood floor buckling

        • Wipe up spills and leaks immediately, and check under appliances periodically for slow leaks
        • Keep indoor humidity between roughly 35 and 55 percent, especially through Calgary’s dry winters and any humid stretches in summer
        • Run a humidifier in winter and a dehumidifier or extra ventilation in humid summer stretches, since Calgary’s swing between the two is wider than most cities
        • Make sure a proper vapor barrier was installed if your hardwood sits over concrete
        • Have new hardwood acclimated properly before installation, not rushed, ideally to the season it’ll actually be living in
        • Address any grading or drainage issues outside the home that could be pushing moisture toward your foundation, worth a second look each spring after snowmelt

        Getting it looked at

        Buckling is one of those problems that gets more expensive the longer it sits, since the moisture causing it usually isn’t done causing damage. If you’re seeing lifted boards, ridges, or a musty smell near your hardwood in Calgary, Airdrie, Cochrane, Okotoks, or the surrounding area, it’s worth having someone assess it before it spreads.

        Contact Arbutus Hardwood for a free assessment and quote on hardwood floor repair anywhere in Calgary and the surrounding area. For general humidity guidance in Canadian homes, the Canada Mortgage and Housing Corporation publishes recommended indoor humidity ranges by season.

        No. If the moisture is caught and removed quickly, many buckled sections can be repaired rather than replaced. The longer wood sits in moisture, the lower the chance of saving those specific boards.

        It varies. Significant flooding can cause visible buckling within hours. A slow, hidden leak might take weeks or months to show up as buckling, since the moisture builds up gradually.

        A dehumidifier can help dry out the area and prevent further damage, but it won't flatten boards that have already buckled. Those boards typically need to be removed and either dried and reinstalled or replaced.

        Sometimes, depending on the cause. Sudden and accidental water damage, like a burst pipe, is often covered. Gradual damage from long-term humidity or a slow leak that went unnoticed is less likely to be covered. Check with your insurance provider for your specific policy.

        No. Refinishing addresses the surface finish, not structural movement in the boards. Buckled boards need to be physically removed, dried, and replaced or reset before refinishing makes sense.

        Small cosmetic issues can sometimes wait for a proper assessment, but active buckling usually means moisture is still present somewhere. It's worth having someone assess the subfloor and moisture source quickly, since delays tend to increase both the damage and the cost.

        How to choose a hardwood flooring contractor in Calgary

        How to choose a hardwood flooring contractor in Calgary

        How to choose a hardwood flooring contractor in Calgary Learn how to choose a hardwood flooring contractor in Calgary by checking experience, insurance, past projects and written quotes before you hire. Contact Us Your floors will be under your feet for 20 years or more. The person you hire to…

        Hardwood Flooring Cost Calgary: 2026 Price & Installation Guide

        Hardwood Flooring Cost Calgary: 2026 Price & Installation Guide

        Hardwood Flooring Cost in Calgary: What You’ll Actually Pay Planning your project but unsure about hardwood flooring cost in Calgary? This guide explains installation, refinishing, and repair expenses to help you plan your flooring budget. Contact Us If you’re planning to install, repair, or refinish hardwood flooring in Calgary, understanding…

        Matte vs Gloss Hardwood Flooring | Arbutus Hardwood

        Matte vs Gloss Hardwood Flooring | Arbutus Hardwood

        Matte vs gloss hardwood flooring: which finish is right for your home? Matte vs gloss hardwood flooring, see which finish suits Calgary homes best for durability, style & upkeep. Get expert advice from Arbutus Hardwood. Contact Us Matte vs gloss hardwood flooring feels like a small decision until you’re standing…
          Hardwood floor buckling causes: why it happens and what to do 15

          DIY vs Professional Hardwood Floor Repair: Which Should You Choose?

          Compare DIY vs professional hardwood floor repair costs, risks, and results. Learn when to DIY, when to call a pro, and how to avoid costly mistakes.

          Your hardwood floors are scratched, dented, or maybe there’s a water stain near the kitchen sink that won’t go away. Now you’re stuck weighing DIY vs professional hardwood floor repair, and honestly, it’s not always an easy call.

          Some damage is simple enough to fix on a Saturday afternoon with a stain marker and a little patience. Other damage can turn into a much bigger (and more expensive) problem if you get it wrong. The trick is knowing which category your floor falls into before you pick up a tool.

          This guide walks through both options in plain language, so you can make a decision you won’t regret six months from now. And if you’d rather skip the guesswork entirely, our professional hardwood floor repair team is always happy to take a look.

          Understanding Common Hardwood Floor Damage

          Before deciding how to fix a floor, it helps to actually understand what you’re dealing with. Not all hardwood damage is created equal, and the fix depends entirely on the type.

          Types of Damage You Might Be Dealing With

          Most hardwood floor problems fall into a handful of categories:

          • Surface scratches and scuffs : usually from shoes, pet claws, or furniture being dragged across the room
          • Dents : caused by dropped objects or heavy furniture legs
          • Water damage : cupping, buckling, or discoloration from spills, leaks, or humidity
          • Gaps between planks : common in older homes or during dry winter months
          • Loose or squeaky boards: often a sign of subfloor movement
          • Deep gouges or missing chunks of wood : usually from something heavy being dropped or dragged

          If you’re not sure which category your damage falls into, our article on signs you need hardwood floor repair breaks down what to look for room by room.

          What Causes Hardwood Floor Damage

          Most damage doesn’t happen overnight. It builds up over time from things like:

          • Moisture from spills, leaky appliances, or high indoor humidity (a bigger issue than most people realize in older Calgary-area homes with older HVAC systems)
          • Furniture and pet claws without protective pads
          • Direct sunlight causing fading in high-traffic living rooms
          • Everyday foot traffic wearing down the finish faster than expected

          Water is one of the trickiest culprits because it’s not always obvious until the damage is already done. If you’ve noticed cupped boards or a dull, discolored patch near a window or appliance, it’s worth reading our guide on water-damaged hardwood floors before deciding on a fix.

          Understanding Common Hardwood Floor Damage

          DIY Hardwood Floor Repair: What You Can (and Can’t) Handle

          Let’s be honest, DIY isn’t for every repair. But for the right kind of damage, it can save you money and give you a bit of satisfaction too.

          Repairs Suitable for DIY

          Small, cosmetic issues are usually the safest bet for a DIY approach:

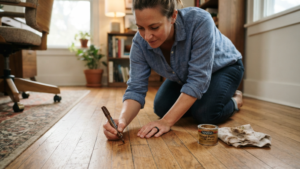
          1. Light surface scratches : a matching stain marker or touch-up pen can hide these in minutes
          2. Shallow dents : a damp cloth and a warm iron can sometimes swell the wood fibers back into place
          3. Small gaps between boards : wood filler or colored putty can close minor gaps
          4. Minor scuffs : often just need cleaning and a light coat of finish

          If your floor only has one or two of these issues and the rest of the finish looks healthy, DIY is a reasonable place to start.

          Tools and Materials You’ll Need

          A basic DIY repair kit typically includes:

          Item

          Approximate Cost

          Wood stain marker/touch-up pen

          $10–$20

          Wood filler or putty

          $10–$25

          Fine sandpaper

          $5–$15

          Protective finish (small can)

          $20–$40

          Soft cloths and applicators

          $10–$15

          For most small jobs, you’re looking at $50–$100 in materials, which is a fraction of what a professional callout might cost.

          Risks and Common DIY Mistakes

          Here’s where things can go sideways. The most common DIY mistakes we see are:

          • Color mismatch : stain markers rarely match the exact tone of an aged floor, leaving an obvious patch
          • Over-sanding a small area: which creates a dip that catches light differently than the rest of the floor
          • Using the wrong filler for the wood species: leading to it cracking or shrinking later
          • Treating water damage like a cosmetic problem: when the real issue is moisture trapped beneath the surface

          That last one is the big one. A plank that looks fine after drying out can still warp again months later if the underlying moisture source wasn’t addressed. If you’re dealing with anything beyond a surface-level fix, it’s worth getting a second opinion before you start sanding.

          We’ve seen this play out more than once. A homeowner notices a small water stain near the dishwasher, sands it down, and applies a fresh coat of finish. It looks great for a few weeks. Then the cupping comes back, sometimes worse than before, because the moisture underneath was never fully dried out or addressed. What started as a $50 touch-up job turns into a $400 repair once the boards actually need to be pulled up and replaced. This is exactly why understanding the type of damage matters more than the size of it.

          There’s also a learning curve most people underestimate. Matching stain color sounds simple until you’re standing in the hardware store aisle holding three different “oak” stains that all look slightly different under store lighting than they will on your actual floor. Testing on a hidden section first, like inside a closet, can save you from a patch that stands out every time you walk through the room.

          DIY Hardwood Floor Repair

          Professional Hardwood Floor Repair: When Expertise Matters

          Some damage just isn’t a weekend project, and that’s okay. Knowing when to bring in a pro can actually save you money in the long run.

          What Professional Repair Services Include

          A professional repair typically covers a lot more ground than a DIY fix, including:

          • Full assessment of the damage and its root cause (not just the visible symptoms)
          • Board or plank replacement when wood is beyond saving
          • Precise color and stain matching using professional-grade products
          • Structural repairs for loose boards or subfloor issues
          • Moisture testing before any refinishing begins

          Many professional teams also use dustless sanding equipment, which contains airborne particles far better than a rented sander from the hardware store. If dust and mess are a concern for your household, our page on dustless hardwood floor refinishing explains how that process works.

          Professionals also bring something you can’t rent at the hardware store: pattern recognition. After enough years on the job, an experienced technician can look at a warped board and tell within minutes whether it’s from a slow leak, seasonal humidity swings, or a one-time spill. That diagnosis matters, because fixing the symptom without fixing the cause just means you’ll be back here again next year. It’s the difference between patching a problem and actually solving it.

          The same goes for wood species. Oak behaves differently than maple under a sander. Older reclaimed wood behaves differently than newer engineered planks. A professional adjusts technique and grit sequence based on what’s actually underfoot, which is nearly impossible to know without hands-on experience.

          Benefits of Hiring a Professional

          The advantages go beyond just “it looks nicer.” Professional repair usually means:

          • Longer-lasting results : properly sanded and sealed repairs tend to hold up for years, not months
          • Consistent color matching: especially tricky on older or sun-faded floors
          • Faster turnaround : most repairs are done in a day or two, not spread across several weekends
          • Warranty coverage: so if something isn’t right, it gets fixed at no extra cost
          • Fewer hidden surprises: since professionals know how to spot subfloor or moisture issues before they become bigger problems

          Reputable flooring professionals also follow practices aligned with the National Wood Flooring Association, which sets the benchmark for sanding, finishing, and repair standards across the industry. That’s not something a DIY job can replicate with a rented sander and a YouTube tutorial.

          Professional Hardwood Floor Repair

          DIY vs Professional Hardwood Floor Repair: Cost Comparison

          Cost is usually the first question homeowners ask, so let’s break it down honestly.

          Factor

          DIY Repair

          Professional Repair

          Small scratch/scuff fix

          $50–$100

          $150–$300 (service call minimum)

          Dent repair

          $20–$50

          Included in service call

          Plank replacement (per board)

          $30–$80 (materials only, high risk of mismatch)

          $80–$200 (materials + labor, matched finish)

          Water damage repair

          Not recommended DIY

          $300–$1,500+ depending on extent

          Risk of redo cost

          High

          Low

          DIY looks cheaper on paper, and for small cosmetic fixes, it usually is. But once you factor in the cost of materials that don’t get used correctly, or a professional having to fix a botched DIY attempt, the savings shrink fast. We’ve seen homeowners spend more redoing a failed DIY dent repair than they would have spent calling a professional in the first place.

          DIY vs Professional Hardwood Floor Repair: Pros and Cons


          Pros

          Cons

          DIY

          Lower upfront cost, flexible timing, hands-on satisfaction

          Risk of color mismatch, limited tools, no warranty, potential for permanent damage

          Professional

          Expert results, warranty protection, faster completion, handles hidden issues

          Higher upfront cost, requires scheduling

          How Long Does Each Option Actually Take?

          Time is another factor people tend to underestimate, especially with DIY projects that sound quick in theory.

          Repair Type

          DIY Timeline

          Professional Timeline

          Surface scratch touch-up

          1–2 hours, plus drying time

          Rarely booked alone, usually bundled with other work

          Dent repair

          30 minutes to 1 hour

          Same day, included in service call

          Single plank replacement

          Half a day to a full day, plus trial and error

          2–4 hours

          Water damage repair

          Not recommended, can take several failed attempts

          1–3 days depending on drying and curing

          Notice that even “quick” DIY jobs often come with hidden time costs, like a second trip to the hardware store for the right stain shade or extra drying time because the first coat didn’t cure evenly. Professionals build that buffer into their process from the start, so there are fewer surprises along the way.

          How to Decide Between DIY and Professional Hardwood Floor Repair

          At this point you’re probably wondering which camp your situation falls into. Here’s a simple way to think it through.

          Questions to Ask Yourself

          • Is the damage purely cosmetic, or does it affect the wood’s structure?
          • Have you seen any signs of water involvement, even in the past?
          • Is the affected area larger than a couple of square feet?
          • Do you have prior experience with wood finishing or staining?
          • Would a mismatched patch bother you, or is this a low-visibility area like a closet?

          If you answered “yes” to structural damage, water involvement, or a large affected area, professional repair is the safer route. Small, cosmetic, low-visibility fixes are where DIY tends to shine.

          When to Call a Professional Right Away

          Some situations shouldn’t wait for a DIY attempt at all:

          • Cupping, buckling, or visible warping
          • A musty smell near the damaged area (possible moisture trapped underneath)
          • Squeaking or movement when you walk across a section of floor
          • Damage that’s already been “fixed” once and has come back
          • Older homes where the finish history or wood species is unknown

          Hardwood Floor Repair vs Refinishing: What’s the Difference?

          It’s worth mentioning that repair and refinishing aren’t always the same thing, and sometimes one leads to the other. Repair fixes specific damaged spots. Refinishing sands and recoating the entire floor for a uniform, like-new look.

          If your damage is spread across multiple rooms or the finish is worn through in several places, a full hardwood floor refinishing might actually be the more cost-effective option compared to patching multiple spots individually. We’ve also put together a breakdown of hardwood floor polishing vs refinishing if you’re trying to figure out which service actually matches your floor’s condition.

          Preventing Future Hardwood Floor Damage

          Whichever route you choose this time, a little prevention goes a long way toward avoiding a repeat repair:

          • Use felt pads under furniture legs
          • Keep humidity levels stable, especially through Alberta’s dry winters
          • Wipe up spills immediately instead of letting them sit
          • Place mats at entryways to catch grit before it scratches the finish
          • Trim pet nails regularly if you have dogs or cats on hardwood

          Small habits like these can add years to the life of a repair, whether it was done by you or a professional.

          It’s also worth doing a quick seasonal check twice a year. Walk through your home and look for early warning signs: a slightly raised board near a window, a dull patch that never seems to shine no matter how much you clean it, or a faint musty smell in one corner of a room. Catching these early almost always means a smaller, cheaper fix. Waiting until the damage is obvious usually means a bigger repair bill later, regardless of whether you go the DIY or professional route.

          Final Thoughts

          Choosing between DIY vs professional hardwood floor repair really comes down to the size and type of damage you’re dealing with. Small scratches and shallow dents are usually safe to handle yourself. Water damage, structural issues, and larger repairs are best left to people who do this every day.

          If you’re still not sure which category your floor falls into, that’s exactly what we’re here for. Our team offers honest assessments, so you’re never guessing whether a repair will hold up. We also serve homeowners in nearby communities, including hardwood floor repair in Priddis, so help is closer than you might think.

          Ready to get your floors looking their best again? Reach out to our hardwood floor repair team for a free assessment and honest recommendation, no pressure, just an expert opinion on what your floor actually needs.

          It can be, especially for small cosmetic touch-ups before a tenant moves in. Just keep in mind that landlords often want a quicker, more uniform result, which usually favors a professional fix for anything beyond a light scratch.

          Yes, in most cases. Spot repairs and single-plank replacements are common and don't require refinishing the entire room, as long as the surrounding boards are in good shape.

          Water damage usually shows as cupping (edges higher than the center of the board), discoloration, or a slightly soft feel underfoot. General wear tends to look more like dullness or fine scratching spread evenly across the floor.

          It can, depending on the manufacturer. Many hardwood warranties require that repairs and refinishing be performed by a certified professional, so it's worth checking your paperwork before attempting a DIY fix on a newer floor.

          Most spot repairs are completed in a single day. Larger jobs involving plank replacement or water damage restoration may take two to three days, depending on drying and curing time for the finish.

          Repair is almost always cheaper than replacement, unless the damage covers a large percentage of the floor or the subfloor itself is compromised. A professional assessment can tell you which option makes more financial sense for your specific situation.

          How to choose a hardwood flooring contractor in Calgary

          How to choose a hardwood flooring contractor in Calgary

          How to choose a hardwood flooring contractor in Calgary Learn how to choose a hardwood flooring contractor in Calgary by checking experience, insurance, past projects and written quotes before you hire. Contact Us Your floors will be under your feet for 20 years or more. The person you hire to…

          Hardwood Flooring Cost Calgary: 2026 Price & Installation Guide

          Hardwood Flooring Cost Calgary: 2026 Price & Installation Guide

          Hardwood Flooring Cost in Calgary: What You’ll Actually Pay Planning your project but unsure about hardwood flooring cost in Calgary? This guide explains installation, refinishing, and repair expenses to help you plan your flooring budget. Contact Us If you’re planning to install, repair, or refinish hardwood flooring in Calgary, understanding…

          Matte vs Gloss Hardwood Flooring | Arbutus Hardwood

          Matte vs Gloss Hardwood Flooring | Arbutus Hardwood

          Matte vs gloss hardwood flooring: which finish is right for your home? Matte vs gloss hardwood flooring, see which finish suits Calgary homes best for durability, style & upkeep. Get expert advice from Arbutus Hardwood. Contact Us Matte vs gloss hardwood flooring feels like a small decision until you’re standing…
            DIY vs Professional Hardwood Floor Repair: Which Should You Choose? 19

            Water Damaged Hardwood Repair: Step-by-Step Guide

            How to Repair Water-Damaged Hardwood Floors: A Step-by-Step Guide

            Need reliable water damaged hardwood repair? Our flooring specialists can assess the damage, recommend the most effective repair solution, and restore your hardwood floors to their original beauty. From minor water stains and cupping to warped boards and extensive moisture damage, we use proven restoration techniques and premium materials to deliver durable, long-lasting results.

            Hardwood floors are one of the most valuable features in a home, but they don’t react well to standing water. A burst pipe, leaking appliance, overflowing sink, or flooding can leave your flooring swollen, stained, warped, or even structurally damaged. The good news is that water damage doesn’t always mean you have to replace the entire floor.

            In many cases, hardwood flooring can be restored if you act quickly and use the right repair methods. The key is understanding how deeply the moisture has penetrated, whether the boards are still structurally sound, and which repair approach fits the type of damage.

            This guide explains how to repair water-damaged hardwood floors, when a DIY repair makes sense, when professional restoration is the better investment, and how to prevent the same problem from happening again. If you’d rather skip the guesswork, our team at Arbutus Hardwood Floors handles everything from moisture assessment to full hardwood floor repair but this walkthrough will help you understand exactly what’s happening to your floor either way.

            Can Water-Damaged Hardwood Floors Be Repaired?

            Yes, hardwood floors can often be repaired if the damage is addressed before the wood begins to rot or permanently deform.

            Minor issues like light cupping, small stains, or slight swelling usually improve after the floor dries completely. Moderate damage may require sanding, refinishing, or replacing a few boards. Severe flooding that causes buckling, mold growth, or widespread structural damage often calls for partial or full floor replacement.

            The faster you remove moisture, the better the chances of saving your hardwood floor.

            Signs Your Hardwood Floor Has Water Damage

            Identifying Water Damage on Hardwood Floors

            Water affects wood in different ways depending on how long it remains wet and how much moisture the boards absorb. For a full visual breakdown of what to look for, see our detailed guide on signs you need hardwood floor repair.

            Look for these warning signs:

            • Boards that feel raised or uneven
            • Edges curling upward (cupping)
            • Centers higher than edges (crowning)
            • Loose or separated floorboards
            • Buckling or lifting from the subfloor
            • Dark water stains
            • Soft spots underfoot
            • Squeaking that wasn’t there before
            • Musty odors indicating trapped moisture
            • Mold around joints or baseboards

            Even if the floor looks dry, moisture can remain trapped underneath for weeks.

            Common Causes of Water Damage

            Understanding what caused the damage helps determine how extensive repairs need to be.

            Plumbing Leaks: Hidden pipe leaks often damage hardwood slowly. Since the leak may continue for weeks before being discovered, moisture frequently reaches the subfloor.

            Appliance Failures: Dishwashers, washing machines, refrigerators, and water heaters are common sources of hardwood floor damage.

            Roof Leaks: Rainwater entering through a damaged roof may stain hardwood while also affecting ceilings and wall framing.

            Flooding: Floodwater usually causes the most serious damage because it saturates both the flooring and the subfloor.

            High Indoor Humidity: Poor ventilation or excessive indoor humidity can gradually cause hardwood to expand, cup, and develop gaps as seasons change. The EPA recommends keeping indoor relative humidity between 30–50% to limit moisture-related damage and mold growth.

            Assess the Severity Before Starting Repairs

            Not every damaged floor needs to be torn out. Use this simple assessment:

            Damage Level

            Typical Symptoms

            Recommended Solution

            Minor

            Light cupping, slight swelling, small stains

            Dry thoroughly, monitor, sand if necessary

            Moderate

            Noticeable warping, isolated buckling, loose boards

            Replace damaged boards and refinish

            Severe

            Extensive buckling, mold, rotten wood, damaged subfloor

            Professional restoration or replacement

            One important mistake homeowners make is repairing the surface before confirming the floor is dry underneath. Sanding wet hardwood often makes the problem worse.

            Step 1: Stop the Water Source

            Repair begins by eliminating the source of moisture. That may involve:

            • Turning off the main water supply
            • Fixing leaking plumbing
            • Repairing a roof leak
            • Replacing a damaged appliance hose
            • Removing standing floodwater

            Unless the source is fixed first, repairs won’t last.

            Step 2: Remove Standing Water Immediately

            Time is the biggest factor in determining whether hardwood survives. Use:

            • Wet/dry vacuum
            • Towels
            • Mop
            • Water extraction equipment

            Avoid letting water sit longer than necessary. Hardwood starts absorbing moisture almost immediately. If flooding affects multiple rooms, professional extraction equipment removes water much faster than household tools.

            Step 3: Dry the Hardwood Floor Properly

            Professional Drying Equipment Restoring Hardwood Floors

            Drying is the most important part of the restoration process.

            Open windows if outdoor humidity is low. Use:

            • High-volume fans
            • Commercial air movers
            • Dehumidifiers
            • HVAC system

            Leave the equipment running continuously until moisture readings return to normal. Depending on the amount of water involved, drying may take anywhere from several days to several weeks. Never assume the floor is dry simply because the surface feels dry.

            Step 4: Measure Moisture Before Making Repairs

            Professional flooring contractors use moisture meters rather than guessing.

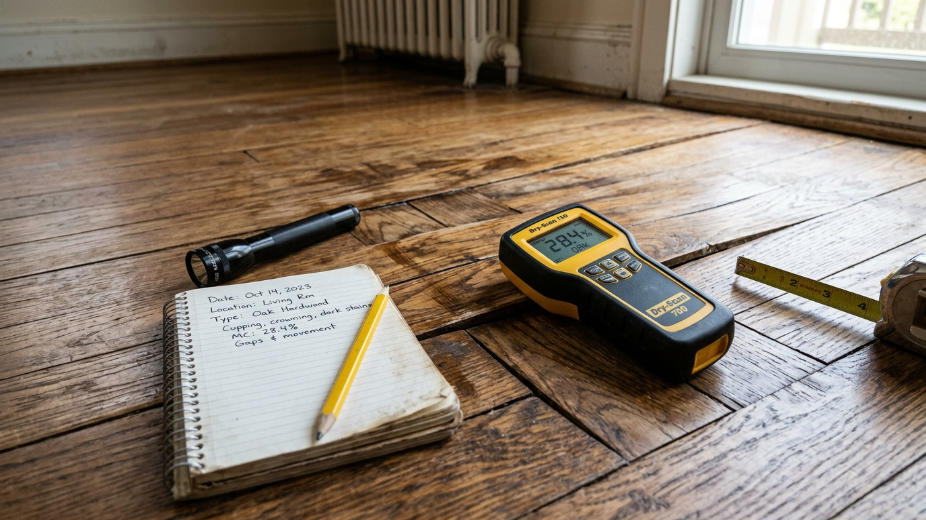
            Generally, hardwood flooring should return close to its normal moisture content before sanding or refinishing begins. If moisture remains trapped inside the boards or subfloor, repairs performed too early often fail as the wood continues moving during the drying process.

            This step alone prevents many costly mistakes.

            How to Repair Minor Water Damage

            Minor water damage is usually repairable without replacing flooring.

            Remove Surface Stains:

             Light stains can sometimes be cleaned using hardwood-safe cleaners designed for finished wood surfaces. For darker discoloration, gentle sanding followed by refinishing may restore the wood’s appearance. Avoid using bleach or harsh chemicals unless recommended for unfinished hardwood, as they may permanently damage the finish.

            Fix Small Areas of Cupping:

             Cupping happens when the bottom of a board contains more moisture than the top, causing the edges to rise. In many situations, the boards flatten naturally after drying.

            If slight cupping remains after moisture levels stabilize:

            1. Sand high edges
            2. Apply fresh stain if needed
            3. Refinish the repaired section

            Sanding before the floor finishes drying may cause the opposite problem — crowning.

            Repair Surface Scratches:

             Water sometimes softens finishes, making scratches more visible. Small scratches can often be repaired using:

            • Hardwood repair markers
            • Wax filler sticks
            • Color-matched repair kits

            These cosmetic repairs blend minor imperfections until the floor is refinished.

            Repairing Warped Hardwood Boards

            Warped boards don’t always need replacement.

            First, determine whether the boards remain securely attached. If the wood has only slightly distorted, drying followed by sanding may restore a flat surface. If boards remain permanently twisted or separated from neighboring planks, replacement becomes the better long-term solution.

            Professionals typically remove only the damaged boards rather than replacing the entire room. This approach preserves matching flooring while reducing repair costs.

            How to Replace Individual Hardwood Boards

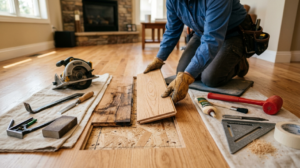
            Step-by-Step Hardwood Board Replacement

            Localized damage is often easier to repair than many homeowners expect. The general process includes:

            1. Mark the damaged board.
            2. Cut through the center using a circular saw set to the correct depth.
            3. Remove the damaged sections carefully.
            4. Clean the opening.
            5. Fit a matching replacement board.
            6. Secure it with flooring adhesive or nails, depending on the installation method.
            7. Sand, stain, and refinish the repaired area until it blends with the surrounding floor.

            Finding an exact match may require using leftover flooring from the original installation or sourcing the same wood species and width from a flooring supplier.

            How to Repair Buckled Hardwood Floors

            Buckling is one of the most severe forms of water damage. Instead of simply swelling, the boards lift away from the subfloor, creating raised sections or large gaps. This usually happens after prolonged exposure to water or flooding.

            Before replacing anything, make sure the flooring is completely dry. In some cases, slight buckling settles as moisture levels return to normal.

            If the boards remain lifted:

            1. Inspect the subfloor for moisture or rot.
            2. Remove damaged planks without disturbing the surrounding flooring.
            3. Replace any compromised underlayment.
            4. Install matching hardwood boards.
            5. Sand and refinish the repaired area so it blends with the rest of the floor.

            If buckling affects a large portion of the room, replacing the entire floor may be more cost-effective than patching dozens of individual boards.

            Can Swollen Hardwood Floors Shrink Back?

            Yes, sometimes.

            Wood naturally expands when it absorbs moisture and contracts as it dries. If the water exposure was brief and the flooring hasn’t been permanently distorted, the boards often return close to their original shape after proper drying.

            Patience is important. Depending on humidity levels and the amount of water involved, hardwood may need several weeks to stabilize. If swelling remains after the floor reaches normal moisture content, sanding or replacing affected boards may be necessary.

            Removing Dark Water Stains

            Dark stains usually indicate that water has penetrated below the finish and reacted with the wood. The right repair depends on the depth of the stain.

            Stain Type

            Best Repair Method

            Surface discoloration

            Hardwood cleaner and light buffing

            Finish damage

            Sand and refinish

            Deep black stains

            Replace affected boards if sanding won’t remove discoloration

            Avoid aggressively sanding one small spot. Removing too much material can leave a visible low area in the floor. For older hardwood, feathering the repair into surrounding boards creates a more natural appearance a technique covered in more depth in our hardwood floor refinishing services guide.

            Watch for Mold Beneath the Floor

            One problem many homeowners overlook is hidden mold. Even if the surface looks dry, moisture trapped between the hardwood and subfloor creates ideal conditions for mold growth.

            Possible warning signs include:

            • Persistent musty odors
            • Black or green discoloration
            • Allergy symptoms that worsen indoors
            • Soft subflooring
            • Moisture readings that remain high

            If mold has spread beneath the flooring, removing the affected boards is usually the safest solution. Simply drying the surface won’t eliminate mold growing underneath. For guidance on assessing indoor mold risk, the EPA’s mold resource center is a helpful reference.

            Solid Hardwood vs. Engineered Hardwood Repairs

            Not all wood flooring responds to water the same way.

            Solid Hardwood:

             Solid hardwood is generally easier to restore because it can be sanded and refinished multiple times. Individual boards are also easier to replace.

            Engineered Hardwood:

             Engineered hardwood has a thin hardwood veneer over a plywood core. While it handles humidity better than solid wood, severe water damage often affects the inner layers, causing them to separate. Minor surface damage may be repairable, but delamination usually requires replacing the damaged planks.

            DIY Repair vs. Hiring a Professional

            Some repairs are well within reach of an experienced DIY homeowner. Others require specialized drying equipment and flooring expertise.

            DIY Repairs

            Professional Repairs

            Drying small spills

            Flood restoration

            Cleaning surface stains

            Extensive buckling

            Replacing one or two boards

            Large-scale board replacement

            Minor refinishing

            Subfloor repairs

            Cosmetic touch-ups

            Mold remediation

            A professional restoration company also uses moisture meters and commercial dehumidifiers to confirm the floor is dry before repairs begin. That reduces the risk of future movement or hidden damage.

            How Much Does Water-Damaged Hardwood Floor Repair Cost?

            Costs vary depending on the extent of the damage, the wood species, and whether refinishing or replacement is required.

            Repair

            Typical Cost

            Drying and moisture testing

            $300–$1,000

            Sanding and refinishing

            $3–$8 per sq. ft.

            Replacing a few boards

            $200–$800

            Partial floor replacement

            $8–$20 per sq. ft.

            Full hardwood replacement

            $10–$25+ per sq. ft.

            If the damage was caused by a sudden event such as a burst pipe or appliance failure your homeowner’s insurance may cover part or all of the restoration costs. Damage caused by long-term neglect or unresolved leaks is less likely to be covered.

            When Should You Replace Instead of Repair?

            Repair isn’t always the most practical option. Replacement is usually the better choice if:

            • Mold has spread beneath the flooring
            • The subfloor is rotting
            • Most boards are buckled
            • Water has remained for several days
            • The flooring cannot be matched
            • The wood has started to decay
            • The floor has already been sanded multiple times and has little wear layer remaining

            Trying to save severely damaged flooring often leads to repeated repairs that cost more over time than replacing the affected area.

            How to Prevent Future Water Damage

            While accidents can’t always be avoided, a few preventive measures can significantly reduce the risk of water damage:

            • Clean up spills immediately
            • Keep indoor humidity between 35% and 55%
            • Inspect plumbing connections regularly
            • Replace aging appliance hoses
            • Use mats near exterior doors and sinks
            • Maintain your roof and gutters
            • Install leak detectors near water heaters, dishwashers, washing machines, and refrigerators
            • Refinish hardwood floors when the protective coating begins to wear

            Heating sources near hardwood flooring also deserve attention. Fireplaces and wood stoves can dry out or stress nearby boards if humidity swings too far in the other direction, so proper installation and clearance matter just as much as moisture control. If you’re upgrading or maintaining a fireplace near hardwood flooring, Classic Fireplace offers a range of options worth reviewing before installation.

            Expert Tips for Better Long-Term Results

            Small decisions during the repair process can have a big impact on the final outcome:

            • Don’t sand hardwood until moisture levels have stabilized
            • Photograph the damage before beginning cleanup if you plan to file an insurance claim
            • Save leftover flooring from renovations for future repairs
            • Replace damaged underlayment when installing new boards
            • Blend stains across multiple boards instead of repairing only one visible plank
            • If flooding involved contaminated water, prioritize safety and sanitation before restoration

            These steps help produce repairs that look better and last longer.

            Final Thoughts

            Water damage doesn’t automatically mean your hardwood floor is beyond repair. Many floors recover well when moisture is removed quickly and repairs are performed only after the wood has fully dried.

            The biggest mistakes homeowners make are rushing into sanding, ignoring hidden moisture beneath the flooring, and overlooking damage to the subfloor. Taking the time to assess the severity, dry the floor properly, and choose the right repair method can extend the life of your hardwood flooring for many years.

            When damage is limited to a few boards, targeted repairs often restore the floor with little evidence of the problem. For widespread flooding, professional restoration provides the best chance of protecting both the flooring and the structure beneath it.

            Not sure if your floor can be saved? Arbutus Hardwood Floors offers on-site moisture assessments and full water damage restoration, including hardwood floor repair and refinishing services. If you’re in the area, check out our hardwood floor repair services in Priddis or contact us today for a free consultation.

            Yes. Many hardwood floors can be restored if drying begins quickly and the wood hasn't suffered severe structural damage or mold growth.

             Minor water exposure may dry within several days, while major flooding can require several weeks. Moisture should be confirmed with a meter before repairs begin.

             Often, yes. As the flooring returns to its normal moisture content, slight cupping may improve naturally. Permanent deformation may require sanding or board replacement.

            No. Sanding before the wood has completely dried can create permanent crowning and uneven boards.

            Not necessarily. Some boards can be replaced individually, but widespread buckling usually indicates more extensive damage beneath the floor.

            It often does when the damage results from a sudden, accidental event such as a burst pipe. Coverage varies by policy, so review your insurance documents or contact your provider.

            Minor damage may be repairable, but if the plywood core separates or swells significantly, replacing the affected planks is usually the best solution.

            How to choose a hardwood flooring contractor in Calgary

            How to choose a hardwood flooring contractor in Calgary

            How to choose a hardwood flooring contractor in Calgary Learn how to choose a hardwood flooring contractor in Calgary by checking experience, insurance, past projects and written quotes before you hire. Contact Us Your floors will be under your feet for 20 years or more. The person you hire to…

            Hardwood Flooring Cost Calgary: 2026 Price & Installation Guide

            Hardwood Flooring Cost Calgary: 2026 Price & Installation Guide

            Hardwood Flooring Cost in Calgary: What You’ll Actually Pay Planning your project but unsure about hardwood flooring cost in Calgary? This guide explains installation, refinishing, and repair expenses to help you plan your flooring budget. Contact Us If you’re planning to install, repair, or refinish hardwood flooring in Calgary, understanding…

            Matte vs Gloss Hardwood Flooring | Arbutus Hardwood

            Matte vs Gloss Hardwood Flooring | Arbutus Hardwood

            Matte vs gloss hardwood flooring: which finish is right for your home? Matte vs gloss hardwood flooring, see which finish suits Calgary homes best for durability, style & upkeep. Get expert advice from Arbutus Hardwood. Contact Us Matte vs gloss hardwood flooring feels like a small decision until you’re standing…
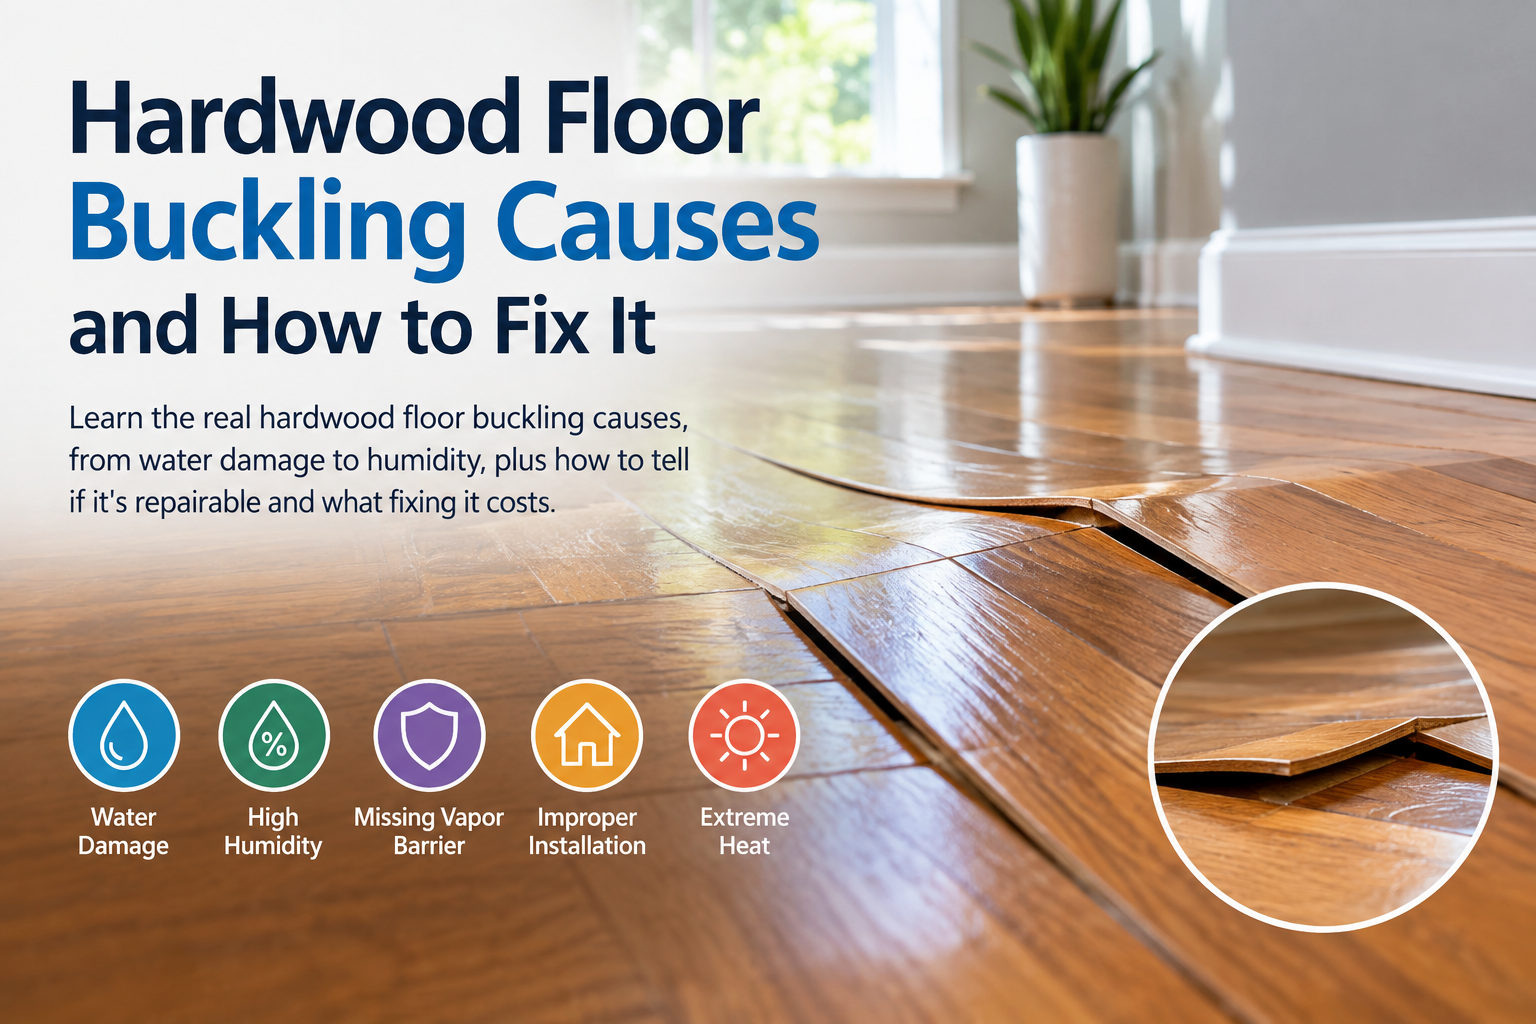
            Dealing with water damage doesn’t always mean replacing your entire hardwood floor. Our water damaged hardwood repair specialists can assess the extent of the damage, recommend the most effective repair solution, and restore your floors with lasting results. Whether you’re facing cupping, buckling, stains, or warped boards, contact us today for expert repairs that protect your investment and bring your hardwood floors back to life.

              Water Damaged Hardwood Repair: Step-by-Step Guide 23