Arbutus Hardwood Floors

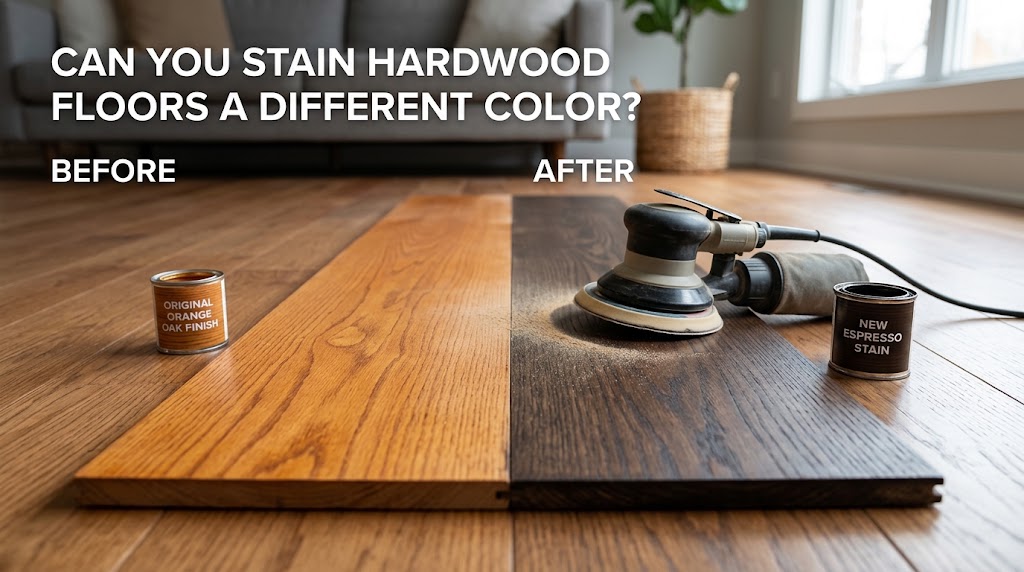
Can you stain hardwood floors a different color?

Can you stain hardwood floors a different color? Yes, absolutely. Most solid hardwood floors can go darker, lighter, or be transformed into a completely different tone altogether. The catch is that it always starts with sanding the old finish and stain completely off the wood. Plenty of homeowners ask this after living with an outdated orange oak or a dark espresso they no longer love. The good news is that the wood itself is rarely the problem the color lives on the surface, and with the right process, it can easily change.

Quick answer: To change the color of hardwood floors, the old finish and stain must be sanded off down to bare wood. New stain is applied, then a clear protective finish on top. Going darker is easy. Going lighter is harder and depends on how deep the old stain went and what species the wood is. Engineered floors can only be restained if the top layer is thick enough to sand.

Here’s how the process works, what each color change really involves, and how to avoid the mistakes that leave people with a floor they like even less than before.

Why you can’t just stain over the old color

New stain needs to soak into bare wood. A floor that’s been finished with polyurethane has a clear plastic-like coating on top, and stain can’t pass through it. If you brush stain over an intact finish, it sits on the surface, looks blotchy, and wipes or wears away.

There are products sold as gel stains or toners that go over existing finish. They can change the tone a little, but they don’t last. They scratch off in walkways and can leave a muddy look. We wouldn’t recommend them for a whole floor.

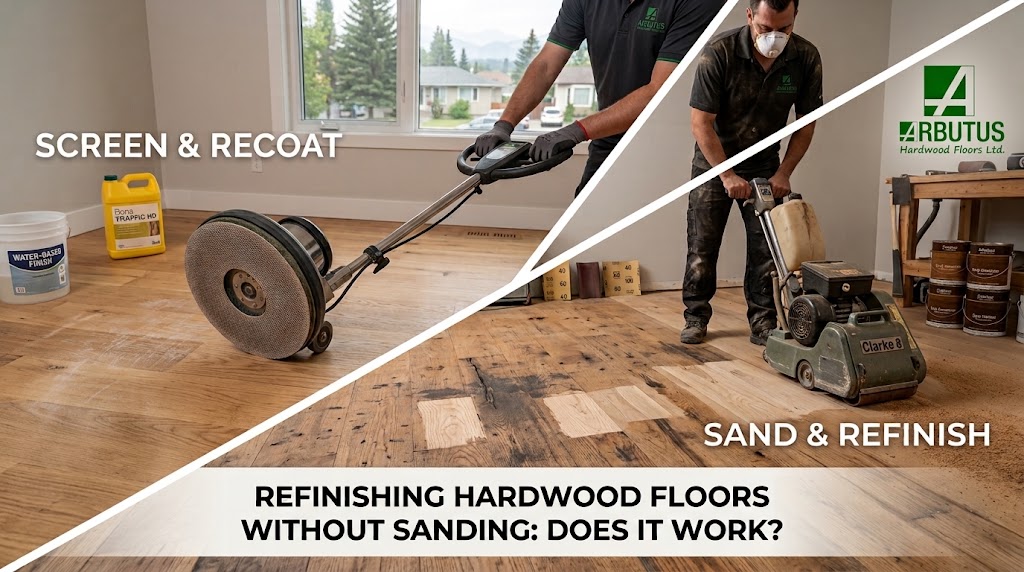
If you only need to refresh a tired finish and keep the current color, there’s a lighter option. Our guide to refinishing hardwood floors without sanding explains when a screen and recoat does the job. Changing color is a different story, because color lives in the wood.

How the Process Works: Can You Stain Hardwood Floors a Different Color?

A color change is a full hardwood floor refinishing project. These are the steps:

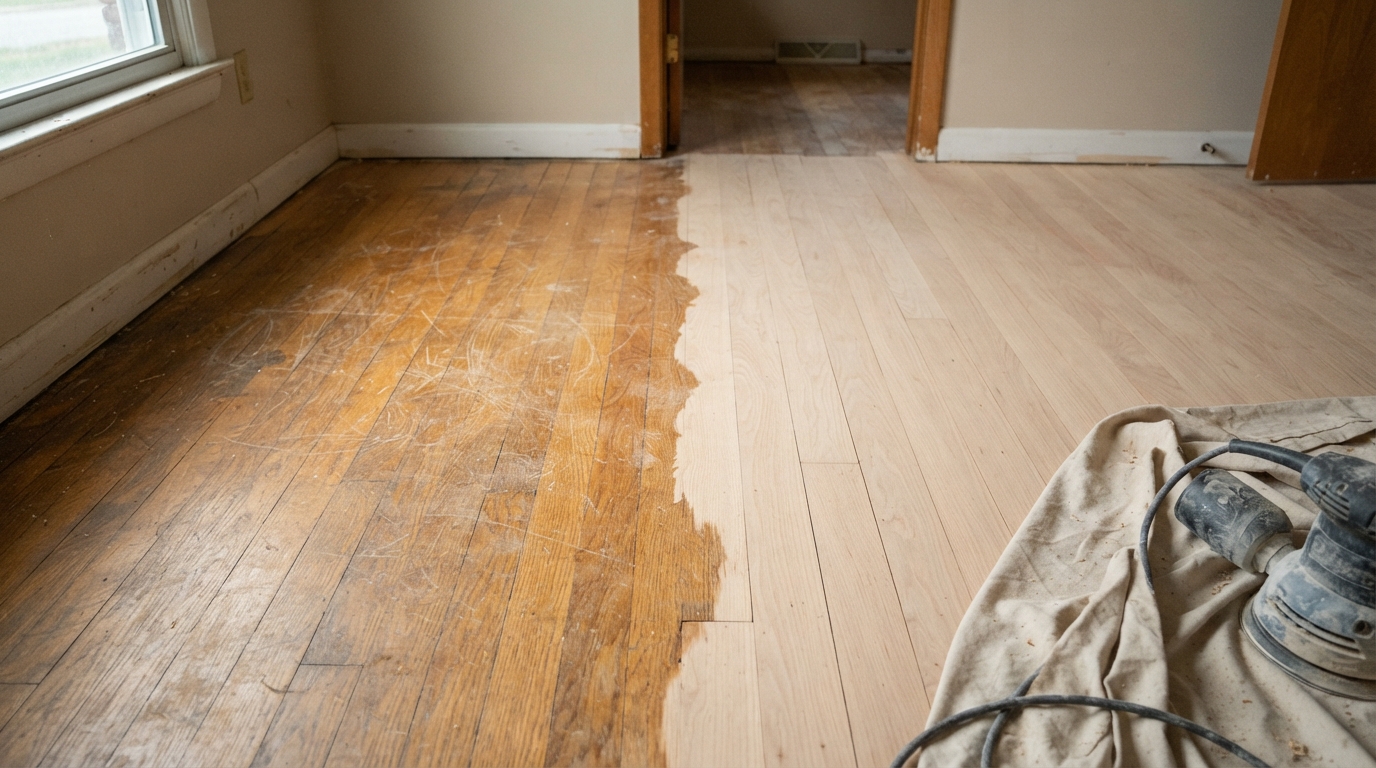
  1. Sand to bare wood. The old finish and the stain in the top layer of wood are removed, usually in several passes with finer and finer sandpaper.
  2. Repair and prep. Gaps, nail holes, and damaged boards are fixed. The floor is vacuumed thoroughly so no dust ends up in the stain.
  3. Test the color. Samples are applied on a spare board or hidden area, in the room’s real lighting.
  4. Apply the stain. Stain goes on in even sections and the excess is wiped off.
  5. Let it dry. Water-based stains dry faster than oil-based. Dry time depends on the product and the room.
  6. Apply protective finish. Usually two or three coats of polyurethane, with light abrasion between coats.
  7. Cure. The floor feels dry long before the finish hardens fully. Rugs and heavy furniture wait.

A main floor typically takes four to seven days from start to finish, depending on size, product, and drying conditions.

Going darker vs going lighter

This is where expectations and reality often split.

Going darkerGoing lighter
How hardStraightforwardHarder, less predictable
WhyDark stain covers what’s left in the woodOld stain pigment must be sanded out first
RiskShows dust and scratches moreOld color can show through
Typical resultVery reliableDepends on species and how deep the old stain went

Going darker is the easy direction. Once the floor is sanded, a darker stain simply covers whatever is left. It’s also the better choice if you want to hide old stains or uneven color.

Going lighter means removing the old stain from the wood itself. Stain soaks in, so sanding has to cut deep enough to take that color out. If the old stain is dark and the floor was stained heavily, some tone may remain after sanding. Pushing for a very pale or white look can need bleaching or special products, and results vary by wood. This is professional work, and it’s worth having a sample done before you commit.

Pro Tip: Ask for a sample on your own floor before you pick a color. Small stain cards and online photos rarely match how a color looks on your species of wood in your room’s light. A test patch costs a little time and can save you from a floor you didn’t mean to have.

How wood species changes the color you get

The same stain looks different on different woods. Grain, density, and natural color all affect the result.

SpeciesHow it takes stainThings to know
Red oakTakes stain evenly, shows grainHas pinkish undertones that can show through some colors
White oakTakes stain well, cooler tonePopular for natural and neutral looks
MapleTight grain, can look blotchy with dark stainOften needs conditioning or a gel approach
HickoryStrong grain contrastStain exaggerates natural color variation
WalnutAlready darkUsually left natural or lightly toned
BirchCan blotchSimilar care to maple

This is why a color you love on a sample photo may not match on your floor. If you’re not sure how your species will respond, a professional can tell you before sanding starts. For floors that need a more unusual look, our custom hardwood flooring work is another path.

How the finish changes the final color

Stain isn’t the only thing that changes how a floor looks. The clear finish on top matters too.

  • Oil-based polyurethane has a warm, amber tone that deepens over time. It makes wood look richer and slightly more yellow.
  • Water-based polyurethane dries clear and keeps the color closer to what you chose. It’s a common pick for pale, natural, and gray-toned floors.
  • Sheen matters. Matte and satin hide scratches and dust better than gloss, and they suit the soft, natural look many homeowners want now.

Mention the finish when you pick your stain. The same color can read warmer or cooler depending on what goes over it.

Choosing a stain color that works in Calgary homes

A few practical things worth thinking about before you choose:

Light. Calgary has bright winter sun and long, dim evenings. Rooms with a lot of south-facing light can handle richer, deeper tones. Darker, north-facing rooms often feel better with lighter or warmer floors.

Maintenance. Very dark floors show dust, pet hair, and scratches. Very light or white-washed floors show dirt less, but can reveal wear differently. Mid-tone, natural-looking colors are the most forgiving.

Style. Warm, natural wood tones are popular right now, and many homeowners are moving away from the cold gray floors that were common a few years ago. Trends change, though, so choose something you’ll still like in ten years.

Dry winter air. Our indoor air gets very dry once the furnace is on. Whatever color you pick, seasonal gapping can happen, and it shows more on some tones than others. See our guide to hardwood floor gaps in Calgary winters for what’s normal.

Can you restain engineered hardwood

Sometimes. It depends on the thickness of the wood layer on top of the board. Engineered hardwood has a thin hardwood veneer over a plywood core, and a full sand to change color removes part of that veneer.

If the veneer is thick enough, one color change may be possible. If it’s thin, sanding could go through it and ruin the board. Many prefinished engineered floors can’t be restained at all. Check the manufacturer’s information or have a professional measure before you plan on it. We cover wear layer limits in our guide to hardwood floor refinishing vs replacement.

How much does it cost to change hardwood floor color

Changing color follows the same price as a standard full refinish, plus extra for stain and prep. These are rough Calgary-area estimates, not quotes:

ItemTypical cost
Full sand and refinishAbout $3 to $6 per sq ft
Custom stain or color changeAdds roughly $1 to $2 per sq ft
Bleaching or special lighteningQuoted individually
Sample test patchOften included in a good quote

Your price depends on floor size, condition, species, and the product system used. For a wider picture of what each flooring job costs, see our hardwood flooring cost guide.

Common mistakes when changing floor color

  • Picking a color from a photo. Screens lie. Always test on your floor.
  • Skipping the sample. This is the most common reason people end up unhappy.
  • Going too light on red oak. The natural pink tone can fight against pale colors.
  • Staining over old finish. It won’t absorb properly and often fails.
  • Not allowing enough dry time. Rushing the finish coats can trap moisture and cause cloudiness or peeling.
  • Ignoring the wood’s thickness. If a floor has already been sanded several times, another full sand may not be a safe option.

If your floor has serious damage, such as deep stains, warping, or loose boards, those should be handled first. Our hardwood floor repair service can fix individual problem areas so the new color goes onto a sound surface.

Frequently asked questions

Can you change hardwood floor color without sanding?

Not properly. Stain can’t penetrate an intact finish. Toners and gel stains can shift the tone a little, but they wear off quickly and aren’t a lasting solution.

How many times can you restain hardwood floors?

Solid hardwood can usually be sanded four to six times over its life, so a few color changes are possible, though each full sand uses up some of that. Engineered floors typically allow one or two.

Can I stain my floor white?

You can get very light, white-washed looks, but true white stain on wood is difficult. Results depend on species, and bleaching may be needed. Ask for a test sample, because the finish and the wood’s natural color both affect it.

What’s the most popular hardwood stain color?

Natural and warm mid-tone oak shades are widely chosen, with satin or matte finishes. The best color is one that suits your light, your furniture, and how you live.

Will a darker stain hide scratches and pet damage?

It can hide small scratches better than very light colors in some cases, but dark floors often show dust, pet hair, and light scuffs more. Sheen matters as much as color here.

How long before I can walk on a freshly stained floor?

Light foot traffic is often possible after the finish has dried, which is usually the next day for water-based products. Full cure takes longer, so keep rugs and heavy furniture off until your contractor says it’s ready.

Making the change with confidence

So, can you stain hardwood floors a different color? Yes. A fresh color is one of the most effective ways to update a home, and solid hardwood is built to be redone. Plan for full sanding, test the stain on your actual floor, and consider your wood species before you decide.

Thinking about a new look for your floors? Contact Arbutus Hardwood for a free assessment in Calgary, Airdrie, Cochrane, Okotoks, Chestermere, or nearby. We’ll check your wood, show you samples, and give you a clear quote. You can also read about painted floors in our guide on whether you can paint hardwood floors, or learn more from the National Wood Flooring Association.
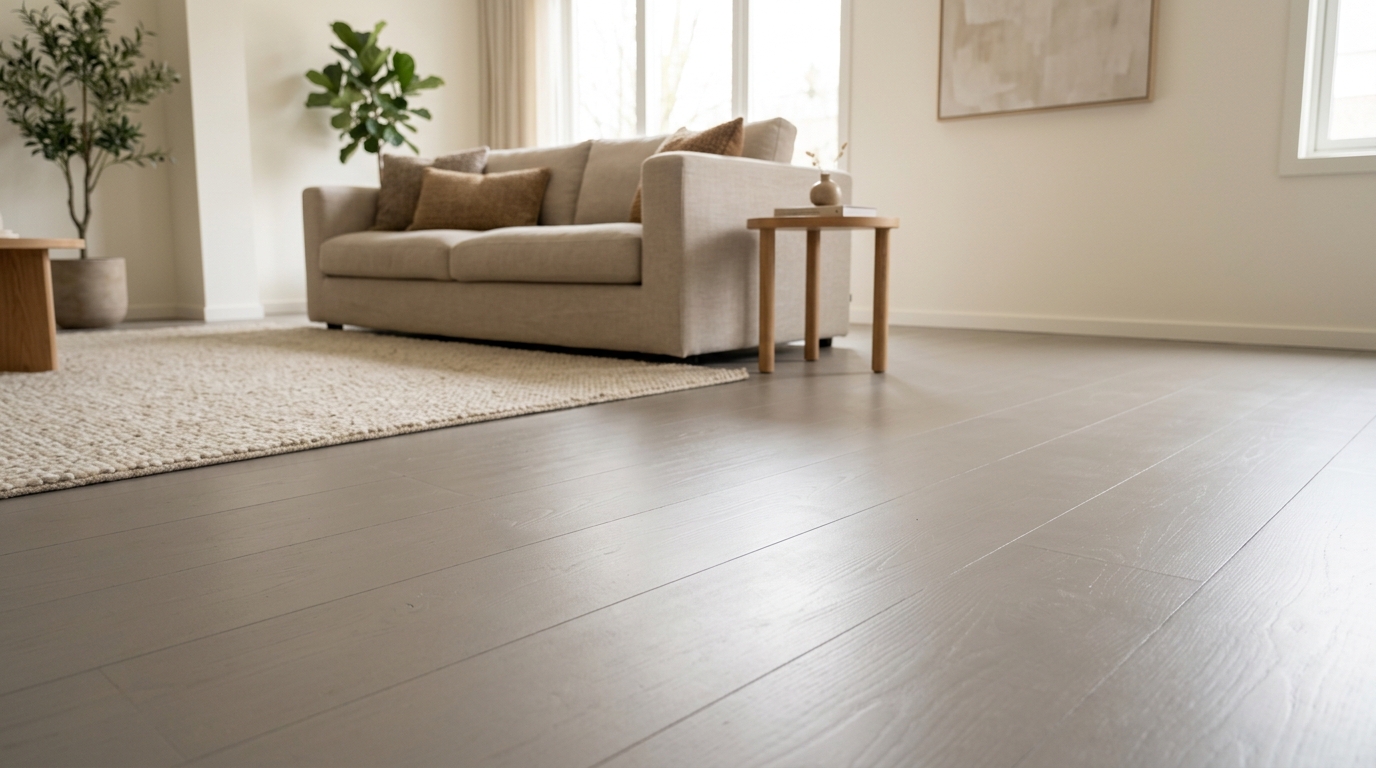
Can you paint hardwood floors? What to know before you start

paint hardwood floors

Written by Arbutus Hardwood Flooring Team | Reviewed by Dave Cunnings, Lead Flooring Specialist

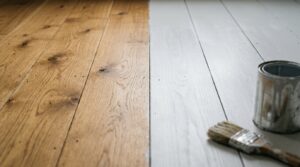
Yes, you can paint hardwood floors. It’s a common way to hide damage or add color, and it can look great in the right room. But paint is harder to undo than most people expect, and that’s the part to think about before you open a can.

Quick answer: Painted hardwood needs the old finish scuffed or sanded, a primer, and a floor-rated paint with a clear topcoat. It costs less than replacing a damaged floor, but it chips and wears faster than a clear finish, and removing paint later makes a full refinish more work and more money.

Here’s what it involves, where it makes sense, and when another option is the better call.

When painting hardwood floors makes sense

Paint isn’t wrong. It’s a good fit in a few situations:

  • The wood is stained, patched, or mismatched in a way sanding can’t fix
  • It’s a low-traffic room like a spare bedroom, loft, or sunroom
  • The floor is old, tired, and not worth a full refinish
  • You want a bold color or pattern that stain can’t give you
  • A budget project where replacement isn’t realistic

If you’re in the early stages of deciding, our guide on refinishing hardwood floors without sanding covers the lighter options first, such as a screen and recoat, which keep the natural wood.

Pros and cons of painted hardwood floors

ProsCons
Hides stains, patches, and uneven colorChips and scuffs show quickly
Wide color choiceHides the wood grain for good
Cheaper than replacing damaged floorsNeeds touch-ups over time
Can brighten a dark roomCan turn some buyers off at resale
Quick to change the lookMuch harder to remove later

The last row is the one that matters most. Natural wood can be refinished several times. Paint takes that flexibility away.

How to paint hardwood floors

Good prep decides how long painted floors last. Skipping steps is why many painted floors peel within a year.

  1. Clean and degrease. Remove dirt, oils, and any wax or polish. Wax stops paint from bonding.
  2. Repair the floor. Fill gaps and holes, and fix loose boards.
  3. Scuff or sand the old finish. The surface needs a rough, dull profile so primer can grip. This is where many people expect to skip sanding and end up regretting it.
  4. Prime. Use a primer made for floors and compatible with your paint.
  5. Paint in thin coats. Use paint made for floors, like a porch and floor enamel. Two coats is typical.
  6. Seal with a clear topcoat. A floor-grade polyurethane protects the paint from scuffs.
  7. Let it cure. Paint can feel dry in a day but take weeks to fully harden. Keep rugs and heavy furniture off until the can says it’s safe.

Follow the instructions on your specific products. Drying and cure times change with temperature and humidity, and Calgary’s dry indoor air in winter can affect how some coatings behave.

Paint vs stain on hardwood floors

Paint vs stain on hardwood floors

Stain soaks into the wood and keeps the grain visible. Paint sits on top and covers it.

StainPaint
Shows wood grainYesNo
Hides damagePartlyMostly
Color rangeWood tones, some grays and whitesAlmost unlimited
Wear over timeWears evenly with the finishChips and shows scuffs
Easy to redoYes, by refinishingNo, paint has to be removed first

If you mainly want a different color but still want wood, a new stain is worth a look. We cover that in our upcoming guide on staining hardwood floors a different color. For custom looks, our custom hardwood flooring service is another route.

Can you sand painted hardwood floors

Yes, but it’s harder than sanding a clear finish. Paint can gum up sandpaper, so the job takes more passes and more material. That usually means higher labor cost, and it removes more of the wood’s limited thickness. Solid hardwood can only be sanded so many times in its life, so every extra pass matters. For the limits, see our guide to hardwood floor refinishing vs replacement.

Most painted floors can be brought back to bare wood. Some can’t. If paint soaked into cracks, or the boards were already sanded thin, the wood may not recover well.

A safety note for older Calgary homes

If your home was built before 1960, there’s a real chance old paint contains lead. Health Canada says homes from that period probably contain lead-based paint, and homes built between 1960 and 1990 may too. If you’re painting over or sanding off old paint on a floor in an older home, get the paint tested first. Sanding lead paint creates toxic dust. Health Canada’s lead-based paint guidance explains how to test and what to avoid.

This matters in older Calgary neighborhoods such as Inglewood and Bridgeland, where original hardwood and layers of old paint are common.

How much does it cost to paint hardwood floors

Costs vary a lot, so treat these as rough ranges.

ApproachTypical cost
DIY (materials only)Roughly $1 to $3 per sq ft
Professional paintingRoughly $3 to $7 per sq ft
Sanding paint off laterUsually adds to a standard $3 to $6 refinish

Your final number depends on floor condition, square footage, and products used. For a wider view, see our hardwood flooring cost guide.

Better options if you just want a fresh look

Before you paint, ask whether one of these fits:

  • Screen and recoat if the wood is fine and only the finish is dull
  • A new stain if you want a different tone but still want wood
  • Board repair if the real issue is a few damaged spots, which our hardwood floor repair service handles
  • Full refinishing if the whole floor is tired but structurally sound

Frequently asked questions

Do you have to sand hardwood floors before painting? Most of the time, you at least need to scuff the surface to dull the old finish. Painting over a glossy finish without that step usually leads to peeling.

Is painted hardwood durable? It holds up in low-traffic rooms with a good topcoat. In hallways, kitchens, and entryways, paint wears faster than a clear finish.

Can you paint over a floor that was waxed? Not safely. Wax blocks adhesion. The wax has to be removed first, and that often means sanding.

Does painted hardwood hurt resale value? It can. Many buyers prefer natural wood. Painted floors can often be restored, but buyers may not know that or want the work.

Can you stain hardwood floors a lighter color instead of painting? Often yes, but lightening wood usually needs full sanding to bare wood first. How light you can go depends on the species.

Is painting engineered hardwood a good idea? Be careful. Engineered floors have a thin top layer and can’t take many sandings, so painting them limits your options later.

Making the right choice for your floor

So, can you paint hardwood floors? Yes, and in the right room it works well. Just treat it as a long-term choice, not a quick fix, because removing paint later costs more than most people plan for.

Not sure whether paint, a recoat, or a full refinish suits your floor? Contact Arbutus Hardwood for a free assessment in Calgary, Airdrie, Cochrane, Okotoks, Chestermere, or nearby. We’ll tell you plainly what your floor can handle and what each option will cost you down the road. You can also see our hardwood floor refinishing service for the full process.

Can you refinish hardwood floors without sanding?

Yes, you can refinish hardwood floors without sanding, but only in the right situation. If the finish is dull and worn but the wood underneath is in good shape, a screen and recoat can bring the floor back for a fraction of the price.

Quick answer: A screen and recoat lightly abrades the old finish and adds a fresh protective coat, with no heavy sanding. It works when the floor has surface wear, dullness, and light scuffs. It will not fix deep scratches, dark stains, gouges, or a color you want to change. Those need a full sand and refinish.

Here’s how to tell which one your floor needs, what each costs, and where homeowners go wrong.

What Does Refinish Hardwood Floors Without Sanding Actually Mean?

When people say this, they usually mean one of three things.

Screen and recoat: A floor buffer with a fine abrasive screen scuffs the surface of the existing finish. Then a new coat of finish goes on top. Some people call this buffing and recoating. It’s the only method here that really renews a floor’s protection.

Cleaning and restoring products: Rejuvenators and restorers are sold as quick fixes. They fill tiny scratches and add shine, but most wear off within months.

Paint or chemical stripping: These get searched a lot, and they cause the most problems. More on that below.

When you can skip sanding

A screen and recoat is a good fit when your floor shows these signs:

  • The finish looks dull or cloudy, especially in walkways
  • Light surface scratches that haven’t reached bare wood
  • General scuffing from furniture and foot traffic
  • The floor was refinished within the last several years and the finish is still mostly intact
  • You want to extend the life of the floor before it needs a full refinish

It’s also a smart maintenance step. A recoat every few years can delay a full sand and refinish by a long time, which matters because solid hardwood only has so many sandings in it. We cover that limit in our guide to hardwood floor refinishing vs replacement.

When you can’t skip sanding

Sanding is the only fix when:

  • Scratches or gouges have cut through the finish into the wood
  • Pet stains or water marks have turned the wood dark or gray
  • The finish is peeling or flaking in patches
  • You want to change the stain color
  • Years of wax or polish buildup are blocking new finish from bonding
  • The floor has never had a proper coat, or the finish is worn down to bare wood

Stain color is the one people ask about most. New finish sits on top of the old surface, so the color underneath stays the same. If you want a darker, lighter, or different tone, the old finish and stain have to come off first.

Pro Tip: Not sure if a recoat will work? Put a few drops of water on a worn spot. If the water beads up, the finish is still intact and a recoat can bond to it. If the water soaks in and darkens the wood, the finish is gone in that area and the floor needs sanding.

Why wax and polish can ruin a recoat

New finish needs to grip the old surface. Oil soaps, wax, and some store-bought polishes leave a film that stops that from happening. The new coat can peel within weeks, and fixing it means sanding the whole floor, which is the job you were trying to avoid.

If you’ve ever used wax or a polish product on your floor, mention it before anyone quotes a recoat. A good contractor will test the surface for adhesion first.

Can you paint hardwood floors instead

You can, but think carefully before you do. Paint hides the wood grain and wears faster than a clear finish on floors with regular traffic. The bigger issue is later. If you ever want to go back to natural wood, sanding painted floors takes much more work, and the paint can clog sanding equipment and cost more to remove.

Paint can make sense for a low-traffic room in an older home where the wood is too damaged to show. For most homes, we’d steer you toward a proper refinish.

Rejuvenators and restorers: do they work

They give a short-term improvement. Most products fill fine scratches and add a thin layer of shine, so the floor looks better for a while. They don’t repair damage and don’t replace a recoat.

There’s also a catch. Some products leave a residue, and that residue can interfere with a professional recoat later. If you plan to hire someone, ask before you use one.

Screen and recoat vs sand and refinish

Screen and recoatSand and refinish
What it doesScuffs old finish, adds a new coatRemoves old finish and a layer of wood
Fixes deep scratchesNoYes
Changes stain colorNoYes
Typical cost per sq ft$1.50 to $3.50$3 to $6
Typical time1 to 2 days2 to 7 days
Impact on wood thicknessNoneRemoves a thin layer

These are estimates for the Calgary market. Your price depends on square footage, finish type, and floor condition. For a full breakdown, see our hardwood flooring cost guide.

How a screen and recoat works

  1. The floor is cleaned and checked for wax, oil, or other contamination
  2. A buffer with a fine screen scuffs the existing finish
  3. Dust is removed completely
  4. Any small repairs are done
  5. One or two new coats of finish go on, with drying time between coats

Most water-based finishes are ready for light foot traffic the next day. Plan on a few days before you put heavy furniture and rugs back. Your contractor will give you exact timing for the product they use.

How often do hardwood floors need refinishing

It depends on traffic, pets, and how well the finish was maintained. As a rough guide, a recoat every 3 to 5 years suits many homes. A full sand and refinish typically comes much less often, closer to every 10 to 20 years.

Calgary adds one more factor. Our dry winters stress finishes and wood, and fall is a good time to book a recoat so the new finish is in place before the heat comes on. If your floors also gap in winter, our guide to hardwood floor gaps in Calgary winters explains what’s normal.

Should you do this yourself

You can rent a buffer, but the results depend on details that are easy to miss. Dust left on the floor shows up as bumps in the new finish. A wrong product choice can cause peeling. Some finishes need specific prep, and the finish manufacturers publish their own instructions, such as Bona’s guidance on recoating, which are worth reading before you start.

DIY can work on a small, simple room if the floor has never been waxed. For a full main floor, most homeowners are happier with a professional result.

Frequently asked questions

Can hardwood floors be refinished without sanding in one day?

A screen and recoat can often be done in one to two days for an average room or two. Drying time before you can use the floor depends on the finish.

Does screen and recoat remove scratches?

It hides very light surface scratches in the finish. It doesn’t remove scratches that have gone into the wood.

Can I recoat engineered hardwood?

Yes, and it’s often the best option. Engineered floors can only be sanded once or twice because of the thin top layer, so recoating helps protect that limited wear layer.

Is buffing hardwood floors the same as a recoat?

Buffing alone only smooths and cleans the surface. A recoat adds new finish after the buffing, and that’s what restores protection.

Will a recoat fix a floor that’s gray or black in spots?

No. Dark stains are in the wood itself. Sanding may lighten them, and some may need board replacement. Our repair service handles those cases.

How do I know if my floor was waxed?

Wax leaves a slightly greasy or hazy look, and water may bead oddly. A professional can run a quick test patch to confirm before quoting.

Choosing the right fix for your floor

Refinishing hardwood floors without sanding is a real option, but it’s a maintenance step, not a cure-all. If the wood is sound and only the finish is tired, a screen and recoat saves money and keeps your floor’s thickness for later. If the damage goes into the wood or you want a new color, sanding is the honest answer.

Not sure which one your floor needs? Contact Arbutus Hardwood for a free assessment in Calgary, Airdrie, Cochrane, Okotoks, Chestermere, or nearby. We’ll test the floor and tell you plainly whether a recoat will do the job, or if our hardwood floor refinishing service is the better move.

How to choose a hardwood flooring contractor in Calgary

How to choose a hardwood flooring contractor in Calgary

Learn how to choose a hardwood flooring contractor in Calgary by checking experience, insurance, past projects and written quotes before you hire.

Your floors will be under your feet for 20 years or more. The person you hire to install or refinish them matters more than the wood species you pick.

If you’re working out how to choose a hardwood flooring contractor in Calgary, you’re asking the right question. Dry winters, chinook swings and a mix of old and new homes punish sloppy work. A bad job shows up as gaps by February and cupped boards by July.

Here’s what we’d check before you sign anything. You’ll get a vetting checklist, a quote comparison table, red flags and six FAQs. Use it for a full install or a refinish on floors you already own.

Why the contractor matters more than the wood

Hand the same pallet of white oak to two crews. One acclimates the boards, checks the subfloor moisture and leaves proper expansion gaps. The other opens the boxes and starts nailing. Same wood. Completely different floor in 3 years.

Hardwood is a natural material that moves with humidity. Calgary’s indoor air in winter can drop below 20% relative humidity, while most wood flooring guidelines call for 30% to 50%. That gap is where shrinking, cracking and cupping come from.

A good contractor plans for it. A weak one finds out after you’ve paid.

Most of the horror stories we hear fit a short list. If you want a sense of how many ways an install can go wrong, our breakdown of 9 hardwood installation mistakes that wreck Calgary floors is a useful read before you start calling people.

Start with the job you actually have

Contractors specialize. Some live for new-build installs. Others do mostly sanding and refinishing. A few handle custom patterns and borders. Knowing which job you have helps you ask sharper questions.

New installation

Installing hardwood means subfloor prep, moisture testing, acclimation and the right fastening method for your wood type. Solid planks are usually nailed down. Engineered boards can be glued or floated. Your contractor should explain why they picked one method for your house.

If you’re leaning toward engineered boards, which handle Calgary’s humidity swings better than solid in many cases, read our engineered hardwood installation guide for Calgary homeowners first. It covers the process and what to expect on the day.

Refinishing, repair and polishing

Floors that look tired aren’t always done for. A full sand and refinish removes the old coating and a thin layer of wood. A lighter hardwood floor polishing job can bring back the shine on floors that only have surface wear.

A contractor who pushes a full sand on every floor might be padding the invoice. One who recommends the lighter option when it fits is usually the one you want.

Repairs deserve a similar look. A few damaged boards, a water stain or a squeak don’t always call for a weekend project. We wrote up the real costs and risks in DIY vs professional hardwood floor repair.

Custom work

Borders, inlays, herringbone, wide planks, stairs and mixed-height transitions all need a different skill set. Ask to see finished examples of the exact thing you want. A crew that does custom hardwood flooring every month will have photos ready. A crew that has never done it will change the subject.

How to choose a hardwood flooring contractor in Calgary, step by step

Work through these 8 checks in order. Most bad contractors fail at step 2 or step 3.

1. Look for real Calgary experience

Experience in Calgary matters because the climate is rough on wood. Ask how long they’ve worked here and how they handle winter humidity. A good answer mentions acclimation time, moisture readings and expansion gaps. A weak answer is “we’ve never had a problem.”

Years in business count too. A company that has run for 30 years has survived plenty of bad winters and plenty of picky customers. Arbutus Hardwood, for example, has been working on Calgary floors for over 30 years and has completed more than 500 projects. Numbers like those are worth asking any contractor for.

2. Verify insurance and WCB coverage

This is the check most homeowners skip. It’s also the one that can cost you the most.

Ask for proof of liability insurance. Then ask for WCB coverage. In Alberta, if you hire a contractor who has no WCB account and a worker gets hurt in your house, you may be on the hook. The Workers’ Compensation Board explains when you need a WCB clearance letter before hiring and before releasing payment.

A real company will hand over both documents within a day. If you get excuses, move on.

3. Look at finished projects

Photos are good. Visiting a finished floor is better. Ask for 2 or 3 recent jobs similar to yours and look at them closely.

Check these things:

  • Gaps between boards and along the walls
  • Sanding swirl marks in raking light
  • Finish bubbles, dust nibs or roller lines
  • How cleanly the floor meets doorways, vents and stairs
  • Whether the stain colour is even across the room

If the contractor has a gallery, scan it for variety. Our own gallery shows installs, refinishes, stairs and borders, so you can see the range before you call.

4. Read reviews the smart way

The details inside a review tell you more than the star count.

Look for reviews that mention timelines, communication and surprises. “Showed up on time and the quote matched the invoice” is worth more than “great job!!!” Read the 3-star reviews too, because they show how a company handles problems.

Builders and other trades are your best source. A Red Seal carpenter who keeps hiring the same flooring crew for years has already done your vetting for you.

Two examples from our own reviews show what to look for. One Calgary homeowner needed a white oak main floor finished before a firm move-in date. He praised the straight answers about timing and a final invoice that matched the quote. A contractor who works as a Red Seal carpenter wrote that we blended hardwood sitting at two different heights into one smooth floor. Specific stories like those are hard to fake.

5. Ask how they handle dust and mess

Sanding used to mean dust on every shelf for a week. Modern dustless systems with vacuum attachments cut that down a lot. Ask what equipment the contractor runs and how they protect furniture, vents and doorways.

Brands matter a little here. Contractors who work with established finish and sanding suppliers tend to be more serious about their process. Ask what finishes they use and why. If you’re torn between looks, our guide to high-gloss vs satin hardwood finish explains how each one wears.

6. Ask where the wood comes from

Solid vs engineered

Some contractors only install what you buy. Others source and supply the material too. Both models work, but you should know which one you’re getting.

When one company handles both, there’s one party responsible if boards arrive warped or the colour is off. If you’re buying wood yourself, expect to coordinate delivery and acclimation. A contractor with a hardwood flooring supply service can often match species, grade and plank width to your subfloor and your budget without the back and forth.

7. Get 3 written quotes

Three is the sweet spot. Fewer than that and you can’t spot an outlier. More than that and you’ll drown in numbers.

A written quote should name the wood species and grade, the square footage, the prep work, the finish system and the number of coats. It should also state what happens with baseboards, transitions and stair nosings. Verbal quotes are worth the paper they’re not written on.

8. Pin down the timeline, deposit and warranty

Ask for a start date and an end date. Ask what happens if the job runs over.

Weather and drying time can move a schedule, so a few days of cushion is reasonable. A contractor who promises a fixed date with no wiggle room on a site-finished floor is guessing. One who explains each stage and keeps you updated is planning.

Deposits are normal. A big chunk up front before any materials are ordered is a warning sign. Payment should follow progress. Get the workmanship warranty in writing, including what it covers and for how long.

What a good quote looks like

Compare quotes line by line. The cheapest number often leaves things out. The gaps show up later as change orders.

Quote itemStrong quoteWeak quote
Wood detailsSpecies, grade, width, thickness“Hardwood flooring”
Square footageMeasured and listedRough estimate
Subfloor prepMoisture test and levelling describedNot mentioned
FinishBrand, type and number of coats“Standard finish”
ExtrasBaseboards, stairs, transitions itemizedAdded later
Clean-up and disposalIncluded and describedUnclear
Insurance and WCBProof offered“We’re covered”
WarrantyIn writing with termsVerbal promise
Payment scheduleTied to progressLarge deposit up front

If two quotes differ by 30%, find out which line items explain the gap before you pick the lower one.

8 questions to ask on the first call

You can learn a lot in 10 minutes. Ask these:

  1. How many hardwood jobs like mine have you done in Calgary this year?
  2. How do you check subfloor moisture before installing?
  3. How long do you let the wood acclimate?
  4. Who actually does the work, your crew or subcontractors?
  5. What finish do you recommend for my household and why?
  6. How do you control dust during sanding?
  7. Can I see insurance and WCB documents?
  8. What does your warranty cover and for how long?

Listen to how they answer. Confident, specific answers beat polished sales pitches every time. If they get defensive about the questions, that tells you how they’ll handle problems on site.

Red flags and green flags

You’ll spot most trouble before the job starts.

Red flagsGreen flags
Quote arrives without a site visitMeasures your space in person
Pressure to sign todayGives you time to compare
Cash-only or big upfront paymentClear payment schedule
No insurance or WCB proofDocuments provided quickly
Vague about materialsNames species, grade and finish
No recent local projectsShows finished Calgary homes
Promises a 2-day install on a whole houseGives a realistic timeline
Dodges questions about humidityTalks about acclimation and moisture

One red flag can be a bad day. Three of them is a pattern.

Mistakes homeowners make when hiring

We see the same errors over and over.

Hiring on price alone. A quote 25% lower usually skips something. Prep work, finish coats and proper clean-up are the usual casualties.

Skipping the site visit. Nobody can quote a floor accurately from a phone call. Subfloor type, existing coatings and room layout all change the job.

Ignoring the season. Winter installs need extra attention to indoor humidity. Summer jobs have their own issues when the house is sticky. A good contractor will tell you how to prepare your home. If you’re planning a refinish, timing matters too. The best time to polish hardwood floors in Calgary depends on the season and your schedule.

Forgetting about furniture and pets. Moving a full living room takes planning. Ask who does it and where things will sit during the job.

Not reading the warranty. Some warranties cover almost nothing. Others exclude humidity damage, which is the most common problem in Calgary. Read before you sign.

What drives the price

Price per square foot never tells the full story. These factors move the total:

  • Wood species and grade. Maple and white oak sit in a different range than walnut or exotic species
  • Solid vs engineered construction
  • Subfloor condition, including levelling and moisture work
  • Stairs, which take far more labour than flat floor
  • Pattern choice. Herringbone and borders take more time than straight lay
  • Finish system and number of coats
  • Removal of old flooring
  • Furniture moving and clean-up

Ask each contractor to break the price into labour, materials and extras. When two numbers differ, you’ll see exactly why.

Special situations in Calgary

Condos. Many boards require underlay that meets sound ratings. Get the building’s flooring rules in writing before you order anything. Your contractor should know how to handle this.

Basements. Concrete holds moisture. Solid hardwood usually doesn’t belong down there. Engineered products need moisture testing first.

Homes with in-floor heating. Wood species, plank width and installation method all matter. Check with your contractor and your flooring manufacturer.

Homes outside city limits. If you’re in Airdrie, Cochrane, Okotoks or Chestermere, ask whether the contractor covers your area without extra travel fees. Arbutus Hardwood, for instance, serves Calgary and nearby communities including Airdrie, Cochrane, Okotoks and Chestermere.

Older homes. Existing floors may have decades of finish or uneven boards. A seasoned crew will assess whether sanding, repair or replacement makes sense.

Final thoughts

Knowing how to choose a hardwood flooring contractor in Calgary comes down to a few habits. Verify insurance and WCB. Look at finished work. Get 3 written quotes and compare them line by line. Ask about humidity and acclimation until you hear specific answers.

Then trust your gut on communication. A contractor who returns calls, shows up on time and answers questions plainly will usually do the same on the job.

If you’re ready to talk, Arbutus Hardwood has spent over 30 years working on Calgary floors. Contact us for a free quote or call 403-371-7531. You can also visit the Arbutus Hardwood homepage to see our services and recent work.

A single room can take 1 to 2 days. A whole main floor typically runs several days to a week or more, depending on the finish. Site-finished floors need sanding, staining and multiple coats with drying time between them. Prefinished boards go faster. Ask for a day-by-day schedule.

Both can work. Buying yourself gives you control over cost and selection. Letting the contractor supply it usually means one point of contact and fewer surprises if something arrives damaged. Either way, the wood needs to sit in your home to acclimate before installation.

Usually yes. Solid hardwood can be sanded and refinished several times. Engineered floors depend on the thickness of the top wear layer. A contractor can check this on a site visit and tell you how many more sandings you have left.

Compare the line items. If a quote leaves out prep work, finish details or clean-up, the low price is probably temporary. Ask the contractor what’s included and have them put it in writing.

Not completely, but it cuts airborne dust by a large margin. Vacuum-assisted sanders pull most of it into a collection system as they work. You’ll still want to cover furniture and seal off doorways.

Clear the room and remove baseboards only if the contractor asks you to. Keep the home at normal temperature and humidity. Move pets and kids out of the work area. Confirm parking and access for the crew and their equipment.

How to choose a hardwood flooring contractor in Calgary

How to choose a hardwood flooring contractor in Calgary

How to choose a hardwood flooring contractor in Calgary Learn how to choose a hardwood flooring contractor in Calgary by checking experience, insurance, past projects and written quotes before you hire. Contact Us Your floors will be under your feet for 20 years or more. The person you hire to…

Hardwood Flooring Cost Calgary: 2026 Price & Installation Guide

Hardwood Flooring Cost Calgary: 2026 Price & Installation Guide

Hardwood Flooring Cost in Calgary: What You’ll Actually Pay Planning your project but unsure about hardwood flooring cost in Calgary? This guide explains installation, refinishing, and repair expenses to help you plan your flooring budget. Contact Us If you’re planning to install, repair, or refinish hardwood flooring in Calgary, understanding…

Matte vs Gloss Hardwood Flooring | Arbutus Hardwood

Matte vs Gloss Hardwood Flooring | Arbutus Hardwood

Matte vs gloss hardwood flooring: which finish is right for your home? Matte vs gloss hardwood flooring, see which finish suits Calgary homes best for durability, style & upkeep. Get expert advice from Arbutus Hardwood. Contact Us Matte vs gloss hardwood flooring feels like a small decision until you’re standing…

    How to choose a hardwood flooring contractor in Calgary 3

    Does Refinishing Hardwood Floors Increase Home Value in Calgary?

    Does Refinishing Hardwood Floors Increase Home Value in Calgary?

    Refinishing hardwood floors usually adds value in Calgary homes, with national data showing cost recovery between 100% and 147% and bigger gains in faster sales and better listing photos. The article covers typical costs, when refinishing pays off or doesn’t, how to choose a finish, and what the process and timeline look like.

    Does refinishing hardwood floors increase home value? In most Calgary homes, yes. It also costs less than almost any other upgrade you could do before listing.

    The gain rarely shows up as a neat dollar figure. It shows up as stronger offers and fewer requests for a flooring credit after the inspection.

    We’ve spent 30+ years sanding and refinishing floors across Calgary, so this guide sticks to what we see on real jobs. You’ll find cost ranges, a few cases where refinishing is a bad idea and some practical advice on timing.

    The short answer for Calgary sellers

    Yes, refinishing usually adds value. The floor has to be in the right shape though: solid wood or thick engineered boards, with damage that stays on the surface.

    Think of it as a project that protects your asking price. A buyer who walks onto dull, scratched floors starts subtracting money in their head. A buyer who walks onto fresh floors doesn’t.

    What the national research says

    The best-known numbers come from the National Association of Realtors. Its Remodeling Impact Report has ranked hardwood refinishing among the top interior projects for cost recovery. The 2022 edition put it at 147%. Other editions landed closer to 100%.

    Even the low end means you get your money back. Plenty of kitchen and bathroom remodels can’t say that.

    Those figures come from US homeowners and US dollars. We’re not aware of a Calgary-specific study, so treat the percentages as a rough direction.

    Does refinishing hardwood floors increase home value in Calgary specifically?

    Technician sanding hardwood floor

    Probably, and for a few local reasons.

    Older neighbourhoods like Inglewood, Bridgeland and Varsity have plenty of homes with original hardwood. Buyers there often want that character. They’ll pay for it when it looks cared for.

    Calgary’s dry winters also beat up floors. Low humidity shrinks boards and opens gaps. A finish that has worn thin gives the wood no protection at all. A fresh one gives it a shield again.

    Then there’s the scroll. Calgary buyers flip through dozens of listings online. A home with glowing hardwood stands out next to one with tired laminate or worn carpet.

    Why refinished floors help a home sell

    Photos and first showings

    Most buyers meet your home through a screen first. Fresh hardwood photographs well because the finish reflects window light evenly. Worn floors do the opposite. Every scuff and dull patch shows up in a wide-angle shot.

    At a showing, floors are the one surface buyers stand on in every room. They notice.

    Condition tells a story

    Buyers read floors as a sign of how the owners treated the rest of the house. Gouged boards at the front door make people wonder what else got ignored. Clean, even floors send the opposite message.

    This matters most when buyers are stretching their budget. They look for reasons to negotiate, and floors are an easy target.

    What appraisers actually count

    Appraisers rarely add a separate line item for flooring. They adjust for overall condition compared with similar sales nearby. A refinish can move your home into a better condition bracket, which is where the extra value comes from.

    That’s also why we wouldn’t promise anyone a dollar-for-dollar return.

    How much does refinishing cost in Calgary?

    Prices depend on scope. These are ballpark ranges for planning. Your quote will move with species, stain colour and the shape of your floor.

    Option

    Typical cost per sq ft

    Example: 1,000 sq ft

    Best for

    Buff and recoat

    $1.50 to $3

    $1,500 to $3,000

    Light wear with an intact finish

    Full sand and refinish

    $3 to $8

    $3,000 to $8,000

    Scratches, dull spots or a new stain colour

    Sand, repair and refinish

    $5 to $10+

    $5,000 to $10,000+

    Gaps, damaged boards or pet stains

    A few things push the price up or down:

    • Stairs, which are usually priced per step
    • Dark stains and white washes, which take more labour
    • Boards that need repair or replacement
    • The finish type and number of coats
    • Furniture moving and access (a third floor condo is a different day than a bungalow)

    A quick cost versus return example

    Say you have 1,000 sq ft of main floor and pay $5,000 for a full refinish. If the NAR range holds even loosely, that’s roughly $5,000 to $7,350 in value on paper. The real return shows up in sale price, days on market or both. Treat the math as an illustration.

    Buff and recoat versus a full sand

    A buff and recoat scuffs up the old finish and adds a fresh coat on top. It’s quick and cheap. It can’t remove scratches that reach the wood or change the stain colour.

    Here’s a simple check. Drop a little water on a worn spot. If it beads up, the finish is still working and a recoat might be enough. If it soaks in or the wood looks grey, you need a full sand.

    Our hardwood floor refinishing service covers both options, so we’ll tell you which one your floor actually needs.

    When refinishing adds the most value

    Hardwood staircase refinished home

    Original oak in older homes

    Old growth oak is dense and stable. It sands beautifully and often looks better after refinishing than it did when new. Homes in character neighbourhoods get the biggest lift because buyers expect that warm, aged hardwood look.

    Solid wood with a worn finish

    Solid hardwood with dull traffic lanes is the sweet spot. The wood underneath is fine. Only the top layer has given up. One refinish resets the whole floor.

    Open layouts with one worn patch

    When hardwood runs through the living room, dining area and hallway, a tired section stands out fast. Refinishing the whole connected space in one go gives it a single even look. Stairs matter too. Refinished treads show up in listing photos.

    When refinishing won’t pay off

    Sometimes the honest answer is to skip it. We’d rather say that up front.

    Thin engineered boards

    Engineered hardwood has a real wood layer on top of plywood or a core board. If that top layer is thin, sanding can go straight through it. Many newer builds in areas like Mahogany or Seton use engineered flooring, so check before you plan anything. Pull a floor vent cover and look at the board edge to see the wear layer.

    Damage that needs repair first

    Cupped boards, water stains and deep pet urine damage won’t disappear under a new finish. A fresh coat over a problem just makes the problem shiny. Fix the cause first. Our hardwood floor repair service handles squeaks, water damage and board replacement before we refinish.

    Floors sanded too many times

    Solid wood can be sanded several times over its life. Each sanding removes a bit of the wear layer. When nail heads start showing or the tongue-and-groove joints are exposed, the floor is near the end. Replacement is usually the better money at that point.

    Refinish, replace or cover: how they compare

    If your floors are borderline, this table helps you decide.


    Refinish

    Replace with new hardwood

    Install vinyl plank

    Cost per sq ft

    $3 to $8

    $10 to $20+

    $4 to $8

    Time on site

    3 to 5 days

    1 to 2 weeks

    2 to 4 days

    Buyer appeal

    High

    High

    Moderate

    Can it be refinished later?

    Yes

    Yes

    No

    Refinishing wins on cost almost every time. Replacement makes sense when the boards are past saving or you want a different look entirely, like wider planks, herringbone or a border. In that case, custom hardwood flooring gives you a floor designed for your space.

    Covering hardwood with vinyl is the one move we’d talk you out of. Buyers who find hardwood under vinyl are often disappointed they can’t see it.

    Picking a finish and stain buyers like

    Mid-tone natural colours tend to sell best. They work with grey walls and warm walls alike. Very dark floors show every speck of dust and pet hair. Heavily grey tones date quickly.

    Sheen matters too. Satin hides scratches and foot traffic better than a high gloss finish. We compare both in our guide to high-gloss vs satin hardwood finish.

    For current colour direction, our post on hardwood flooring trends in Calgary shows what homeowners are choosing right now. If you’re selling, lean conservative. If you’re staying, pick what you love.

    Waterborne polyurethane is the usual choice. It has low odour and cures quickly. Oil-based finishes add an amber warmth some owners want on oak or fir.

    What the refinishing process looks like

    Here’s how a typical job runs:

    1. Inspect and prep. We check the wear layer, look for damage and move or protect anything that stays.
    2. Sand with dust control. We sand in passes from coarse to fine grit. Dustless sanding pulls most of the dust into a vacuum system instead of your living room.
    3. Repair and fill. Small gaps and nail holes get filled. Damaged boards get replaced.
    4. Stain. This step is optional. Many owners keep the natural wood colour.
    5. Apply the finish. Most floors get two to three coats with drying time between.
    6. Cure. The floor looks done before it’s actually ready for heavy use.

    Stage

    Typical timing

    Sanding and repairs

    Day 1 to 2

    Stain and first coat

    Day 2 to 3

    Final coats

    Day 3 to 4

    Walking in socks

    About 24 hours after the last coat

    Furniture back

    48 to 72 hours

    Area rugs

    1 to 2 weeks

    These times vary with the product and the weather. Cold, humid days slow drying.

    Calgary’s dry air matters after the job too

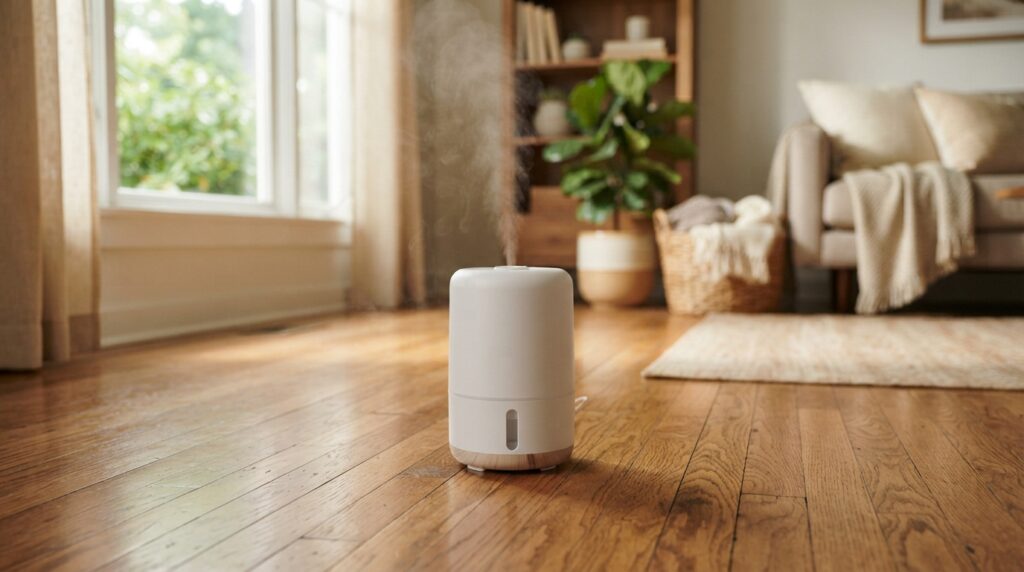
    Fresh finish can’t stop wood from reacting to winter air. Keep indoor humidity somewhere around 30% to 50% and the boards stay calmer. A humidifier in January is cheap insurance for any hardwood floor.

    Mistakes that cost you value

    • Renting a drum sander. One pause in the wrong spot leaves a dent you can see from across the room. Our post on DIY vs professional hardwood floor repair covers where DIY goes wrong.
    • Skipping repairs. Loose boards and gaps show through any finish.
    • Rushing the cure. Rugs and furniture too early leave marks in soft finish.
    • Chasing a trend. A bold colour that reads great today can put buyers off in five years.
    • Sanding before other trades finish. Painters and electricians scratch new floors. Do floors last when you can.
    • Picking on price alone. The cheapest quote often leaves out dust control, repairs or the final coat.

    The best time to refinish before selling

    Aim for 2 to 4 weeks before photos. That leaves room for curing and any touch-ups. Most listing agents want floors done before the photographer arrives.

    If you’re staying put, refinish when the finish starts wearing through to bare wood. Waiting past that point lets moisture and dirt into the grain. Spring and fall are comfortable seasons for the work. Winter jobs are fine too if the house is heated.

    Conclusion

    So, does refinishing hardwood floors increase home value? In most Calgary homes it does. National data shows cost recovery between 100% and 147%, and the less measurable gains matter too: better photos, faster showings and fewer price chops.

    Check the wear layer first. Fix damage before you refinish. Choose a neutral colour with a satin sheen if you’re selling.

    If you’re unsure what your floors can handle, we’ll look at them and give you a straight answer. Request a free quote or call Arbutus Hardwood at 403-371-7531.

    Usually yes. A full refinish takes 3 to 5 days for a typical main floor. Add a few days for cure time before furniture goes back. Book as early as you can since spring and early summer fill up quickly.

    Solid hardwood at 3/4 inch can often be sanded 4 to 6 times over its life. Thinner or heavily sanded floors have fewer left. We check the board thickness before quoting.

    No, though you'll stay off the floors for a day or two. With dustless sanding and a low odour waterborne finish, many families stay home. Pets and small children do better at a friend's house for the first night.

    Paint first when you can. Floors should be among the last jobs because ladders and tape scratch fresh finish. If the walls need repainting, schedule the painters a week ahead of your floor date.

    Often yes for surface stains. Deep urine stains that turned the wood black usually need boards replaced. We can tell during an inspection which camp your floor falls into.


    It can be. If the finish is intact and scratches are shallow, a recoat gives a fresh look for much less money. If you see grey wood or deep marks, a full sand gives buyers a better first impression.


    How to choose a hardwood flooring contractor in Calgary

    How to choose a hardwood flooring contractor in Calgary

    How to choose a hardwood flooring contractor in Calgary Learn how to choose a hardwood flooring contractor in Calgary by checking experience, insurance, past projects and written quotes before you hire. Contact Us Your floors will be under your feet for 20 years or more. The person you hire to…

    Hardwood Flooring Cost Calgary: 2026 Price & Installation Guide

    Hardwood Flooring Cost Calgary: 2026 Price & Installation Guide

    Hardwood Flooring Cost in Calgary: What You’ll Actually Pay Planning your project but unsure about hardwood flooring cost in Calgary? This guide explains installation, refinishing, and repair expenses to help you plan your flooring budget. Contact Us If you’re planning to install, repair, or refinish hardwood flooring in Calgary, understanding…

    Matte vs Gloss Hardwood Flooring | Arbutus Hardwood

    Matte vs Gloss Hardwood Flooring | Arbutus Hardwood

    Matte vs gloss hardwood flooring: which finish is right for your home? Matte vs gloss hardwood flooring, see which finish suits Calgary homes best for durability, style & upkeep. Get expert advice from Arbutus Hardwood. Contact Us Matte vs gloss hardwood flooring feels like a small decision until you’re standing…

      Does Refinishing Hardwood Floors Increase Home Value in Calgary? 7

      Hardwood floor refinishing vs replacement: how to actually decide

      Deciding between hardwood floor refinishing vs replacement usually comes down to one thing: how much usable wood is actually left in the boards. This guide breaks down the real signs, costs, and timelines for each option, so you can tell which one your floor actually needs.

      Hardwood floor refinishing vs replacement usually isn’t as close a call as it feels. Most floors can be refinished. Fewer actually need to be replaced than homeowners assume.

      Quick answer: Refinishing is almost always the better option if the boards are structurally sound and there’s enough wood thickness left to sand. Replacement becomes the right call when boards are warped beyond flattening, water damage has reached the subfloor, or the floor has already been sanded down to the point where there’s nothing left to remove. For most homes, that means refinishing wins on both cost and value, with replacement reserved for genuinely damaged floors.

      Here’s how to tell which situation you’re actually in, what each option costs, and what the process looks like for both.

      What’s the real difference between refinishing and replacing

      Refinishing means sanding down the existing wood surface and applying a new finish, working with the boards you already have. Replacement means removing the existing flooring entirely and installing new material.

      The decision comes down to one core question: is the wood itself still good, or is the problem underneath the surface?

      How many times can hardwood floors be refinished

      Solid hardwood can typically be refinished 4 to 6 times over its lifetime, depending on the original thickness of the boards and how aggressively each sanding removes material. Engineered hardwood is more limited, usually good for 1 to 2 refinishes, since only a thin veneer layer sits on top of the plywood core.

      This is the single biggest factor in the refinish vs replace decision. A 1990s solid oak floor that’s only been refinished once still has plenty of life left. A floor that’s already been sanded three or four times is getting close to its limit.

      Signs your hardwood floors can be refinished

      • Surface scratches, scuffs, or dullness from years of foot traffic
      • Discoloration or an outdated stain color you want to change
      • Minor, shallow gouges that don’t go deep into the wood
      • Squeaks that come from finish wear rather than structural movement
      • A floor that still has visible wood thickness above the tongue and groove

      Signs hardwood floors need replacing instead

      • Boards that are warped, cupped, or buckled badly enough that sanding won’t flatten them
      • Water damage that reached the subfloor, not just the surface finish
      • Wood that’s been sanded down close to the nail line or tongue and groove, leaving little material left to remove
      • Rot, mold, or structural decay in the wood itself
      • Engineered hardwood with a veneer too thin to sand again

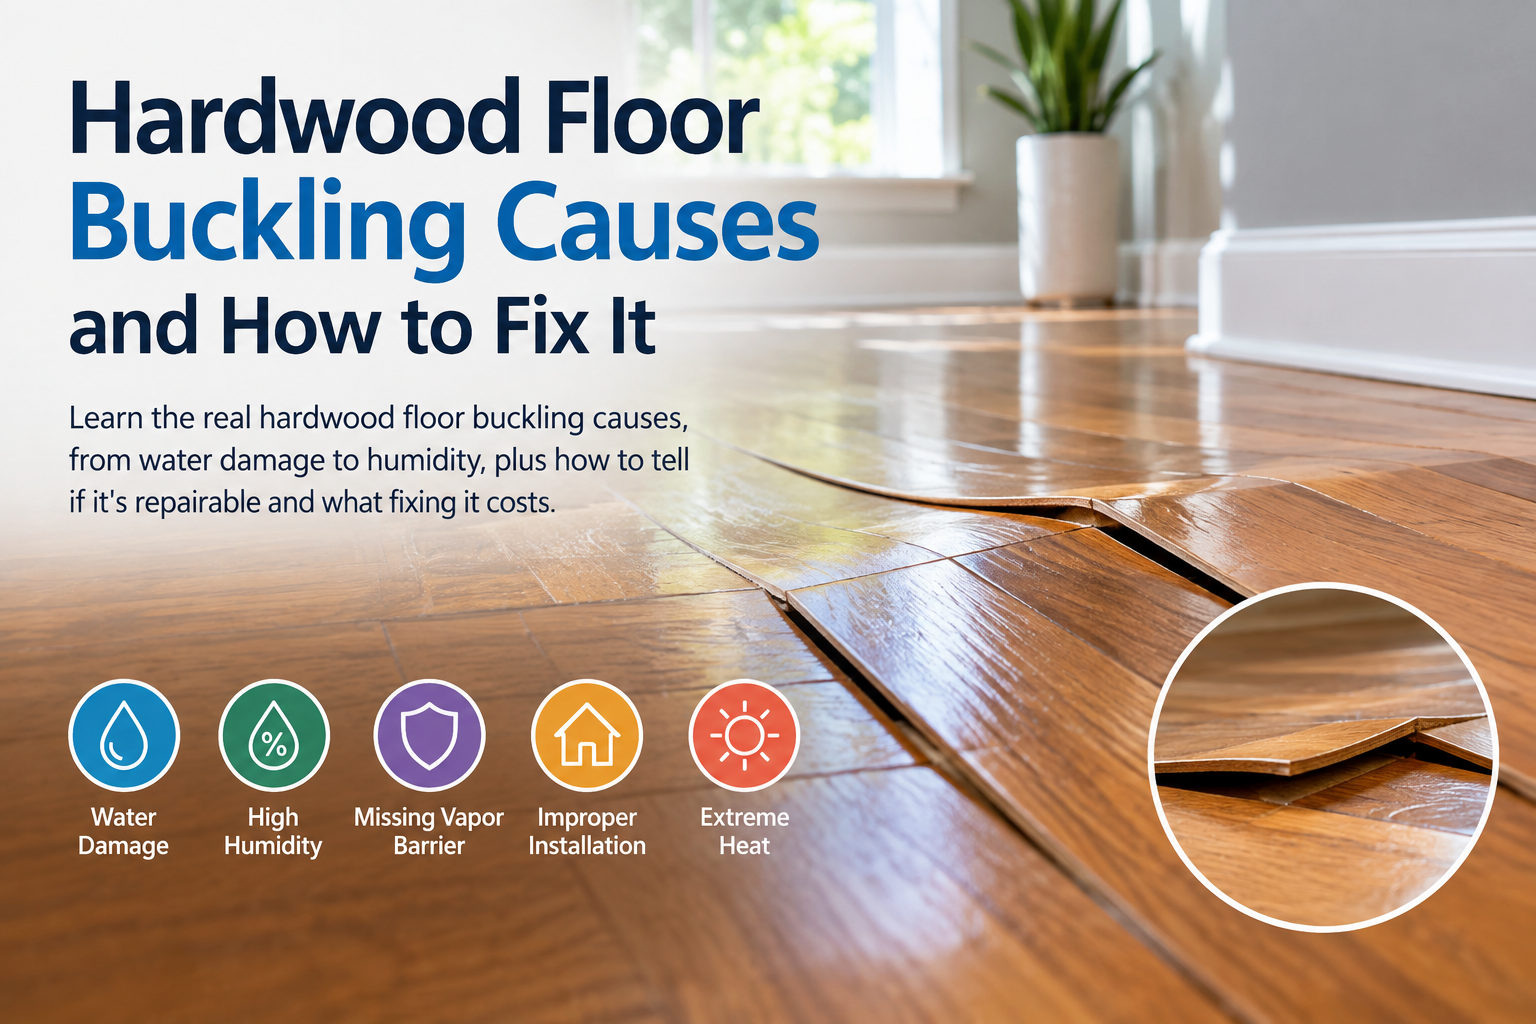
      If your floor is showing signs closer to the second list, especially significant warping, it’s worth reading through our guide on hardwood floor buckling causes to understand whether the damage is something that formed gradually or points to an ongoing moisture problem that needs addressing either way.

      How deep can you sand hardwood floors

      Most solid hardwood has enough wear layer to be sanded roughly 1/8 to 3/16 of an inch total over its lifetime, spread across multiple refinishing jobs. Each refinish typically removes a small, controlled amount, which is why professional assessment matters. Sanding too aggressively, or sanding a floor that’s already near its limit, can expose nail heads or weaken the tongue and groove joints.

      Pro Tip: Not sure if your floor has enough wood left to sand? Remove a floor vent cover in any room to inspect the cross-section of your floorboard directly. It’s one of the easiest ways to get a rough sense of remaining thickness without any tools.

      Solid vs engineered hardwood: refinishing limits

      Flooring typeTypical refinish limitWhy
      Solid hardwood4 to 6 timesFull thickness of wood throughout the board
      Engineered hardwood1 to 2 timesThin veneer layer over a plywood core

      This table alone answers a lot of the refinish vs replace question. If you know which type of flooring you have and roughly how many times it’s been refinished, you already have a strong sense of which side of the decision you’re on.

      Hardwood floor refinishing cost vs replacement cost

      OptionTypical cost per sq ftWhat it includes
      Refinishing$3 – $6Sanding, staining (optional), and new protective finish
      Full replacement$8 – $22Removal of old flooring, new material, and full installation

      Refinishing is almost always the more budget-friendly hardwood floor restoration route, often costing a third or less of full replacement for the same square footage. For a broader breakdown of installation, refinishing, and repair pricing across different scopes, see our hardwood flooring cost guide.

      Does refinishing hardwood floors increase home value

      Yes, generally. Refinished hardwood is one of the more reliable renovation investments for return on value, since original hardwood is a strong selling point for most buyers and refinishing costs far less than replacement while delivering a comparable visual result. In a market where homes are moving quickly, a freshly refinished floor can also make a property show better without the disruption of a full flooring replacement project.

      How long does each option take

      ProjectTypical timeline
      Refinishing (single room)2 to 3 days
      Refinishing (full main floor)4 to 7 days
      Replacement (single room)3 to 5 days
      Replacement (full main floor)1 to 3 weeks

      Timelines shift based on drying time between coats, subfloor condition, and whether old flooring needs to be removed and disposed of before new material goes down.

      Refinishing process steps

      1. Assess the floor’s current wood thickness and refinish history
      2. Sand down the existing finish and surface
      3. Repair or replace any individual damaged boards before finishing
      4. Apply stain, if changing color
      5. Apply multiple coats of protective finish with drying time between coats

      Replacement process steps

      1. Remove and dispose of the existing flooring
      2. Inspect and repair the subfloor as needed
      3. Allow new hardwood to acclimate to the home’s humidity
      4. Install using the appropriate method for the space
      5. Sand and finish on-site, or install prefinished material

      Special situations: water damage, warping, and old floors

      Water damaged hardwood floor: refinish or replace depends entirely on depth. Surface staining from a spill usually sands out fine. Water that soaked into the subfloor, causing warping across multiple boards, often points toward replacement of that section.

      Discolored hardwood floor fix options: discoloration from sun exposure, old rugs, or pet stains is often correctable through refinishing and re-staining, unless the discoloration has penetrated deep into the wood grain.

      Old hardwood floor in older Calgary homes: original hardwood in older neighborhoods is often solid wood with plenty of refinishing life left, even when it looks worn. Before assuming an old floor needs replacing, it’s worth having someone confirm the actual wood thickness remaining, since many older floors are better candidates for refinishing than newer, thinner engineered products.

      Making the right call for your floor

      The deciding factor almost always comes down to wood thickness and structural condition, not how old or worn the floor looks on the surface. A dull, scratched floor with plenty of wood left is a straightforward refinish. A warped or water-damaged floor with little material remaining is a replacement.

      According to the National Wood Flooring Association’s general guidance on wood flooring lifespan, well-maintained solid hardwood can last several decades and go through multiple refinishing cycles before replacement is ever necessary, which is why a professional assessment before assuming the worst is almost always worth the time.

      If you’re not sure which side of this decision your floor falls on, contact Arbutus Hardwood for a free assessment anywhere in Calgary and the surrounding area. We’ll tell you honestly whether refinishing will do the job or if replacement is genuinely the better move, and give you a clear, upfront quote either way.

      Refinishing is almost always cheaper, typically costing a fraction of full replacement for the same area, as long as the existing wood is structurally sound enough to sand.

      Not always. Surface-level water exposure often refinishes fine. Water that reached the subfloor or caused significant warping usually means the affected boards need replacing, even if the rest of the floor is fine to refinish.

      A professional can check remaining wood thickness above the tongue and groove. Visible nail heads, a very thin-feeling surface, or a floor that's noticeably lower than surrounding transitions are signs it may be near its limit.

      Squeaks usually come from loose boards or subfloor movement, not the wood itself, and are typically resolved through repair rather than full replacement. Persistent squeaking across a large area is worth having assessed, since the underlying cause matters more than the noise itself.


      Yes. Since engineered hardwood can usually only be refinished once or twice, it reaches its replacement point sooner than solid hardwood, which can often go through several more refinishing cycles over the same number of years.

      Yes, and it's fairly common. A main floor with solid hardwood in good condition might just need refinishing, while a water-damaged section or an outdated engineered floor elsewhere in the home might call for replacement. These decisions can be made room by room rather than all at once.


      How to choose a hardwood flooring contractor in Calgary

      How to choose a hardwood flooring contractor in Calgary

      How to choose a hardwood flooring contractor in Calgary Learn how to choose a hardwood flooring contractor in Calgary by checking experience, insurance, past projects and written quotes before you hire. Contact Us Your floors will be under your feet for 20 years or more. The person you hire to…

      Hardwood Flooring Cost Calgary: 2026 Price & Installation Guide

      Hardwood Flooring Cost Calgary: 2026 Price & Installation Guide

      Hardwood Flooring Cost in Calgary: What You’ll Actually Pay Planning your project but unsure about hardwood flooring cost in Calgary? This guide explains installation, refinishing, and repair expenses to help you plan your flooring budget. Contact Us If you’re planning to install, repair, or refinish hardwood flooring in Calgary, understanding…

      Matte vs Gloss Hardwood Flooring | Arbutus Hardwood

      Matte vs Gloss Hardwood Flooring | Arbutus Hardwood

      Matte vs gloss hardwood flooring: which finish is right for your home? Matte vs gloss hardwood flooring, see which finish suits Calgary homes best for durability, style & upkeep. Get expert advice from Arbutus Hardwood. Contact Us Matte vs gloss hardwood flooring feels like a small decision until you’re standing…

        Hardwood floor refinishing vs replacement: how to actually decide 11

        Hardwood floor gaps Calgary winter: why they happen and what to do

        Hardwood floor gaps Calgary winter cases are almost always caused by furnace-dried air pulling moisture out of the wood, and most of them close back up on their own by summer. This guide breaks down what counts as normal seasonal movement, the humidity level that keeps gaps in check, and when a gap actually needs a professional look.

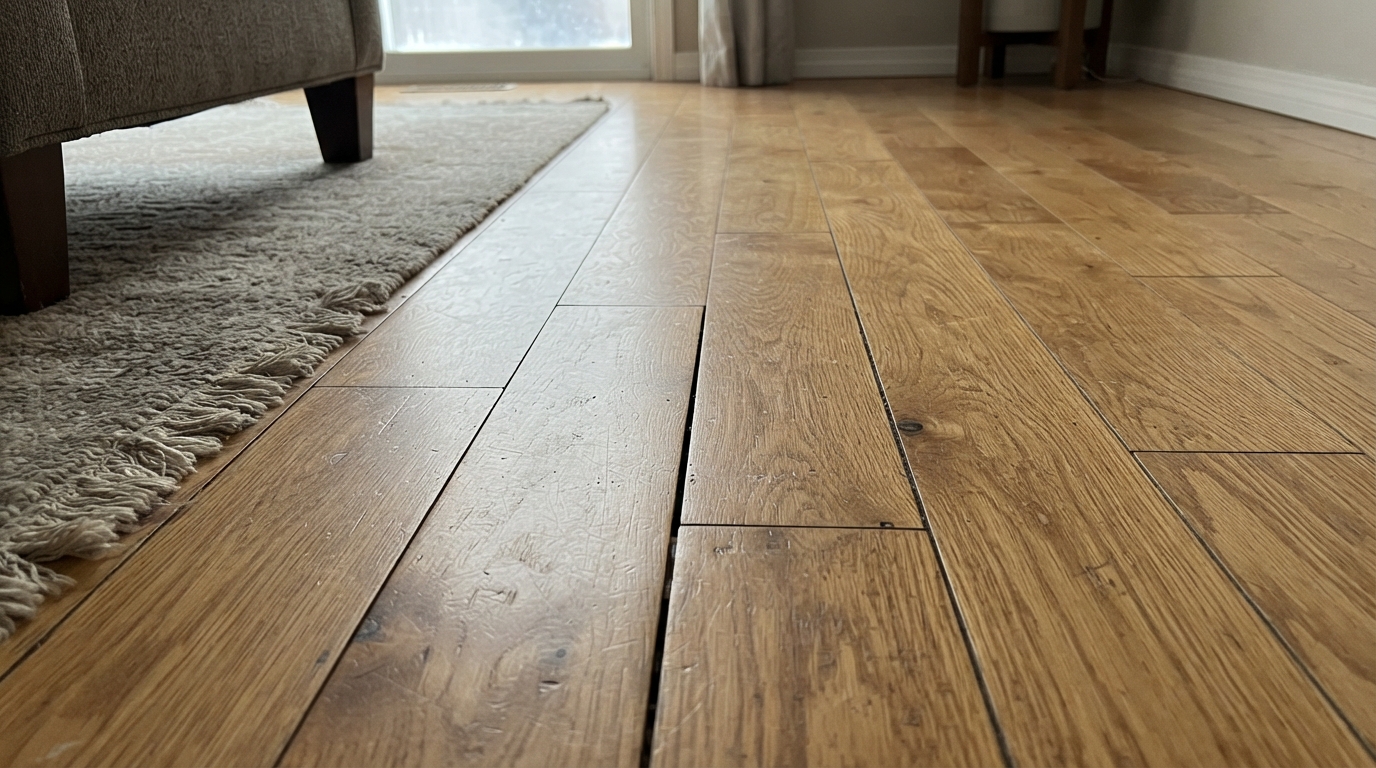
        Hardwood floor gaps in Calgary winters are almost always the same story: furnace-dried indoor air pulling moisture out of the wood faster than it can adjust.

        Quick answer: Small gaps between hardwood boards every winter are normal in Calgary and usually close back up on their own once spring humidity returns. They’re caused by the wood losing moisture to dry indoor air, most often from furnace heating, and shrinking slightly as a result. Gaps become a concern when they’re wider than a business card, appear suddenly, or stay open through summer, since that points to a bigger moisture or subfloor issue rather than normal seasonal movement.

        Here’s the full breakdown of why this happens every year, what’s actually a normal amount of gapping, and when it’s worth calling someone.

        What causes hardwood floor gaps in Calgary winter

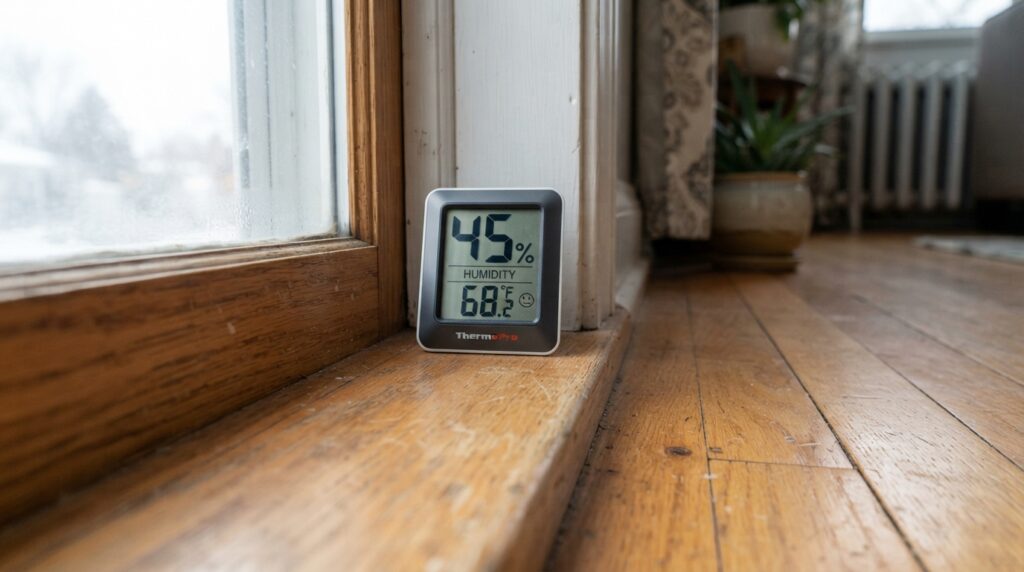
        Hygrometer on wooden table

        Furnace dry air and low indoor humidity

        This is the main one. Calgary winters are already dry, and running a furnace for months on end strips even more moisture out of the air inside a home. Wood naturally releases moisture into dry air, and as it loses that moisture, the boards shrink slightly at the edges. Multiply that shrinkage across a whole floor, and you get visible gaps between boards.

        Wood expansion and contraction cycles

        Hardwood is always responding to the air around it. It swells slightly when humidity is higher, like in Calgary’s summer months, and shrinks when the air dries out in winter. This cycle is completely normal for solid hardwood. The gaps you see in January and the tighter seams you see in July are two sides of the same process.

        Species and cut type differences

        Some species and board cuts move more than others. Flatsawn boards, which are the most common and least expensive cut, tend to shrink and expand more than quartersawn boards. Wider planks also show gaps more noticeably than narrow strip flooring, simply because the same percentage of shrinkage is spread across more width per board.

        New floors that weren’t properly acclimated

        If hardwood was installed without enough time to adjust to the home’s actual humidity levels first, its first winter often brings more dramatic gapping than it should. This is one of the most preventable causes, and it’s a step some lower-cost installers skip to save time.

        Indoor humidity standards for hardwood floors in Calgary

        The standard target range for indoor humidity with hardwood flooring is 30 to 50 percent relative humidity year-round. Many Calgary homes drop well below that in the coldest months, sometimes into the teens or low twenties, especially in homes without a whole-home humidifier.

        Keeping humidity within that range doesn’t eliminate seasonal movement entirely, but it keeps gaps to a minor, normal amount instead of something dramatic enough to notice from across the room.

        Gaps vs cupping vs buckling: how winter gaps differ

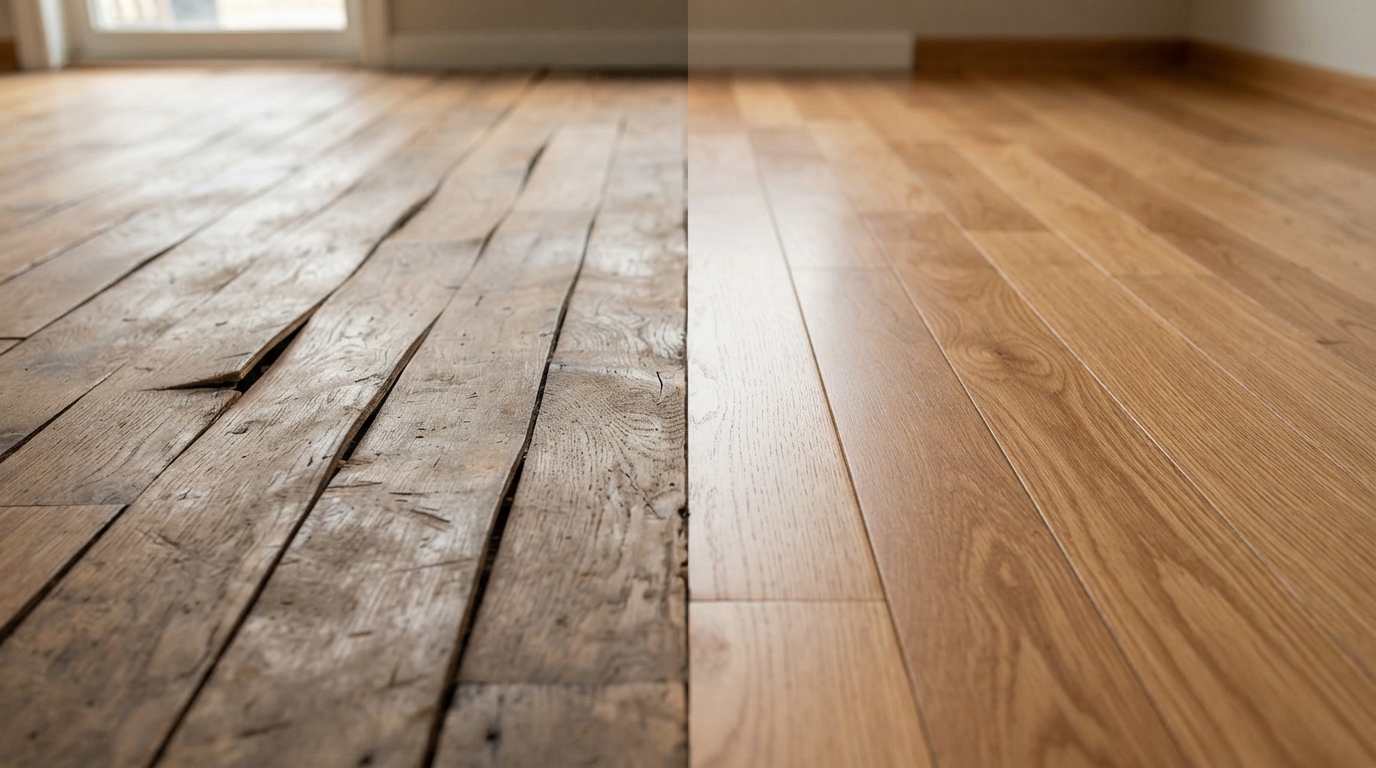
        Gaps aren’t the only seasonal issue Calgary hardwood deals with, and it helps to know which one you’re looking at. Gaps happen from the wood shrinking in dry air. Cupping happens from the opposite problem, excess moisture hitting the underside of a board. Buckling is the most severe of the three and usually points to sustained water exposure rather than normal seasonal dryness.

        If your floor shows raised or curled boards rather than simple gaps between them, that’s a different problem with a different cause, and it’s worth reading through those specific symptoms rather than assuming it’s just winter shrinkage.

        Should you fill hardwood floor gaps in winter

        Generally, no. Filling gaps while they’re at their widest, during peak winter dryness, means the filler gets compressed and can pop out or crack once the wood swells back in summer humidity. Gap filling is usually done in late spring or summer, when the boards are at their most expanded and the gaps are naturally at their smallest.

        Wood floor gap filler: winter vs summer

        Season

        What’s happening to the wood

        Best time to fill gaps?

        Winter

        Boards shrunk, gaps at widest

        No, filler will be pushed out when wood expands

        Summer

        Boards swollen, gaps at smallest

        Yes, this is the ideal window for filling

        If gaps are large enough that you’re considering filler, it’s worth having someone assess whether the humidity issue is the actual cause first, rather than filling gaps that may close up naturally anyway.

        How to fix hardwood floor gaps this winter

        • Run a humidifier. A whole-home humidifier attached to your furnace is the most consistent fix. Portable room humidifiers help too, especially in bedrooms or living areas where you spend the most time.
        • Monitor humidity with a simple hygrometer. These are inexpensive and give you a real number instead of guessing.
        • Avoid over-humidifying. Pushing humidity too high in winter can cause condensation on windows and, in extreme cases, contribute to cupping instead. Stay within the 30 to 50 percent range.
        • Don’t panic over small, seasonal gaps. A hairline gap that closes up by summer is normal wear for solid hardwood, not damage.

        When to call a professional for floor gap repair

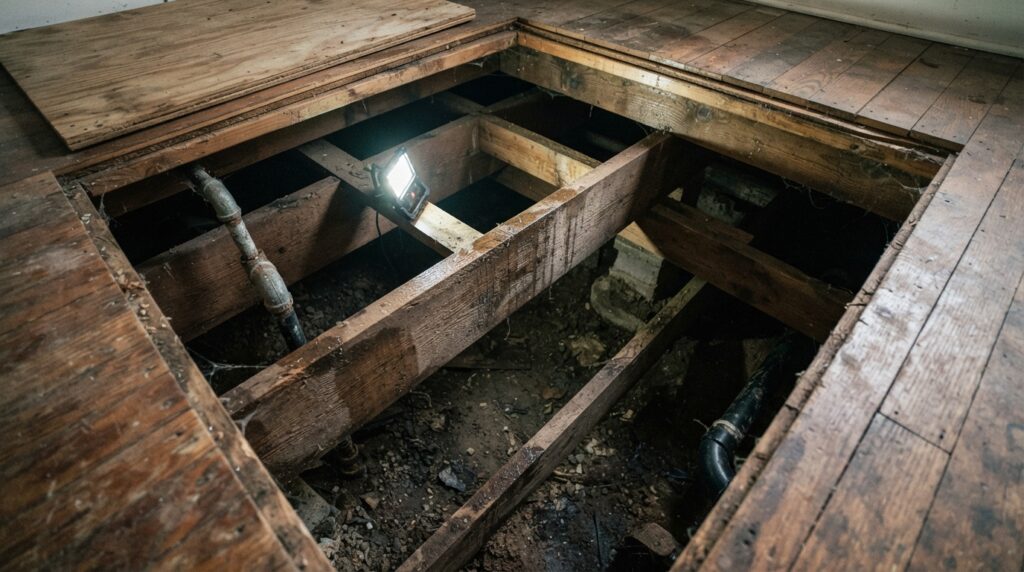
        Most seasonal gapping doesn’t need repair, just humidity management. It’s worth having a professional look at your floor if gaps are wider than a credit card, if they don’t close up by mid-summer, if they’re only happening in one section rather than across the room, or if you notice gaps alongside other signs like squeaking or soft spots. Those patterns can point to a subfloor issue rather than simple seasonal movement.

        How to prevent gaps next winter

        • Have new hardwood properly acclimated before installation, matched to the season it will live in long-term
        • Install or service a whole-home humidifier before the dry season hits, typically by early fall
        • Choose engineered hardwood in rooms where humidity swings are hardest to control, since it resists movement better than solid wood
        • Keep up with regular refinishing, since a well-sealed floor manages moisture exchange more evenly than one with a worn or damaged finish

        This applies across Calgary and the surrounding communities we serve, including Airdrie, Cochrane, Chestermere, and Okotoks. The dry winter air causing these gaps doesn’t stop at city limits, and homes in outlying areas often deal with the same furnace-driven humidity drop.

        Keeping your floors steady through the season

        A little seasonal gapping is just how solid hardwood behaves in a climate like ours, and it’s rarely something to worry about on its own. According to guidance from Natural Resources Canada on indoor humidity and home comfort, keeping winter humidity in a moderate range benefits more than just flooring, it also affects energy efficiency and overall indoor air quality.

        If your gaps look wider than normal, won’t close, or you’d rather have a professional confirm what’s going on before winter sets in, contact Arbutus Hardwood for a free assessment anywhere in Calgary, Airdrie, Cochrane, Okotoks, Chestermere, and the surrounding area.

        Small, uniform gaps that show up every winter and close by summer are normal seasonal movement, not a defect. Gaps that are unusually wide, appear suddenly, or don't close up are worth having checked.

        As a general guide, gaps under about 1/8 inch, roughly the width of a credit card, are typically considered normal seasonal movement. Wider than that is worth a professional look.

        Occasional seasonal dryness usually doesn't cause lasting damage. Chronic, severe dryness over many years can eventually lead to more noticeable long-term gapping or finish problems, which is why consistent humidity control matters more than a one-time fix.

        Engineered hardwood generally shows less seasonal gapping than solid wood, thanks to its layered construction, but it isn't completely immune, especially in homes with very low winter humidity.


        Often yes, as outdoor humidity rises in spring and summer and makes its way indoors. A humidifier just makes the swing smaller and more comfortable for both the floor and the people living on it.

        Some seasonal movement in year one is normal, but new floors that gap dramatically in their first winter often point to acclimation that wasn't done properly before installation.

        How to choose a hardwood flooring contractor in Calgary

        How to choose a hardwood flooring contractor in Calgary

        How to choose a hardwood flooring contractor in Calgary Learn how to choose a hardwood flooring contractor in Calgary by checking experience, insurance, past projects and written quotes before you hire. Contact Us Your floors will be under your feet for 20 years or more. The person you hire to…

        Hardwood Flooring Cost Calgary: 2026 Price & Installation Guide

        Hardwood Flooring Cost Calgary: 2026 Price & Installation Guide

        Hardwood Flooring Cost in Calgary: What You’ll Actually Pay Planning your project but unsure about hardwood flooring cost in Calgary? This guide explains installation, refinishing, and repair expenses to help you plan your flooring budget. Contact Us If you’re planning to install, repair, or refinish hardwood flooring in Calgary, understanding…

        Matte vs Gloss Hardwood Flooring | Arbutus Hardwood

        Matte vs Gloss Hardwood Flooring | Arbutus Hardwood

        Matte vs gloss hardwood flooring: which finish is right for your home? Matte vs gloss hardwood flooring, see which finish suits Calgary homes best for durability, style & upkeep. Get expert advice from Arbutus Hardwood. Contact Us Matte vs gloss hardwood flooring feels like a small decision until you’re standing…

          Hardwood floor gaps Calgary winter: why they happen and what to do 15

          Cupping Hardwood Floors: Causes, Signs, and How to Fix It

          Cupping hardwood floors causes almost always trace back to a moisture imbalance between the top and bottom of the board. This guide breaks down what’s actually causing it, how to tell mild cupping from severe, and whether your floor can be repaired or needs replacing.

          Cupping hardwood floors usually comes down to one thing: moisture hitting the bottom of the board faster than the top can release it.

          Quick answer: Cupping is when the edges of a hardwood board rise higher than the center, giving the board a slightly concave, cup-like shape. It’s almost always caused by a moisture imbalance, most often moisture coming up from underneath the floor, whether that’s a humid crawl space, a subfloor leak, or seasonal humidity swings. Mild cupping often corrects itself once the moisture source is fixed. Severe cupping usually needs sanding and refinishing.

          That’s the short version. Here’s the full picture, including what’s actually causing it in your home, how to tell how bad it is, and what to do next.

          What is cupping in hardwood floors

          Cupping is one of three common ways hardwood boards distort. The edges of the board pull upward while the center stays lower, so if you run your hand across the plank, you can actually feel the dip in the middle.

          It’s different from crowning, where the center of the board rises above the edges, and different from buckling, where entire boards lift off the subfloor. Cupping is usually the mildest of the three and the most common, especially in homes with older solid hardwood.

          Cupping hardwood floors causes

          subfloor moisture

          Moisture imbalance between the top and bottom of the board

          Wood absorbs and releases moisture constantly. When the underside of a board takes on more moisture than the top, it expands more than the top does, and the board bows upward at the edges. This is the mechanical reason behind almost every case of cupping, no matter what’s actually feeding the moisture.

          High humidity or seasonal humidity changes

          Calgary’s climate swings hard between a dry winter and a more humid summer stretch. That swing alone is enough to cause mild, seasonal cupping in solid hardwood, especially in homes without a humidifier or dehumidifier keeping indoor air consistent. This kind of cupping often reduces on its own once humidity levels settle back down.

          Subfloor moisture problems

          A slow plumbing leak, a spill that seeped through instead of being wiped up, or moisture trapped under the flooring during installation can all raise the moisture content of the subfloor. Since the underside of the board sits directly against that subfloor, it absorbs the excess moisture first, which is exactly the imbalance that causes cupping.

          Crawl space moisture

          Homes with a crawl space underneath, more common in some of Calgary’s older neighborhoods and in acreage properties around Bragg Creek, Springbank, and Priddis, can develop cupping from ground moisture rising into the space below the subfloor. A poorly ventilated or uninsulated crawl space makes this worse.

          Missing or damaged vapor barrier

          Hardwood installed over concrete needs a proper vapor barrier. Without one, or with one that’s damaged or was installed incorrectly, moisture from the slab works its way into the wood from below over time. This is a common, often overlooked cause in basements and homes built on slab foundations.

          Improper acclimation before installation

          Hardwood needs to sit in the home and adjust to its actual humidity and temperature before installation. Skipping this step means the wood settles into the room’s real conditions after it’s already down, and cupping is one of the most common results. This shows up more in Calgary and the surrounding communities like Airdrie, Chestermere, and Okotoks than in more humidity-stable climates, simply because the gap between summer and winter indoor conditions is wider here.

          Cupping vs buckling vs crowning

          ProblemWhat it looks likeUsually caused by
          CuppingBoard edges rise, center stays lowerMoisture from below, seasonal humidity
          CrowningCenter rises above the edgesOver-drying, or moisture reaching the top surface
          BucklingEntire boards lift off the subfloorSevere, prolonged moisture exposure

          If your floor is showing more than mild edge-curling, it’s worth confirming which of these you’re actually dealing with. We cover buckling in more detail in our guide to hardwood floor buckling causes, since the fix is different once boards have fully lifted rather than just curled at the edges.

          Mild cupping vs severe cupping

          Mild cupping is subtle. You might only notice it by running a hand across the floor or seeing it under angled light. It’s often seasonal and can resolve once humidity levels normalize.

          Severe cupping is visible without touching the floor, sometimes dramatic enough to catch a shoe edge when walking across it. This level usually means the moisture source has been present for a while and typically needs sanding and refinishing once the wood dries back out and flattens.

          Can cupped hardwood floors be repaired

          Yes, in most cases. The fix depends on severity and, more importantly, on finding and fixing the moisture source first. Sanding a cupped floor before the wood has fully dried and settled is a common mistake that leads to an uneven or crowned floor later, once the wood finishes drying after the sanding is done.

          Does cupped hardwood floor go back to normal

          Sometimes, yes, especially with mild, humidity-driven cupping. Once indoor humidity stabilizes, boards can flatten back out on their own over a period of weeks. Severe cupping, or cupping caused by a sustained moisture problem like a subfloor leak, usually doesn’t fully self-correct and needs professional sanding and refinishing after the underlying issue is resolved.

          How to fix cupped hardwood floors

          Humidity control

          1. Identify and fix the moisture source. Sanding a floor without addressing the cause means the cupping, or worse, will come back.
          2. Let the wood dry and stabilize. This can take anywhere from a few days to several weeks, depending on severity. Sanding too early is one of the most common mistakes made on cupping repairs.
          3. Confirm the board has flattened before sanding. A moisture meter reading helps confirm the wood has returned to a stable range.
          4. Sand and refinish. Once the boards are flat and dry, refinishing restores an even surface and protective finish.
          5. Replace any boards that don’t recover. Some boards, especially with long-term moisture exposure, stay permanently distorted and need individual repair rather than sanding alone.

          How long does it take for hardwood floors to un-cup

          Mild cupping can start improving within a week or two once humidity stabilizes. More significant cupping, particularly from a subfloor moisture issue, can take four to six weeks or longer to fully dry out before it’s safe to sand. Rushing this timeline is the most common reason a cupping repair doesn’t hold.

          Hardwood floor cupping repair cost

          Cost depends on whether the floor just needs sanding and refinishing or whether individual boards need replacing.

          Scope of repairTypical cost
          Sanding and refinishing (per room)$3 – $6 per sq ft
          Individual board replacement$50 – $150 per board
          Combined with subfloor moisture repair$1,000 – $3,000+

          For a full breakdown across installation, refinishing, and repair pricing, see our hardwood flooring cost guide.

          How to prevent hardwood floor cupping

          • Keep indoor humidity in a stable range year-round, roughly 35 to 55 percent, using a humidifier in winter and a dehumidifier in humid summer stretches
          • Wipe up spills immediately and check under appliances and near exterior walls for slow leaks
          • Make sure crawl spaces are properly vented and insulated, especially on acreage properties around Bragg Creek, Springbank Hill, and Priddis
          • Confirm a proper vapor barrier is in place under hardwood installed over concrete
          • Have new hardwood fully acclimated before installation, matched to the season it will actually be living in
          • Get hardwood professionally assessed at the first sign of edge curling, rather than waiting to see if it worsens

          This applies whether you’re in Calgary proper or the surrounding communities we serve, including Airdrie, Cochrane, Chestermere, Okotoks, De Winton, and Crossfield. The humidity swings that cause cupping don’t stop at the city limits.

          Getting it looked at

          Cupping is usually fixable, but the timeline matters more than most homeowners expect. Sanding too early, or ignoring the actual moisture source, is what turns a simple fix into a repeat problem. According to general guidance from the Canadian Wood Council on wood’s response to moisture, dimensional movement like cupping is a normal reaction to humidity change, which is exactly why identifying and controlling the source matters more than the cupping itself.

          If you’re seeing edge curling in your hardwood anywhere in Calgary, Airdrie, Cochrane, Okotoks, Chestermere, or the surrounding area, contact Arbutus Hardwood for a free assessment and quote.

          Not exactly. Water damage is often the source, but cupping is the specific way the wood reacts to that moisture imbalance. A board can cup from a major spill or from something as gradual as normal seasonal humidity changes, without any obvious water event at all.

          It's not recommended. Sanding before the wood has fully dried and flattened often leads to an uneven floor once the boards finish settling, sometimes creating a crowned surface instead of a flat one. Confirming moisture levels before sanding takes equipment most homeowners don't have on hand.

          A humidifier can help stabilize humidity and support recovery from mild, seasonal cupping, but it won't correct cupping caused by a subfloor leak or crawl space moisture. Those need the actual source fixed first.

          Engineered hardwood generally resists cupping better than solid hardwood, since its layered construction is more dimensionally stable. It's not immune, but it holds up better against the kind of humidity swings that affect Calgary homes.

          Compare the depth of the curl over a few weeks, ideally with a photo for reference. If it's stable or improving, it may just be seasonal. If it's deepening or spreading to more boards, that usually points to an ongoing moisture source that needs attention.

          Full replacement is rarely necessary for cupping alone. Even severe cases are usually resolved with sanding, refinishing, or targeted board replacement once the moisture source is addressed. Full replacement tends to come up only when cupping has progressed into buckling or when boards are structurally compromised beyond repair. For older or discontinued flooring, matching replacement boards can sometimes turn into a custom hardwood flooring project rather than a simple swap.

          How to choose a hardwood flooring contractor in Calgary

          How to choose a hardwood flooring contractor in Calgary

          How to choose a hardwood flooring contractor in Calgary Learn how to choose a hardwood flooring contractor in Calgary by checking experience, insurance, past projects and written quotes before you hire. Contact Us Your floors will be under your feet for 20 years or more. The person you hire to…

          Hardwood Flooring Cost Calgary: 2026 Price & Installation Guide

          Hardwood Flooring Cost Calgary: 2026 Price & Installation Guide

          Hardwood Flooring Cost in Calgary: What You’ll Actually Pay Planning your project but unsure about hardwood flooring cost in Calgary? This guide explains installation, refinishing, and repair expenses to help you plan your flooring budget. Contact Us If you’re planning to install, repair, or refinish hardwood flooring in Calgary, understanding…

          Matte vs Gloss Hardwood Flooring | Arbutus Hardwood

          Matte vs Gloss Hardwood Flooring | Arbutus Hardwood

          Matte vs gloss hardwood flooring: which finish is right for your home? Matte vs gloss hardwood flooring, see which finish suits Calgary homes best for durability, style & upkeep. Get expert advice from Arbutus Hardwood. Contact Us Matte vs gloss hardwood flooring feels like a small decision until you’re standing…

            Cupping Hardwood Floors: Causes, Signs, and How to Fix It 19

            Hardwood floor buckling causes: why it happens and what to do

            If your hardwood floor is lifting off the subfloor in visible ridges or waves, that’s buckling, and it’s one of the more serious problems a wood floor can have. Understanding hardwood floor buckling causes early can mean the difference between a small repair and replacing an entire section.

            If your hardwood floor is lifting off the subfloor in visible ridges or waves, that’s buckling, and it’s one of the more serious hardwood floor repair issues a wood floor can have.

            It’s also one of the most misunderstood. A lot of Calgary homeowners assume buckled boards mean the whole floor needs replacing. Sometimes that’s true. Often it isn’t, especially when the cause gets caught early.

            Calgary’s swings between bone-dry winters and humid summer stretches put extra stress on hardwood that homes in milder climates don’t deal with. Add in older housing stock in neighborhoods like Inglewood and Bridgeland, where original subfloors and plumbing weren’t built with today’s hardwood in mind, and buckling shows up here more often than people expect.

            Here’s what actually causes hardwood floors to buckle, how to tell how bad it is, and what your realistic options are.

            Hardwood floor buckling damage

            What is hardwood floor buckling

            Buckling happens when wood planks pull away from the subfloor and rise upward, sometimes in a small section, sometimes across an entire room. In severe cases, boards separate from each other and stand up at the edges.

            It’s different from cupping, where the edges of a board curl upward but the board stays attached to the subfloor, and different from crowning, where the center of the board rises higher than the edges. Buckling is the most extreme of the three, and it usually means moisture has been sitting somewhere for a while.

            Hardwood floor buckling causes

            Almost every case of buckling traces back to one thing: moisture the wood wasn’t built to handle. Here’s where that moisture usually comes from.

            Water damage

            Moisture Damage & Buckling

            This is the most common cause by far. A burst pipe, an overflowing washing machine, a slow leak under a dishwasher, or flooding from outside can all soak the wood from below or above. Wood absorbs water and expands. When it has nowhere to expand into, it pushes up and buckles.

            Even a leak you cleaned up quickly can cause buckling days later, once water has worked its way into the subfloor.

            High humidity or poor ventilation

            Wood is constantly reacting to the moisture in the air around it. In a home with poor ventilation, especially basements or additions with limited airflow, humidity can build up enough to swell the wood over time. This tends to happen more gradually than water damage, so it’s easy to miss until the buckling is already visible.

            Calgary homes see this less often than gapping and cupping, since our winters run dry rather than humid. But summer humidity spikes, a poorly vented bathroom, or a basement with limited airflow can still push moisture levels high enough to cause problems, particularly in newer builds in areas like Mahogany and Seton where basements are finished quickly and ventilation sometimes gets overlooked.

            Missing or damaged vapor barrier

            Hardwood installed over concrete needs a proper vapor barrier between the subfloor and the wood. If that barrier is missing, damaged, or installed incorrectly, moisture from the concrete slab can seep upward into the wood for months without anyone noticing, until the floor starts to lift.

            Improper acclimation before installation

            Hardwood needs time to adjust to a home’s humidity and temperature before it’s installed. Skipping or rushing this step is a common mistake, especially with lower-cost installs. Wood that goes down before it’s acclimated will expand or contract once it settles into the room’s actual conditions, and buckling is one of the ways that shows up.

            This matters more in Calgary than in a lot of other markets. A floor acclimated in summer humidity and then hit with our dry winter indoor air, or installed in winter and then exposed to a humid August, moves more than wood installed in a climate with less seasonal swing.

            Subfloor moisture problems

            Contractor checking hardwood floor

            If the subfloor itself was wet or damp during installation, or develops a moisture issue afterward from a slow plumbing leak or grading problem outside the home, that moisture transfers directly into the hardwood above it.

            Extreme heat exposure

            Less common, but worth knowing: prolonged direct heat, like sunlight through a window for years or a floor installed too close to a heat vent, can also stress the wood enough to contribute to buckling, particularly when combined with humidity swings.

            Buckling vs cupping vs crowning

            These three problems get mixed up constantly, and the fix is different for each one.

            ProblemWhat it looks likeUsually caused by
            CuppingBoard edges curl up, center stays lowerMoisture from below, seasonal humidity
            CrowningCenter of the board rises above the edgesOver-drying after a cupping repair, or moisture from above
            BucklingBoards lift entirely off the subfloorProlonged water exposure, major moisture intrusion

            If you’re not sure which one you’re dealing with, that’s a reasonable thing to have someone confirm in person before you decide on a fix.

            Signs your hardwood floor is buckling

            Catching it early makes a real difference in cost and repair options. Watch for:

            • Boards that feel loose or springy underfoot
            • Visible gaps or ridges between boards
            • A section of floor that looks higher than the rest
            • Boards separating at the seams
            • A musty smell, which often points to moisture sitting underneath

            If you notice any of these, especially after a known water event, don’t wait to see if it gets better on its own. It won’t.

            Can a buckled hardwood floor be repaired

            Often, yes. Hardwood floor repair depends on how long the moisture was present and how many boards are affected.

            Mild to moderate buckling, caught within the first day or two of a water event, can sometimes be corrected by removing the affected boards, thoroughly drying the subfloor, and reinstalling or replacing just that section. This is where a fast response really pays off.

            Severe buckling, where boards have been sitting in moisture for an extended period, often means those specific boards are warped beyond saving and need full replacement. That’s still usually a repair to a section of the floor, not a full floor replacement, unless the water damage was widespread. On older homes with discontinued or unusual species, matching replacement boards can turn into a custom hardwood flooring job rather than a straightforward swap.

            How to fix a buckled hardwood floor

            1. Find and stop the moisture source. Fixing the floor without fixing the leak or humidity problem means you’ll be back here again.
            2. Remove the affected boards. Trying to flatten buckled boards back into place rarely works long-term.
            3. Dry the subfloor completely. This step gets skipped more than it should. Industrial fans or dehumidifiers are often needed, not just open windows.
            4. Check the subfloor for damage. Water that reached the hardwood may have also affected the subfloor underneath.
            5. Replace boards and refinish to match. New boards need to be matched in species, width, and stain, then blended into the surrounding finish so the repair isn’t visible.

            This isn’t usually a DIY-friendly repair. Matching stain and finish on a small section so it blends with surrounding, aged flooring takes experience, and drying a subfloor properly requires more than a fan and a few days.

            How much does hardwood floor buckling repair cost

            Cost depends heavily on how many boards are affected and whether the subfloor also needs repair.

            Scope of repairTypical cost
            Small section (a few boards)$300 – $800
            Moderate section (one room)$800 – $2,500
            Subfloor damage included$1,500 – $4,000+

            For a broader breakdown of flooring costs across installation, refinishing, and repair, see our hardwood flooring cost guide.

            How to prevent hardwood floor buckling

            • Wipe up spills and leaks immediately, and check under appliances periodically for slow leaks
            • Keep indoor humidity between roughly 35 and 55 percent, especially through Calgary’s dry winters and any humid stretches in summer
            • Run a humidifier in winter and a dehumidifier or extra ventilation in humid summer stretches, since Calgary’s swing between the two is wider than most cities
            • Make sure a proper vapor barrier was installed if your hardwood sits over concrete
            • Have new hardwood acclimated properly before installation, not rushed, ideally to the season it’ll actually be living in
            • Address any grading or drainage issues outside the home that could be pushing moisture toward your foundation, worth a second look each spring after snowmelt

            Getting it looked at

            Buckling is one of those problems that gets more expensive the longer it sits, since the moisture causing it usually isn’t done causing damage. If you’re seeing lifted boards, ridges, or a musty smell near your hardwood in Calgary, Airdrie, Cochrane, Okotoks, or the surrounding area, it’s worth having someone assess it before it spreads.

            Contact Arbutus Hardwood for a free assessment and quote on hardwood floor repair anywhere in Calgary and the surrounding area. For general humidity guidance in Canadian homes, the Canada Mortgage and Housing Corporation publishes recommended indoor humidity ranges by season.

            No. If the moisture is caught and removed quickly, many buckled sections can be repaired rather than replaced. The longer wood sits in moisture, the lower the chance of saving those specific boards.

            It varies. Significant flooding can cause visible buckling within hours. A slow, hidden leak might take weeks or months to show up as buckling, since the moisture builds up gradually.

            A dehumidifier can help dry out the area and prevent further damage, but it won't flatten boards that have already buckled. Those boards typically need to be removed and either dried and reinstalled or replaced.

            Sometimes, depending on the cause. Sudden and accidental water damage, like a burst pipe, is often covered. Gradual damage from long-term humidity or a slow leak that went unnoticed is less likely to be covered. Check with your insurance provider for your specific policy.

            No. Refinishing addresses the surface finish, not structural movement in the boards. Buckled boards need to be physically removed, dried, and replaced or reset before refinishing makes sense.

            Small cosmetic issues can sometimes wait for a proper assessment, but active buckling usually means moisture is still present somewhere. It's worth having someone assess the subfloor and moisture source quickly, since delays tend to increase both the damage and the cost.

            How to choose a hardwood flooring contractor in Calgary

            How to choose a hardwood flooring contractor in Calgary

            How to choose a hardwood flooring contractor in Calgary Learn how to choose a hardwood flooring contractor in Calgary by checking experience, insurance, past projects and written quotes before you hire. Contact Us Your floors will be under your feet for 20 years or more. The person you hire to…

            Hardwood Flooring Cost Calgary: 2026 Price & Installation Guide

            Hardwood Flooring Cost Calgary: 2026 Price & Installation Guide

            Hardwood Flooring Cost in Calgary: What You’ll Actually Pay Planning your project but unsure about hardwood flooring cost in Calgary? This guide explains installation, refinishing, and repair expenses to help you plan your flooring budget. Contact Us If you’re planning to install, repair, or refinish hardwood flooring in Calgary, understanding…

            Matte vs Gloss Hardwood Flooring | Arbutus Hardwood

            Matte vs Gloss Hardwood Flooring | Arbutus Hardwood

            Matte vs gloss hardwood flooring: which finish is right for your home? Matte vs gloss hardwood flooring, see which finish suits Calgary homes best for durability, style & upkeep. Get expert advice from Arbutus Hardwood. Contact Us Matte vs gloss hardwood flooring feels like a small decision until you’re standing…

              Hardwood floor buckling causes: why it happens and what to do 23

              Hardwood Flooring Cost Calgary: 2026 Price & Installation Guide

              Hardwood Flooring Cost in Calgary: What You’ll Actually Pay

              Planning your project but unsure about hardwood flooring cost in Calgary? This guide explains installation, refinishing, and repair expenses to help you plan your flooring budget.

              If you’re planning to install, repair, or refinish hardwood flooring in Calgary, understanding hardwood flooring cost Calgary can help you prepare a realistic budget.

              Hardwood flooring installation in Calgary generally costs between $8 and $22 per square foot, including materials and labor. Refinishing usually costs less than complete replacement, while repair costs depend on the type and extent of the damage.

              The final price depends on several factors, including the type of wood, installation method, subfloor condition, room size, and finishing requirements.

              What Affects Hardwood Flooring Cost in Calgary?

              Before requesting a flooring estimate, it is important to understand the factors that can influence the overall cost.

              1. Type of Wood

              Different wood species come with different price points. Red oak and maple are often more budget-friendly options, while walnut, cherry, and wide-plank white oak may cost more.

              2. Solid vs. Engineered Hardwood

              Solid vs engineered

              Solid hardwood is made from a single piece of natural wood, while engineered hardwood consists of a real wood surface attached to multiple layers of plywood.

              Engineered hardwood can be a practical choice for certain Calgary homes because it generally handles changes in humidity better than solid hardwood. However, the best option depends on the room, subfloor, and installation conditions.

              3. Subfloor Condition

              An uneven or damaged subfloor may require additional preparation before installation. Removing old adhesive, repairing damage, or leveling the surface can increase labor costs.

              This is particularly important in older Calgary homes, where the subfloor may require additional inspection and preparation.

              4. Installation Method

              How the installation process works

              The installation method also affects the total cost. Nail-down, glue-down, and floating installations each require different materials, tools, and labor.

              5. Stairs and Transitions

              Stairs, nosings, risers, thresholds, and transitions usually require more detailed work than standard floor installation. As a result, they can increase the overall project cost.

              6. Age and Location of the Home

              Older neighborhoods such as Inglewood and Bridgeland may have original hardwood flooring, uneven subfloors, or hidden flooring beneath carpets. Newer communities such as Mahogany and Seton may have different preparation requirements.

              Hardwood Flooring Cost per Square Foot in Calgary

              The following table provides approximate installed price ranges for common hardwood flooring options in Calgary.

              Flooring Type

              Approximate Installed Cost per Sq. Ft.

              Engineered Oak

              $8–$13

              Solid Red Oak

              $9–$15

              Solid Maple

              $10–$16

              Solid White Oak, Wide Plank

              $14–$20

              Walnut or Exotic Wood Species

              $16–$22+

              These figures include both materials and installation labor. Material-only prices may represent half or less of the total project cost, depending on the wood species and product selected.

              The least expensive flooring material is not always the most economical long-term choice. Solid hardwood can generally be sanded and refinished multiple times, while engineered hardwood may have a limited refinishing capacity because of its thinner top veneer.

              If you plan to remain in your home for 20 years or longer, long-term maintenance and refinishing requirements should be part of your decision.

              Cost to Install Hardwood Floors in Calgary

              Professional hardwood flooring services  can include material preparation, subfloor assessment, installation, finishing, and final cleanup.

              The labor cost varies according to the installation method.

              Installation Method

              Typical Labor Cost per Sq. Ft.

              Common Applications

              Nail-Down Installation

              $3–$6

              Wood subfloors and main floors

              Glue-Down Installation

              $4–$7

              Concrete subfloors, condos, and basements

              Floating Installation

              $3–$5

              Engineered hardwood and faster installations

              Material costs must be added to the labor rates to calculate the complete installed price.

              Larger projects often have a lower cost per square foot because preparation, setup, and material waste are spread across a larger area. For example, installing flooring throughout a 1,500-square-foot main floor may be more cost-effective than completing a single 200-square-foot room.

              Hardwood Floor Repair After Installation Mistakes

              If you are renovating or building a home in areas such as Panorama Hills, Varsity, or Aspen Woods, planning your flooring installation early can help reduce complications. Flooring is generally easier to install before baseboards, cabinets, and appliances are in place.

              Hardwood Floor Repair Cost in Calgary

              Hardwood floor repair costs depend on the type of damage and the amount of work required. A small squeak repair is significantly different from restoring a floor affected by extensive water damage.

              Repair Type

              Approximate Cost

              Squeak Repair per Area

              $150–$400

              Board Replacement per Board

              $50–$150

              Scratch and Gouge Repair

              $200–$500

              Water Damage Repair per Room

              $500–$2,500+

              Stair Repair

              $300–$1,000+

              Water damage can be particularly difficult to estimate without an inspection. A small surface stain may require a simple repair, while a long-term leak beneath a dishwasher or appliance may damage both the flooring and the subfloor.

              Signs You May Need Hardwood Floor Repairs

              signs you need hardwood floor repair

              You may be able to repair your existing flooring instead of replacing the entire room if:

              • Only one or two boards are cracked, cupped, or discolored.

              • Squeaking occurs in one specific area.

              • There is a soft spot near a window, appliance, or exterior wall.

              • The finish is still in good condition, but a few boards have physical damage.

              When most of the flooring remains structurally sound, repairing the damaged section is often more affordable than replacing the entire floor.

              How Much Does It Cost to Sand and Refinish Hardwood Floors?

              Professional hardwood floor refinishing  can restore the appearance of an older floor without the expense of complete replacement.

              The approximate refinishing costs are as follows:

              Refinishing Service

              Approximate Cost per Sq. Ft.

              Standard Sanding and Refinishing

              $4.00–$7.50

              Dustless Sanding Upgrade

              Additional $0.50–$1.50

              Custom Stain or Color Change

              Additional $1–$2

              Water-Based, Low-VOC Finish

              Additional $0.50–$1

              For example, refinishing a 1,000-square-foot main floor may cost approximately $3,000 to $6,000, depending on the condition of the flooring, selected finish, stain requirements, and number of coats.

              Dustless sanding may cost more than conventional sanding, but it can help reduce the amount of fine dust released into the home. This can be especially useful when homeowners are living in the property during the project.

              How Hardwood Floor Refinishing Works

              A typical refinishing project includes the following steps:

              1. Sanding the existing finish and removing surface imperfections.

              2. Repairing or replacing damaged boards.

              3. Applying stain if a color change is requested.

              4. Applying protective finish coats.

              5. Allowing sufficient drying time between coats.

              Solid hardwood can often be refinished several times throughout its lifespan, depending on its thickness and previous refinishing history. Engineered hardwood generally has fewer refinishing opportunities because its top veneer is thinner.

              Solid vs. Engineered Hardwood: Which Is More Cost-Effective Long-Term?

              Both solid and engineered hardwood have advantages, and the right choice depends on your budget, home conditions, design preferences, and long-term plans.

              Engineered Hardwood

              Engineered hardwood may be suitable for homeowners who want:

              • Greater dimensional stability in changing humidity.

              • A practical option for certain basements and concrete subfloors.

              • A potentially lower initial project cost.

              • A wide range of wood styles and finishes.

              Solid Hardwood

              Solid hardwood may be suitable for homeowners who want:

              • A traditional natural wood floor.

              • The ability to refinish the floor multiple times.

              • Long-term durability when properly maintained.

              • A classic appearance that can suit older Calgary homes.

              Neither option is universally suitable for every property. A flooring professional can help determine which product works best for your subfloor, room conditions, and lifestyle.

              Ways to Keep Your Hardwood Flooring Project on Budget

              You can manage your flooring budget more effectively by following a few practical steps:

              • Request itemized quotes: Make sure material, labor, preparation, and finishing costs are listed separately.

              • Compare installation methods: Ask which installation method is appropriate for your subfloor and why.

              • Plan the project carefully: Flooring installation may be easier before cabinets, appliances, and baseboards are installed.

              • Choose suitable materials for basements: Engineered hardwood may be more appropriate for certain below-grade spaces.

              • Combine multiple rooms: Completing several areas during one project may reduce setup and labor costs.

              • Address minor damage early: Small repairs may help prevent more expensive damage in the future.

              Ask about maintenance requirements: Understanding cleaning and refinishing needs can help you estimate long-term expenses.

              Getting an Accurate Hardwood Flooring Cost Estimate

              Every hardwood flooring project is different. The final price depends on square footage, subfloor condition, wood species, installation method, stairs, transitions, finishing requirements, and the condition of the existing flooring.

              The most reliable way to receive an accurate estimate is to arrange an in-person assessment.

              Contact Arbutus Hardwood  to request a consultation for hardwood flooring installation, refinishing, or repairs in Calgary and the surrounding areas.

              You can also explore the hardwood flooring project gallery  to view examples of completed flooring work and get ideas for your own project.

              Refinishing is generally less expensive than replacement when the existing boards are structurally sound. Replacement may be necessary if the floor has extensive water damage, severe warping, or insufficient wood remaining for another sanding.

              Standard hardwood flooring replacement in an existing home typically does not require a permit. However, projects involving structural changes or significant subfloor alterations may have different requirements. Confirm the details with your contractor or the City of Calgary before beginning work.


              A single-room refinishing project often takes approximately two to three days. Refinishing an entire main floor may take four to seven days, depending on the floor’s condition, stain selection, drying time, and number of finish coats.

              No. Engineered hardwood usually has a thinner top layer and may only be refinished once or twice, depending on its construction. Solid hardwood can often be refinished several times if enough wood remains above the tongue and groove.

              Yes, Calgary’s changing humidity levels can influence flooring selection and installation requirements. Dry winter conditions may cause natural wood to shrink and develop gaps if it is not properly acclimated or maintained.

              The National Wood Flooring Association’s moisture-management guidance  explains how humidity changes can cause wood flooring to expand, shrink, or develop gaps. These considerations may affect the type of flooring, acclimation process, and installation approach recommended for your home.

              A flooring quote may include an assessment of the existing floor and subfloor, recommendations for wood species and finishes, project measurements, installation requirements, and a breakdown of material and labor costs.

              How to choose a hardwood flooring contractor in Calgary

              How to choose a hardwood flooring contractor in Calgary

              How to choose a hardwood flooring contractor in Calgary Learn how to choose a hardwood flooring contractor in Calgary by checking experience, insurance, past projects and written quotes before you hire. Contact Us Your floors will be under your feet for 20 years or more. The person you hire to…

              Hardwood Flooring Cost Calgary: 2026 Price & Installation Guide

              Hardwood Flooring Cost Calgary: 2026 Price & Installation Guide

              Hardwood Flooring Cost in Calgary: What You’ll Actually Pay Planning your project but unsure about hardwood flooring cost in Calgary? This guide explains installation, refinishing, and repair expenses to help you plan your flooring budget. Contact Us If you’re planning to install, repair, or refinish hardwood flooring in Calgary, understanding…

              Matte vs Gloss Hardwood Flooring | Arbutus Hardwood

              Matte vs Gloss Hardwood Flooring | Arbutus Hardwood

              Matte vs gloss hardwood flooring: which finish is right for your home? Matte vs gloss hardwood flooring, see which finish suits Calgary homes best for durability, style & upkeep. Get expert advice from Arbutus Hardwood. Contact Us Matte vs gloss hardwood flooring feels like a small decision until you’re standing…

                Hardwood Flooring Cost Calgary: 2026 Price & Installation Guide 27