
Arbutus Hardwood Floors

How to Prepare Hardwood Floor for Calgary Winters

 Learn how to prepare hardwood floor for Calgary winters  humidity control, refinishing tips & maintenance from Arbutus, local experts since 1990s.

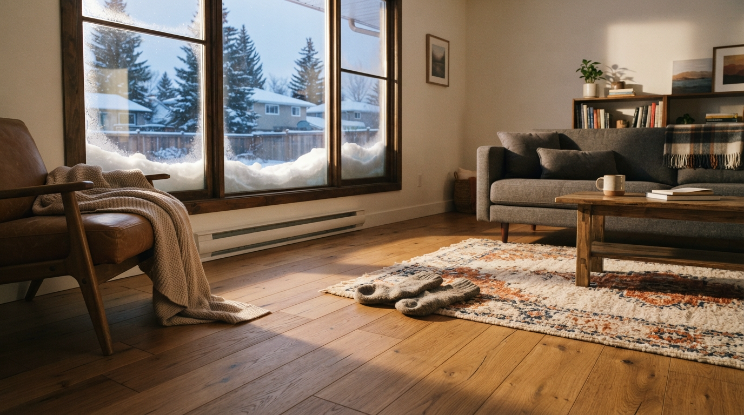
Calgary winters are hard on hardwood. One week you’ve got a chinook pushing 15°C, the next you’re at minus 25 with the furnace running non-stop. That swing dries out the air inside your house fast and your floors feel it before you do.

If you’ve ever noticed thin gaps opening between your boards in January, or a squeak that wasn’t there in the summer, that’s not damage. That’s wood doing exactly what wood does when the humidity drops. The good news: you can prepare hardwood floor for Calgary winters in a weekend and most of it costs nothing but a little attention.

I’ve been fixing, refinishing and installing hardwood in this city for over 30 years. Here’s what actually works.

Why Calgary winters are rough on hardwood floors

Wood is hygroscopic. It absorbs moisture from the air in summer and gives it back in winter. In a coastal city that swing is small. In Calgary, where winter relative humidity indoors can drop into the teens without a humidifier running, the swing is huge.

The National Wood Flooring Association recommends keeping indoor relative humidity between 35% and 55% year round to protect wood flooring. Most Calgary homes sit well below that from November through March unless someone’s actively managing it.

Add chinooks into the mix and you get something most flooring guides never mention: rapid freeze-thaw cycles that push and pull moisture out of your wood multiple times a season instead of once. Your floor isn’t just adjusting to winter. It’s adjusting to winter, then a false spring, then winter again, sometimes in the same week.

That’s the real reason a Calgary homeowner needs to prepare a hardwood floor differently than someone in Vancouver or Toronto.

I’ve walked into homes where the owner assumed a contractor from out of province had done something wrong with the install. Nine times out of ten, the install was fine. It was just never set up to handle Alberta’s dry season, because whoever installed it wasn’t thinking about chinooks or forced-air heating running six months straight.

Calgary sits in a spot where cold Arctic air and warm chinook winds trade places constantly through the winter. Each swing pulls moisture out of the air a little differently and your floor reacts to every single one of them. It’s not one long dry stretch from November to March. It’s more like a series of dry stretches interrupted by brief warm-ups and each transition is its own small stress event for the wood.

That’s also why floors in older Calgary homes, especially ones built before better vapour barriers and modern HVAC systems, tend to show more dramatic seasonal gapping than newer builds. The subfloor and the wall assembly play a role too, not just the hardwood itself.

Signs your hardwood floor isn’t ready for winter

Walk through your home before the temperature drops and look for these:

  • Boards that already feel slightly loose or squeaky underfoot
  • Visible gaps wider than a credit card’s edge between planks
  • A finish that looks dull, scratched, or worn through in high-traffic zones
  • Cupping (edges of boards higher than the middle) near exterior walls or big windows
  • Doors dragging on the floor, which sometimes points to subfloor movement

Small gaps that open in winter and close back up in summer are normal seasonal movement. If you’re seeing signs you need hardwood floor repair that won’t close up again by June, that’s a different problem and it’s worth getting looked at before winter makes it worse.

Step 1: Get your humidity under control

This is the single biggest thing you can do, full stop.

Buy a $15 hygrometer from any hardware store and put it on the main floor. If your reading sits under 30% once the furnace kicks in for winter, your wood is going to shrink and it’s going to show up as gaps.

What actually helps:

  • A whole-home humidifier tied into your furnace (the most effective fix and worth the install cost if you’re not already running one)
  • A portable humidifier in the room with the most hardwood, if a whole-home unit isn’t in the budget this year
  • Keeping houseplants, which do a little work but won’t get you all the way there on their own
  • Cracking a window for 10 minutes a day when it’s not brutally cold, believe it or not this helps refresh stale dry air

Don’t overcorrect either. Pushing humidity above 55% in winter risks condensation on your windows and, eventually, cupping in the opposite direction. Aim for the middle of that 35-55% range and you’re in good shape.

A mistake I see a lot: homeowners buy a humidifier, run it for two weeks in November, then forget about it once they get used to the dry air again. Humidity control only works if it’s consistent through the whole season. One good week doesn’t undo three dry months and it definitely won’t stop gaps from opening back up.

Placement matters too. A portable humidifier sitting in a corner of a big open-concept living room isn’t doing much for the hardwood in your hallway or upstairs bedroom. If you’re only running one unit, put it centrally and consider a small hygrometer in more than one room if your home has distinct zones.

Step 2: Check and adjust your thermostat habits

Check and adjust your thermostat habits

A lot of people crank the heat to 24°C and forget about it. That’s rough on wood.

Keep your home in the 18-21°C range if you can. Big temperature swings between rooms, especially near vents and cold exterior walls, create uneven drying that shows up as inconsistent gapping across the floor.

If you’ve got forced air heating pointed directly at a section of hardwood, consider a vent deflector. It’s a $10 fix that redirects hot, dry air away from the boards instead of blasting them all winter.

Step 3: Deal with entryways before the snow starts
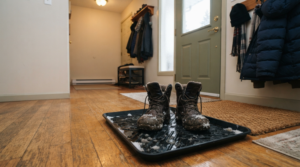
Deal with entryways before the snow starts

Calgary winters mean salt, slush and grit tracked in on every boot. That combination is brutal on the finish.

  • Put a real boot tray or mat right at the door, before the first snowfall, not after
  • Wipe up melted snow and salt residue the same day, don’t let it sit
  • Consider a walk-off mat that’s long enough for two full strides, most people underestimate how much they need

Salt crystals are abrasive. Left on a finished floor and ground in by foot traffic, they’ll dull and scratch the surface faster than almost anything else that happens to hardwood in a Calgary winter.

Step 4: Get ahead of refinishing, not behind it

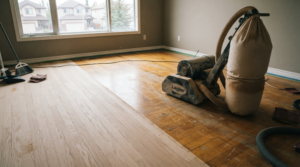
Late summer or early fall is genuinely the best time to polish hardwood before winter arrives, mostly because the humidity is more stable for the finish to cure properly and because a fresh finish gives you a stronger moisture barrier heading into the dry months.

If your current finish is worn thin in walkways, water and grit can reach bare wood faster once winter starts. A worn finish plus dry winter air plus salt is a bad combination for your boards.

We usually recommend dustless hardwood floor refinishing for Calgary homeowners who want the work done without shutting down the house for a week, since it keeps the mess contained and the floor usable again much sooner.

If you’re deciding between finish types for durability against winter grit, our breakdown on oil vs water-based floor finish covers which holds up better under heavy winter traffic and which is easier to spot-repair later.

Waiting until January to book refinishing is the wrong move and not just because of scheduling. Cold, dry winter air makes finish cure slower and less evenly in some cases and you’re stuck living around the smell and downtime during the months you’re home the most. Booking your hardwood floor refinishing in September or early October means the work is done and cured before the temperature drops and your floor goes into winter with a fresh protective layer instead of a worn one.

How installation type affects winter performance

Not every hardwood floor moves the same way, even within the same house. How it was installed matters as much as what it’s made of.

Nail-down floors have a bit more natural give across the whole surface, which can actually help distribute seasonal movement more evenly. Glue-down floors are more rigid and tend to show movement in more concentrated spots, usually where there’s the least adhesive coverage or where the subfloor itself has a weak point. Floating floors, common with a lot of engineered products, handle humidity swings differently again because the whole floor can expand and contract as one unit rather than board by board.

If you’re not sure which installation method your home has, it’s usually visible from a basement or crawl space, look at the underside, or your original installer’s paperwork will say. It’s worth knowing before winter, because the repair approach for a squeak or a gap is different depending on how the floor was put down in the first place.

For newer installs or renovations, the right installation method depends heavily on your subfloor type, whether that’s a concrete slab in a newer build or the older wood subfloors common in some of southwest Calgary’s established neighbourhoods.

Step 5: Protect furniture and high-traffic zones

Winter means more time indoors, more foot traffic and heavier furniture staying put in the same spot for months. That combination leaves marks if you’re not careful.

  • Felt pads under every chair and table leg, replaced when they wear thin
  • Area rugs in high-traffic paths, especially hallways and in front of the couch
  • Rotate rugs occasionally so you’re not creating a permanent sun-fade or wear line underneath one spot

None of this stops seasonal wood movement. It just keeps your finish from taking unnecessary damage while the movement happens.

Solid vs engineered: does it matter for winter prep?
Solid vs engineered

It does, actually. If you’re building or renovating and haven’t picked your flooring yet, solid vs engineered hardwood in Calgary is worth reading before you commit.

Engineered hardwood’s layered construction resists the kind of shrinking and gapping that solid wood is more prone to in a dry Calgary winter, particularly over concrete or in basements. Solid hardwood can absolutely handle our winters too and a lot of homeowners prefer it, it just needs more consistent humidity management to stay stable.

Wood species matters here too. Some hardwood flooring species handle humidity swings better than others. Oak, for example, tends to be more forgiving of Calgary’s dry season than some of the softer or more exotic species.

A quick pre-winter checklist

Task

When to do it

Why it matters

Test indoor humidity

Early fall, before heating season

Establishes your baseline before it drops

Install or run a humidifier

Before first hard freeze

Keeps wood from shrinking too fast

Inspect finish for wear

Late summer

Catches problems before winter stress hits

Refinish if needed

September-October

Finish cures better in stable humidity

Set up entryway mats

Before first snowfall

Stops salt and grit from reaching the finish

Check thermostat habits

Ongoing through winter

Prevents uneven drying across rooms

What to do if water damage happens anyway

Even with good prep, accidents happen. A leaking boot, a spilled humidifier tank, a window that wasn’t sealed as well as you thought. If you catch standing water on hardwood, dry it immediately and don’t wait to see if it’s fine.

Left too long, moisture gets under the finish and into the wood itself and that’s a different repair entirely. Our guide on water-damaged hardwood repair walks through what’s salvageable and what isn’t, depending on how long the water sat and which type of flooring you have.

What you can handle yourself vs when to call a pro

A lot of winter prep is genuinely DIY. Setting a hygrometer, running a humidifier, laying down entry mats, wiping up snow melt, adding felt pads under furniture, none of that requires a professional.

Where it makes sense to call someone:

  • Gaps that don’t close back up by early summer, which can point to a deeper humidity or subfloor issue
  • Cupping that’s gotten worse over more than one season
  • A finish that’s worn through to bare wood in walkways
  • Squeaking that’s gotten louder or spread to more of the floor
  • Any water damage bigger than a small spill you caught right away

Trying to sand and refinish a floor yourself without the right equipment usually ends up costing more in the long run, either because the sanding wasn’t even or because a rushed job traps moisture under a new finish right before winter, which is close to the worst timing possible for that mistake.

A note on older Calgary homes

If you’re in one of Calgary’s older communities, homes built in the 60s, 70s, or 80s often have original hardwood that’s outlasted several generations of homeowners already. That says a lot about the wood itself, but it also means these floors have usually been through decades of uneven humidity control before anyone thought to manage it properly.

If that’s your situation, don’t assume the floor is too far gone just because it’s got more visible seasonal movement than a newer install. Solid hardwood can be sanded and refinished multiple times over its life and older growth wood used decades ago is often denser and more stable than a lot of what’s sold today. A proper inspection will tell you whether you’re dealing with cosmetic wear or something structural.

The bottom line

You don’t need to overhaul your whole house to get through another Calgary winter with your floors intact. A hygrometer, a humidifier, decent entryway mats and catching finish wear before it gets bad will cover most of it.

If your floors are already showing gaps that don’t close, cupping near the windows, or a finish that’s worn through in the hallway, don’t wait for spring to deal with it. Contact Arbutus Hardwood for a straight assessment and a quote. We’ve been doing this in Calgary for over 30 years and we know exactly how this climate treats a hardwood floor.
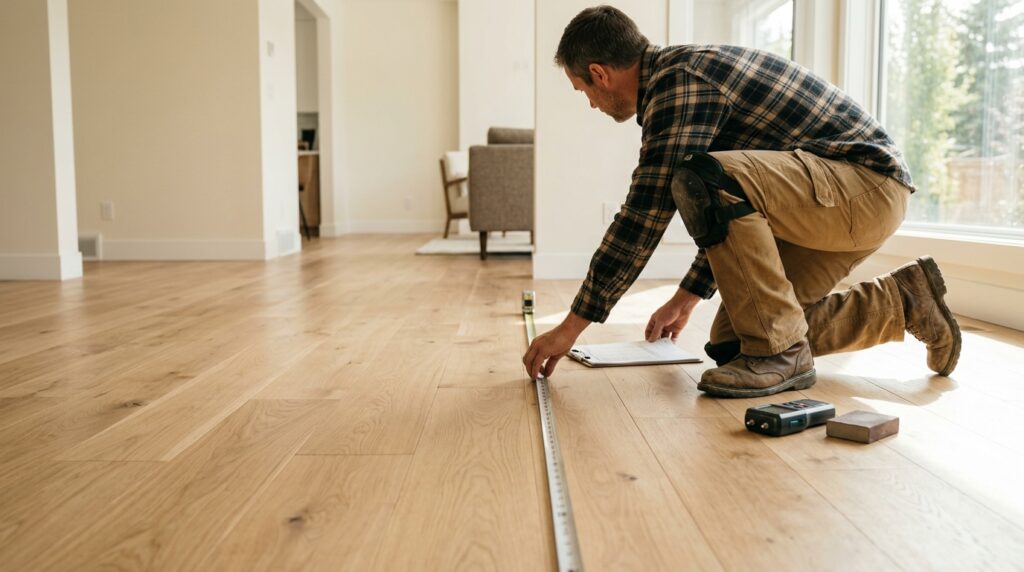
Start with a hygrometer reading in your first week of cold weather. If you don't know the floor's refinishing history, get an inspection before winter stresses it further. New-to-you floors sometimes have hidden wear that only shows up once the dry season hits.

Wood loses moisture to dry indoor air and physically shrinks. The boards pull slightly apart from each other. It's normal seasonal movement and most gaps close back up on their own by summer.

Yes, in almost every case. Calgary's winter air is dry enough that most homes need active humidity management to keep hardwood stable, whether that's a whole-home unit or a portable one in the main living space.

Between 35% and 55% relative humidity, according to NWFA guidelines. Below that range for extended periods is when you start seeing excessive shrinkage and gapping.

Occasional seasonal shrinkage isn't permanent damage. Chronic exposure to very low humidity over years can cause deeper cracking, finish failure and boards that no longer close their gaps in summer. That's when you're looking at repair or refinishing rather than just seasonal movement.

It depends on traffic and finish type, but most Calgary homes need a refinish every 7 to 10 years. Homes with pets, kids, or high foot traffic sometimes need it sooner, especially if winter salt and grit have been wearing down the finish faster than expected.

How to choose a hardwood flooring contractor in Calgary

How to choose a hardwood flooring contractor in Calgary

How to choose a hardwood flooring contractor in Calgary Learn how to choose a hardwood flooring contractor in Calgary by checking experience, insurance, past projects and written quotes before you hire. Contact Us Your floors will be under your feet for 20 years or more. The person you hire to…

Hardwood Flooring Cost Calgary: 2026 Price & Installation Guide

Hardwood Flooring Cost Calgary: 2026 Price & Installation Guide

Hardwood Flooring Cost in Calgary: What You’ll Actually Pay Planning your project but unsure about hardwood flooring cost in Calgary? This guide explains installation, refinishing, and repair expenses to help you plan your flooring budget. Contact Us If you’re planning to install, repair, or refinish hardwood flooring in Calgary, understanding…

Matte vs Gloss Hardwood Flooring | Arbutus Hardwood

Matte vs Gloss Hardwood Flooring | Arbutus Hardwood

Matte vs gloss hardwood flooring: which finish is right for your home? Matte vs gloss hardwood flooring, see which finish suits Calgary homes best for durability, style & upkeep. Get expert advice from Arbutus Hardwood. Contact Us Matte vs gloss hardwood flooring feels like a small decision until you’re standing…

    How to Prepare Hardwood Floor for Calgary Winters 3

    Wide Plank Flooring: Complete Guide, Pros & Cons (2026)

    Everything you need to know about wide plank flooring widths, wood species, pros and cons and how it holds up in Calgary’s dry climate.

    Wide plank flooring is having a moment. Walk into any new build or renovated home right now and there’s a good chance you’re standing on boards wider than what your grandparents had.

    But wider isn’t automatically better. It changes how a floor looks, how it’s installed and how it behaves in a dry climate like Calgary’s.

    I’ve spent years installing, refinishing and repairing hardwood floors. Wide plank jobs come with their own rules. This guide covers what wide plank flooring actually is, which species and widths work best, what it costs and where it can go wrong if it’s not handled right.

    Most of what’s written about wide plank flooring online comes from writers in Georgia or California, places where humidity barely moves and wood behaves itself year-round. That’s not the world we live in here. A Calgary winter can drop indoor relative humidity into the teens. A wide plank floor feels every point of that swing far more than a narrow strip floor does. Keep that in mind as you read the rest of this.

    What is wide plank flooring?

    Standard hardwood boards run 2 ¼ to 3 inches wide. That’s the classic strip flooring you’ve seen in older Calgary homes for decades.

    Wide plank flooring starts around 4 inches and can go up to 10 inches or more, depending on the species and manufacturer. Some specialty mills cut boards 12 inches wide or beyond, though anything past 7 or 8 inches gets into custom territory fast.

    The wider the board, the more of the tree’s natural grain, knots and color variation you see on each piece. Fewer seams across a room. A calmer, less busy floor.

    How width changes the look of a room

    Narrow strip flooring reads as traditional and formal. Wide planks read as relaxed, rustic or modern, depending on the finish.

    A 3-inch oak floor in a small dining room can feel choppy, with dozens of seams breaking up the sightline. Swap that for 6-inch boards and the same room feels bigger and calmer. Fewer lines for your eye to trip over.

    Solid vs engineered wide plank flooring

    Solid vs engineered

    This is the decision that matters most. It’s where a lot of homeowners get steered wrong by a salesperson pushing whatever’s in stock.

    Solid hardwood is one piece of wood, top to bottom. You can sand and refinish it multiple times over its life, which for a wide plank floor can mean decades of use.

    Engineered hardwood has a real wood veneer bonded to layers of plywood underneath. That layered core resists the expansion and contraction that comes with Calgary’s dry winters and humid summer swings.

    Here’s the part most flooring guides skip: width and stability are directly related. A 3-inch solid oak board moves a little with the seasons. A 7-inch solid board moves a lot more, because there’s simply more wood to expand and contract.

    That’s why engineered construction is often the smarter call once you go past 5 or 6 inches wide. I’ve broken this down in more detail here: solid vs engineered hardwood in Calgary.

    Feature

    Solid wide plank

    Engineered wide plank

    Can be refinished

    Yes, multiple times

    Usually 1 to 3 times, depends on veneer thickness

    Stability in dry climates

    Lower, more prone to gaps

    Higher, built for movement

    Best board width

    Up to 5 inches

    5 to 10+ inches

    Typical lifespan

    50+ years

    25 to 40 years

    Installation methods

    Nail-down

    Nail-down, glue-down, floating

    Best wood species for wide plank floors

    Not every species holds up well at wider widths. Softer, more open-grained woods tend to show more movement.

    White oak is the most popular choice for wide plank right now, for good reason. It’s dense, has a tight grain and stains evenly across a wide board.

    Red oak is a close second and usually a bit cheaper, though it has a slightly pinker undertone that shows more at wider widths.

    Walnut looks incredible in wide plank, with deep chocolate tones and dramatic grain. It’s also softer than oak, so it’s not the best pick for high-traffic areas like entryways or kitchens.

    Hickory and maple work too, but their tighter, busier grain patterns can look overwhelming once you get past 6 inches. Oak tends to stay the safer bet for most living rooms and main floors.

    If you’re stuck between red and white oak specifically, I wrote a full breakdown here: red oak vs white oak flooring. And if you want the full species lineup, including walnut and maple, that’s covered in our hardwood species guide.

    Pros of wide plank flooring

    Fewer seams, more character. Each board shows more of the tree’s natural grain. That variation is the whole appeal for a lot of homeowners.

    Faster installation, in theory. Fewer boards means fewer pieces to lay per square foot. In practice this gets offset by the extra care wide boards need, so the time savings aren’t as big as people expect.

    Makes small rooms feel larger. Fewer lines breaking up the floor plane reads as more open space.

    Works with more design styles. Wide plank floors show up in farmhouse kitchens, mid-century remodels and modern new builds equally well. It’s one of the more flexible flooring decisions you’ll make.

    Cons of wide plank flooring

    More visible movement. Wider boards show gaps and cupping more obviously than narrow strip flooring when humidity swings hit. You’ll notice it faster on a 7-inch board than a 2 ¼-inch one.

    Higher cost. Wider boards mean more waste at the mill and slower kiln drying. That gets passed on to you.

    Installation needs more skill. Subfloor flatness matters more with wide boards. A dip that’s invisible under narrow strip flooring can show up as a rock or a squeak under a wide plank.

    Fewer refinishing cycles for engineered options. If you go engineered to solve the stability problem, you’re trading off some of the lifetime refinishing solid wood offers.

    I go into more depth on subfloor prep and installation methods in this guide on nail-down vs glue-down hardwood floors, which matters even more once boards get wider.

    Wide plank flooring installation: what’s different

    Wide plank flooring installation

    Wide boards are less forgiving than narrow ones. A careful installation crew catches problems a rushed one won’t. A few things change on the install side.

    1. Subfloor prep gets stricter. Most manufacturers want flatness within 3/16 inch over a 10-foot span for wide plank, tighter than what’s needed for standard strip flooring.
    2. Acclimation takes longer. Wide boards need more time sitting in the room before installation so they can adjust to your home’s humidity. Rushing this step is the number one cause of gaps down the road.
    3. Fastening pattern changes. Wide solid boards typically need more fasteners per board to keep them from cupping or lifting at the edges.
    4. Expansion gaps need to be sized correctly. Skip this and you’ll see buckling the first dry Calgary winter.

    Get any one of these wrong and you’ll be calling someone for repairs within a year or two.

    The most common installation mistakes

    I’ve walked into more than a few homes where a wide plank floor started failing within its first winter. Almost every time, it comes down to one of these:

    1. Rushed acclimation. Boards were installed within a day or two of delivery, before they’d settled to the home’s actual humidity.
    2. No expansion gap, or too small a gap. The boards were installed edge to edge without room to expand, so they buckled the first humid summer.
    3. Fastening from the wrong end of the board. Wide boards can cup if they’re not fastened evenly across their width, not just at the edges.
    4. Installing over an uneven subfloor. A dip of even a quarter inch can telegraph up through a wide board as a squeak or a soft spot.
    5. Ignoring the home’s HVAC setup. A floor installed in July without accounting for what a bone-dry January will do to it is a floor set up to fail.

    None of these are hard to avoid. They just take an installer who’s actually paid attention to how wide boards behave, not someone treating it the same as a standard strip job.

    Wide plank flooring styles and trends

    flooring styles and trends

    A wide plank isn’t one look. It stretches across several current styles.

    • Matte, low-sheen finishes on white oak, which soften the wide board’s visual weight
    • Wire-brushed or hand-scraped textures that hide minor dents and wear, popular in busy households
    • Gray and warm-neutral stains, a shift away from the orange-toned oak that dominated the 2000s
    • Herringbone and chevron patterns cut from wider boards, giving a bold geometric look without the busyness of narrow-plank herringbone

    For a broader look at where hardwood design is headed this year, check out our hardwood flooring trends article.

    How wide plank floors handle Calgary’s dry climate

    This is where a lot of national flooring guides fall short, because they’re written for climates that don’t see 20% humidity in January.

    Calgary winters pull moisture out of everything, wood included. When a solid wide plank floor loses moisture, it shrinks. Do that every winter for a few years and you’ll see gaps opening between boards, sometimes wide enough to catch a coin.

    Come summer, the reverse happens. Boards pick up moisture, expand and press against each other. If there wasn’t enough expansion gap left at installation, that pressure has to go somewhere. Usually that’s cupping or buckling.

    The National Wood Flooring Association recommends acclimating wood flooring to the room’s expected in-use humidity range before installation, not just to whatever the humidity happens to be on delivery day. That’s a detail a lot of installers skip. It’s usually the first thing I check when I’m called out to fix a wide plank floor that’s failing early.

    If you’re set on solid wide plank in Calgary, plan on running a humidifier through the winter months. If that’s not realistic for your household, engineered construction solves most of this problem for you.

    Cost of wide plank flooring

    Wide plank costs more than standard strip flooring, generally 15 to 30% more per square foot for the same species. A few reasons why:

    • Wider boards mean more waste at the mill, since fewer boards can be cut from each log without defects
    • Kiln drying takes longer for wider stock, tying up equipment longer
    • Grading is stricter, since flaws are more visible on a bigger surface

    Rough Calgary pricing for materials alone, installed:

    Wood type

    Width

    Price range per sq ft (installed)

    Red oak, solid

    5 inch

    $9 to $13

    White oak, solid

    6 to 7 inch

    $12 to $18

    White oak, engineered

    7 to 9 inch

    $10 to $16

    Walnut, engineered

    6 to 8 inch

    $14 to $22

    Brand matters too. Some manufacturers charge a real premium for consistent milling and grading. With a wide plank, that consistency is worth paying for. I put together a comparison here: best hardwood flooring brands in Calgary.

    Caring for wide plank floors long term

    Wide plank floors don’t need much day to day, but a few habits go a long way.

    Run a humidifier through the winter months and aim for somewhere between 35 and 50% indoor relative humidity. That single habit prevents more gapping problems than anything else on this list.

    Wipe up spills fast, especially near wide seams. Water sitting in a seam for hours is one of the quickest ways to see localized cupping on a single board.

    Use furniture pads and avoid dragging heavy items across the floor. Wide boards show scuffs and gouges just as clearly as they show grain, maybe more so, since there’s more flat surface area to catch the light.

    Stick to a cleaner made for hardwood, not an all-purpose spray. Anything with excess water or wax buildup causes more harm on wide boards than narrow ones, since moisture has more surface to sit on before it evaporates.

    Is wide plank flooring right for your home?

    A wide plank makes sense if you’ve got open-concept living spaces where fewer seams read as a bigger, calmer floor plan. It also suits homes going for a farmhouse, rustic or modern aesthetic where natural grain variation is the point.

    It’s a tougher sell in a tight, older home with an uneven original subfloor, unless you’re prepared to invest in leveling first. And if you’re not willing to manage indoor humidity through the winter, a solid wide plank probably isn’t your best bet.

    A lot of our clients land on a middle ground: engineered wide planks in the 5 to 7 inch range, wide enough to get the visual benefit, stable enough for our climate. That’s a conversation worth having before you order material. It’s exactly what we help homeowners work through in our custom hardwood flooring consultations.

    The bottom line

    Wide plank flooring gives you a calmer, more open-looking floor with real character in the grain. It also asks more of your subfloor, your installer and your home’s humidity control, especially here in Calgary.

    Get the species, width and construction type matched to your home and it’ll be one of the best upgrades you make. Get it wrong and you’ll be dealing with gaps and cupping by the second winter.

    If you’re weighing your options, we’re happy to walk through what’ll actually hold up in your home. Get in touch with us for a clear, honest quote.

    Generally, yes. Fewer seams across the floor create a more continuous surface, which tends to make a room read as more open. It's a small design trick, but it works.

    It depends what matters most to you. Engineered wins on stability and is often the better choice for wide boards in a dry climate. Solid wins on total lifespan if you're planning to refinish the floor several times over the decades.

    Most standard product lines top out around 7 to 8 inches. Custom mills can go wider, sometimes past 10 inches, but boards that wide need extra acclimation time and a near-perfect subfloor.

    A little, mostly because there's more surface area per board to notice a mark on. Matte and wire-brushed finishes hide wear better than high-gloss finishes.

    Yes, but engineered construction is strongly recommended. Solid wide boards over radiant heat are far more prone to gapping from the constant, uneven moisture loss.

    For an average main floor, plan on 3 to 5 days including acclimation time, longer than standard strip flooring because of the extra prep work involved.

    How to choose a hardwood flooring contractor in Calgary

    How to choose a hardwood flooring contractor in Calgary

    How to choose a hardwood flooring contractor in Calgary Learn how to choose a hardwood flooring contractor in Calgary by checking experience, insurance, past projects and written quotes before you hire. Contact Us Your floors will be under your feet for 20 years or more. The person you hire to…

    Hardwood Flooring Cost Calgary: 2026 Price & Installation Guide

    Hardwood Flooring Cost Calgary: 2026 Price & Installation Guide

    Hardwood Flooring Cost in Calgary: What You’ll Actually Pay Planning your project but unsure about hardwood flooring cost in Calgary? This guide explains installation, refinishing, and repair expenses to help you plan your flooring budget. Contact Us If you’re planning to install, repair, or refinish hardwood flooring in Calgary, understanding…

    Matte vs Gloss Hardwood Flooring | Arbutus Hardwood

    Matte vs Gloss Hardwood Flooring | Arbutus Hardwood

    Matte vs gloss hardwood flooring: which finish is right for your home? Matte vs gloss hardwood flooring, see which finish suits Calgary homes best for durability, style & upkeep. Get expert advice from Arbutus Hardwood. Contact Us Matte vs gloss hardwood flooring feels like a small decision until you’re standing…

      Wide Plank Flooring: Complete Guide, Pros & Cons (2026) 7

      Custom Hardwood Floor Borders & Inlays | Calgary

      Get custom hardwood floor borders & inlays in Calgary from Arbutus Hardwood. 30+ years of craftsmanship behind every install. Free quote!

      A plain hardwood floor does its job. It looks fine. But it doesn’t say anything about the people who live there.

      That’s where custom hardwood floor borders & inlays come in. A border along the perimeter of a room, a medallion at the bottom of a staircase, a herringbone pattern running through an entryway. These details turn an ordinary floor into something a guest actually stops to look at.

      We’ve been installing hardwood in Calgary homes for more than 30 years, and border and inlay work is some of the most satisfying stuff we do. It’s also some of the most misunderstood. Homeowners often assume it’s out of budget, or that it only belongs in old European mansions. Neither is true.

      This guide walks through what these designs actually are, which species work best, what they cost, and what Calgary’s climate means for your floor over the next 10 or 20 years.

      What are custom hardwood floor borders and inlays

      The two terms get used interchangeably, but they’re not quite the same thing.

      Borders run along the edge of a room, usually 6 to 10 inches from the wall. They can be a simple contrasting stripe, or a more layered pattern with multiple wood tones.

      Inlays are a broader category. They include medallions (a decorative centerpiece, often circular), geometric accents, and full pattern work like parquet or herringbone. An inlay can sit inside a border, replace an area rug in an entryway, or mark a transition between rooms.

      Most projects we do combine the two. A border frames the room, and a small medallion sits under a chandelier or at the base of a staircase.

      If you want to see the full range of what’s possible, our custom hardwood flooring page has photos from past Calgary projects.

      Why Calgary homeowners are choosing this right now

      Custom flooring has moved past the “luxury home” stereotype. We’re seeing it in renovated bungalows in Bridgeland, new builds in Mahogany, and character homes in Elbow Park.

      Part of it is Pinterest and Instagram. People see a herringbone entryway online and want the same feeling in their own house. Part of it is resale value. A well-executed inlay signals quality craftsmanship to a future buyer in a way that basic plank flooring doesn’t.

      We’ve written more about where the broader flooring market is headed in our piece on current hardwood flooring trends, if you want the bigger picture.

      Popular wood species for custom inlays

      Contrast is what makes a border or medallion pop. You need at least two species with a visible difference in tone or grain.

      Here’s what we use most often in Calgary homes:

      Species

      Tone

      Best used for

      Red oak

      Warm, reddish-brown

      Base floor with a darker walnut border

      White oak

      Cool, neutral tan

      Modern homes, works with grey stains

      Walnut

      Deep brown, almost chocolate

      Accent strips and medallion centers

      Maple

      Pale, subtle grain

      Contrast strips against darker species

      Cherry

      Rich red, deepens with age

      Traditional and formal spaces

      Wenge

      Nearly black

      High-contrast borders and inlay detailing

      If you’re still deciding between the two most common base species, our breakdown of red oak vs. white oak flooring covers durability, cost, and how each takes stain.

      One thing worth knowing before you fall in love with a species: not every wood species handles Calgary’s dry winters the same way. Species with tighter grain, like white oak, tend to move less as humidity swings. We factor that in when we’re recommending a species combination, especially for a floor that’s going to sit near a large window or a fireplace.

      Design styles: borders, medallions, and parquet

      Design styles

      Not every project needs the same approach. Here’s a quick comparison to help you figure out which style fits your space.

      Style

      Where it works best

      Complexity

      Simple border

      Living rooms, dining rooms

      Low

      Layered/multi-species border

      Formal spaces, large open rooms

      Medium

      Medallion

      Entryways, under a staircase

      Medium to high

      Herringbone

      Entryways, hallways

      Medium

      Chevron

      Modern living spaces

      Medium

      Full parquet

      Statement rooms, historic-style homes

      High

      Herringbone and chevron patterns have had a real moment over the last few years. Both use rectangular planks laid at angles, herringbone with a zigzag joint, chevron with a continuous point. They read as more modern than a traditional medallion, which is why we’re installing more of them in newer Calgary builds.

      Parquet, the oldest of these techniques, cuts wood into geometric pieces and arranges them into a mosaic. It’s labour-intensive, but it’s also the most distinctive option on this list.

      Solid or engineered: which works for inlay projects

      This question comes up on almost every consultation.

      Solid hardwood can be sanded and refinished multiple times over its life, which matters if you want your border or medallion to stay crisp for decades. Engineered hardwood handles humidity swings better, which is relevant given how dry Calgary winters get.

      For border and inlay work specifically, we lean toward solid hardwood in most cases. The detail work in a medallion or layered border shows up more clearly with solid wood, and refinishing later on preserves the pattern rather than sanding through the design layer.

      That said, engineered hardwood has its place, especially over concrete or radiant heat. We break the whole decision down in our guide to solid vs. engineered hardwood, including how each performs in a Calgary home specifically.

      How the installation process works

      Border and inlay installation is a different skill set than standard plank flooring. It requires precise measurements, careful cutting, and a steady hand with a router or table saw.

      Here’s roughly how a project moves:

      1. Design consultation. We walk through your space, discuss species combinations, and sketch out the pattern.
      2. Material sourcing. Border and inlay wood often needs to be custom milled to exact thickness, since it has to sit flush with the field flooring.
      3. Layout and dry fit. Before anything gets glued or nailed, we lay the pattern out to confirm spacing and symmetry.
      4. Cutting and installation. This is where precision matters most. A gap of even a millimetre throws off the whole visual line.
      5. Sanding and finishing. The entire floor, field and inlay together, gets sanded flush and finished as one surface.

      This is also where professional hardwood floor installation really earns its keep. A border that’s off by a fraction of an inch is obvious the moment you walk into the room, and there’s no fixing it without pulling boards back up.

      The National Wood Flooring Association sets the installation and moisture-testing standards most reputable contractors in North America follow, and we hold our own crews to those benchmarks on every project, custom or not.

      How the installation process works

      Common mistakes to avoid

      We’ve fixed enough botched jobs over the years to know where things usually go wrong.

      • Skipping the moisture test. Calgary’s humidity swings hard between seasons. Installing without checking subfloor moisture is asking for gaps or cupping later.
      • Mismatched wood movement rates. Combining species with very different expansion rates in a tight border can cause cracking at the seams.
      • Rushing the layout stage. A medallion that looks slightly off-center is more noticeable, not less, because of how much attention the design draws.
      • DIY inlay kits on existing floors. Pre-made medallion kits look good in photos. Fitting them into an existing floor without the right tools usually ends in a visible seam.

      Our article on hardwood installation mistakes covers more of these in detail, including a few that apply to standard installations too.

      Caring for and refinishing a bordered floor

      A custom border or medallion needs the same day-to-day care as any hardwood floor. Sweep regularly, wipe up spills fast, and use furniture pads under heavy pieces.

      Refinishing is where it gets a little different. Because a border uses multiple species, each one sands and absorbs stain at a slightly different rate. A refinishing crew that hasn’t worked on inlay floors before can end up with uneven colour across the pattern.

      When it’s time to refresh yours, our hardwood floor refinishing service accounts for the different species in the design, so the border comes back looking the way it did on day one.

      What does it cost

      Pricing depends on the complexity of the design, the species you choose, and how much of the floor the pattern covers.

      Project type

      Typical scope

      Relative cost

      Simple single-species border

      Perimeter of one room

      $

      Multi-species layered border

      Perimeter of one room

      $$

      Small medallion (entryway)

      2-4 ft diameter

      $$

      Large medallion (foyer/staircase)

      5+ ft diameter

      $$$

      Herringbone or chevron pattern

      Entryway or hallway

      $$ to $$$

      Full parquet room

      Entire room

      $$$$

      The honest answer is that a quote depends on your specific space, the wood species you want, and the pattern complexity. We give free, no-pressure estimates so you know the real number before committing to anything.

      A few cost factors homeowners don’t always expect going in:

      • Custom milling. Border and inlay wood usually needs to be milled to a specific thickness so it sits flush with the field flooring. That milling adds cost before installation even starts.
      • Exotic species. Wenge, purple heart, and other high-contrast woods used in accent strips cost more per board foot than standard oak or maple.
      • Room shape. A perfectly rectangular room is cheaper to border than one with bay windows, angled walls, or multiple doorways breaking up the perimeter.
      • Existing floor condition. Adding a border to an existing floor sometimes requires more prep work than installing into a brand new subfloor.

      None of these should scare you off. They’re just the variables we walk through on a consultation so the number you get is the number you actually pay, with no surprises halfway through the project.

      Why homeowners choose Arbutus Hardwood

      We’ve been doing this in Calgary for over 30 years. Dave and the team have handled everything from a single accent border in a condo to a full parquet foyer in a custom-built home.

      What sets border and inlay work apart from standard installation is patience. There’s no rushing a layout, and there’s no fixing a cut that’s slightly off. It’s the kind of work you either do carefully or you don’t do at all.

      If you’re weighing whether custom detailing fits your budget or your home’s style, our custom hardwood flooring page has more examples, or you can call us directly and we’ll talk through what makes sense for your space.

      Matching a border style to your home

      Matching a border style to your home

      The wrong border can fight with a room instead of framing it. A few things we walk through with homeowners before picking a design.

      Room size matters more than people think. A wide, layered border with three species can overwhelm a small bedroom. In a smaller space, a single thin accent line usually reads better than a full multi-species pattern.

      Existing trim and doors set the tone. A home with dark walnut trim and traditional casings usually calls for a border that echoes that warmth. A modern build with clean baseboards and large windows tends to suit a simpler, high-contrast line, like white oak against wenge.

      Think about furniture placement. A medallion looks incredible until a dining table sits directly on top of it for 10 months of the year. We always ask where the furniture is going before finalizing a centerpiece design.

      One project that sticks with us: a family in Aspen Woods wanted a full medallion under their dining table, thinking it would show through a glass tabletop. It worked, but only because we measured the table dimensions first and sized the medallion to sit visible around the edges. Skip that step and you’ve spent extra money on a design nobody sees.

      Seasonal timing and Calgary’s climate

      Wood moves. It expands when the air is humid and contracts when it’s dry, and Calgary swings between both extremes hard.

      Border and inlay work is more sensitive to this than a standard floor, because the seams between species are tighter and the visual line depends on everything staying flush.

      We generally recommend installing custom detailing in late spring or early fall, when indoor humidity sits closer to the middle of the range. Installing in the peak of a dry Calgary winter, right after the furnace has been running non-stop for weeks, increases the odds of a gap showing up once spring humidity returns.

      If your project timeline doesn’t allow for that flexibility, it’s not a dealbreaker. It just means we spend more time acclimating the wood on-site before installation, sometimes a full week longer than a standard job.

      Ready to add a custom border or inlay to your floor

      Custom hardwood floor borders & inlays aren’t just decoration. They’re a way to make a floor that’s actually yours, built by hands that know how Calgary’s climate treats wood over the long run.

      Whether you’re picturing a simple border in the dining room or a full medallion at your front entrance, we’ll help you figure out what’s realistic for your space and budget.

      Get your free quote from Arbutus Hardwood today, or call us at 403-371-7531 to talk through your project.

      A simple border in one room usually adds 1 to 2 days to a standard installation timeline. A large medallion or full parquet room can add a week or more, depending on complexity.

      Sometimes. It depends on the condition of your existing floor and whether there's enough wear-layer left to sand and blend the new work in. We'd need to see the floor first.

      Yes, though we typically recommend engineered hardwood in that case, since it handles temperature-driven movement better than solid wood.

      It generally helps. Buyers notice craftsmanship, and a well-installed border or medallion reads as a sign the whole home has been cared for.

      Herringbone entryways are the most requested design we're seeing this year, followed by simple two-tone perimeter borders in living and dining rooms.

       It's not recommended. The two products move differently with humidity, and mixing them in a tight pattern increases the risk of gapping or cracking at the seams.

      How to choose a hardwood flooring contractor in Calgary

      How to choose a hardwood flooring contractor in Calgary

      How to choose a hardwood flooring contractor in Calgary Learn how to choose a hardwood flooring contractor in Calgary by checking experience, insurance, past projects and written quotes before you hire. Contact Us Your floors will be under your feet for 20 years or more. The person you hire to…

      Hardwood Flooring Cost Calgary: 2026 Price & Installation Guide

      Hardwood Flooring Cost Calgary: 2026 Price & Installation Guide

      Hardwood Flooring Cost in Calgary: What You’ll Actually Pay Planning your project but unsure about hardwood flooring cost in Calgary? This guide explains installation, refinishing, and repair expenses to help you plan your flooring budget. Contact Us If you’re planning to install, repair, or refinish hardwood flooring in Calgary, understanding…

      Matte vs Gloss Hardwood Flooring | Arbutus Hardwood

      Matte vs Gloss Hardwood Flooring | Arbutus Hardwood

      Matte vs gloss hardwood flooring: which finish is right for your home? Matte vs gloss hardwood flooring, see which finish suits Calgary homes best for durability, style & upkeep. Get expert advice from Arbutus Hardwood. Contact Us Matte vs gloss hardwood flooring feels like a small decision until you’re standing…

        Custom Hardwood Floor Borders & Inlays | Calgary 11