Arbutus Hardwood Floors

DIY vs Professional Hardwood Floor Repair: Which Should You Choose?

Compare DIY vs professional hardwood floor repair costs, risks, and results. Learn when to DIY, when to call a pro, and how to avoid costly mistakes.

Your hardwood floors are scratched, dented, or maybe there’s a water stain near the kitchen sink that won’t go away. Now you’re stuck weighing DIY vs professional hardwood floor repair, and honestly, it’s not always an easy call.

Some damage is simple enough to fix on a Saturday afternoon with a stain marker and a little patience. Other damage can turn into a much bigger (and more expensive) problem if you get it wrong. The trick is knowing which category your floor falls into before you pick up a tool.

This guide walks through both options in plain language, so you can make a decision you won’t regret six months from now. And if you’d rather skip the guesswork entirely, our professional hardwood floor repair team is always happy to take a look.

Understanding Common Hardwood Floor Damage

Before deciding how to fix a floor, it helps to actually understand what you’re dealing with. Not all hardwood damage is created equal, and the fix depends entirely on the type.

Types of Damage You Might Be Dealing With

Most hardwood floor problems fall into a handful of categories:

  • Surface scratches and scuffs : usually from shoes, pet claws, or furniture being dragged across the room
  • Dents : caused by dropped objects or heavy furniture legs
  • Water damage : cupping, buckling, or discoloration from spills, leaks, or humidity
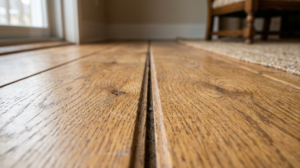
  • Gaps between planks : common in older homes or during dry winter months
  • Loose or squeaky boards: often a sign of subfloor movement
  • Deep gouges or missing chunks of wood : usually from something heavy being dropped or dragged

If you’re not sure which category your damage falls into, our article on signs you need hardwood floor repair breaks down what to look for room by room.

What Causes Hardwood Floor Damage

Most damage doesn’t happen overnight. It builds up over time from things like:

  • Moisture from spills, leaky appliances, or high indoor humidity (a bigger issue than most people realize in older Calgary-area homes with older HVAC systems)
  • Furniture and pet claws without protective pads
  • Direct sunlight causing fading in high-traffic living rooms
  • Everyday foot traffic wearing down the finish faster than expected

Water is one of the trickiest culprits because it’s not always obvious until the damage is already done. If you’ve noticed cupped boards or a dull, discolored patch near a window or appliance, it’s worth reading our guide on water-damaged hardwood floors before deciding on a fix.
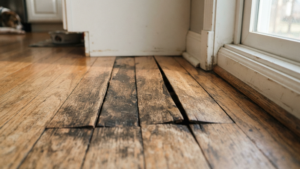
Understanding Common Hardwood Floor Damage

DIY Hardwood Floor Repair: What You Can (and Can’t) Handle

Let’s be honest, DIY isn’t for every repair. But for the right kind of damage, it can save you money and give you a bit of satisfaction too.

Repairs Suitable for DIY

Small, cosmetic issues are usually the safest bet for a DIY approach:

  1. Light surface scratches : a matching stain marker or touch-up pen can hide these in minutes
  2. Shallow dents : a damp cloth and a warm iron can sometimes swell the wood fibers back into place
  3. Small gaps between boards : wood filler or colored putty can close minor gaps
  4. Minor scuffs : often just need cleaning and a light coat of finish

If your floor only has one or two of these issues and the rest of the finish looks healthy, DIY is a reasonable place to start.

Tools and Materials You’ll Need

A basic DIY repair kit typically includes:

Item

Approximate Cost

Wood stain marker/touch-up pen

$10–$20

Wood filler or putty

$10–$25

Fine sandpaper

$5–$15

Protective finish (small can)

$20–$40

Soft cloths and applicators

$10–$15

For most small jobs, you’re looking at $50–$100 in materials, which is a fraction of what a professional callout might cost.

Risks and Common DIY Mistakes

Here’s where things can go sideways. The most common DIY mistakes we see are:

  • Color mismatch : stain markers rarely match the exact tone of an aged floor, leaving an obvious patch
  • Over-sanding a small area: which creates a dip that catches light differently than the rest of the floor
  • Using the wrong filler for the wood species: leading to it cracking or shrinking later
  • Treating water damage like a cosmetic problem: when the real issue is moisture trapped beneath the surface

That last one is the big one. A plank that looks fine after drying out can still warp again months later if the underlying moisture source wasn’t addressed. If you’re dealing with anything beyond a surface-level fix, it’s worth getting a second opinion before you start sanding.

We’ve seen this play out more than once. A homeowner notices a small water stain near the dishwasher, sands it down, and applies a fresh coat of finish. It looks great for a few weeks. Then the cupping comes back, sometimes worse than before, because the moisture underneath was never fully dried out or addressed. What started as a $50 touch-up job turns into a $400 repair once the boards actually need to be pulled up and replaced. This is exactly why understanding the type of damage matters more than the size of it.

There’s also a learning curve most people underestimate. Matching stain color sounds simple until you’re standing in the hardware store aisle holding three different “oak” stains that all look slightly different under store lighting than they will on your actual floor. Testing on a hidden section first, like inside a closet, can save you from a patch that stands out every time you walk through the room.
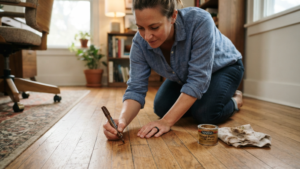
DIY Hardwood Floor Repair

Professional Hardwood Floor Repair: When Expertise Matters

Some damage just isn’t a weekend project, and that’s okay. Knowing when to bring in a pro can actually save you money in the long run.

What Professional Repair Services Include

A professional repair typically covers a lot more ground than a DIY fix, including:

  • Full assessment of the damage and its root cause (not just the visible symptoms)
  • Board or plank replacement when wood is beyond saving
  • Precise color and stain matching using professional-grade products
  • Structural repairs for loose boards or subfloor issues
  • Moisture testing before any refinishing begins

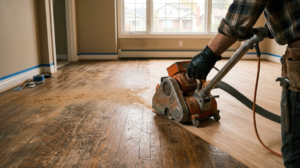
Many professional teams also use dustless sanding equipment, which contains airborne particles far better than a rented sander from the hardware store. If dust and mess are a concern for your household, our page on dustless hardwood floor refinishing explains how that process works.

Professionals also bring something you can’t rent at the hardware store: pattern recognition. After enough years on the job, an experienced technician can look at a warped board and tell within minutes whether it’s from a slow leak, seasonal humidity swings, or a one-time spill. That diagnosis matters, because fixing the symptom without fixing the cause just means you’ll be back here again next year. It’s the difference between patching a problem and actually solving it.

The same goes for wood species. Oak behaves differently than maple under a sander. Older reclaimed wood behaves differently than newer engineered planks. A professional adjusts technique and grit sequence based on what’s actually underfoot, which is nearly impossible to know without hands-on experience.

Benefits of Hiring a Professional

The advantages go beyond just “it looks nicer.” Professional repair usually means:

  • Longer-lasting results : properly sanded and sealed repairs tend to hold up for years, not months
  • Consistent color matching: especially tricky on older or sun-faded floors
  • Faster turnaround : most repairs are done in a day or two, not spread across several weekends
  • Warranty coverage: so if something isn’t right, it gets fixed at no extra cost
  • Fewer hidden surprises: since professionals know how to spot subfloor or moisture issues before they become bigger problems

Reputable flooring professionals also follow practices aligned with the National Wood Flooring Association, which sets the benchmark for sanding, finishing, and repair standards across the industry. That’s not something a DIY job can replicate with a rented sander and a YouTube tutorial.
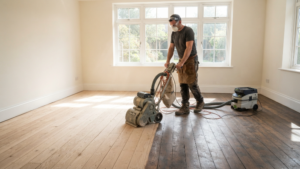
Professional Hardwood Floor Repair

DIY vs Professional Hardwood Floor Repair: Cost Comparison

Cost is usually the first question homeowners ask, so let’s break it down honestly.

Factor

DIY Repair

Professional Repair

Small scratch/scuff fix

$50–$100

$150–$300 (service call minimum)

Dent repair

$20–$50

Included in service call

Plank replacement (per board)

$30–$80 (materials only, high risk of mismatch)

$80–$200 (materials + labor, matched finish)

Water damage repair

Not recommended DIY

$300–$1,500+ depending on extent

Risk of redo cost

High

Low

DIY looks cheaper on paper, and for small cosmetic fixes, it usually is. But once you factor in the cost of materials that don’t get used correctly, or a professional having to fix a botched DIY attempt, the savings shrink fast. We’ve seen homeowners spend more redoing a failed DIY dent repair than they would have spent calling a professional in the first place.

DIY vs Professional Hardwood Floor Repair: Pros and Cons


Pros

Cons

DIY

Lower upfront cost, flexible timing, hands-on satisfaction

Risk of color mismatch, limited tools, no warranty, potential for permanent damage

Professional

Expert results, warranty protection, faster completion, handles hidden issues

Higher upfront cost, requires scheduling

How Long Does Each Option Actually Take?

Time is another factor people tend to underestimate, especially with DIY projects that sound quick in theory.

Repair Type

DIY Timeline

Professional Timeline

Surface scratch touch-up

1–2 hours, plus drying time

Rarely booked alone, usually bundled with other work

Dent repair

30 minutes to 1 hour

Same day, included in service call

Single plank replacement

Half a day to a full day, plus trial and error

2–4 hours

Water damage repair

Not recommended, can take several failed attempts

1–3 days depending on drying and curing

Notice that even “quick” DIY jobs often come with hidden time costs, like a second trip to the hardware store for the right stain shade or extra drying time because the first coat didn’t cure evenly. Professionals build that buffer into their process from the start, so there are fewer surprises along the way.

How to Decide Between DIY and Professional Hardwood Floor Repair

At this point you’re probably wondering which camp your situation falls into. Here’s a simple way to think it through.

Questions to Ask Yourself

  • Is the damage purely cosmetic, or does it affect the wood’s structure?
  • Have you seen any signs of water involvement, even in the past?
  • Is the affected area larger than a couple of square feet?
  • Do you have prior experience with wood finishing or staining?
  • Would a mismatched patch bother you, or is this a low-visibility area like a closet?

If you answered “yes” to structural damage, water involvement, or a large affected area, professional repair is the safer route. Small, cosmetic, low-visibility fixes are where DIY tends to shine.

When to Call a Professional Right Away

Some situations shouldn’t wait for a DIY attempt at all:

  • Cupping, buckling, or visible warping
  • A musty smell near the damaged area (possible moisture trapped underneath)
  • Squeaking or movement when you walk across a section of floor
  • Damage that’s already been “fixed” once and has come back
  • Older homes where the finish history or wood species is unknown

Hardwood Floor Repair vs Refinishing: What’s the Difference?

It’s worth mentioning that repair and refinishing aren’t always the same thing, and sometimes one leads to the other. Repair fixes specific damaged spots. Refinishing sands and recoating the entire floor for a uniform, like-new look.

If your damage is spread across multiple rooms or the finish is worn through in several places, a full hardwood floor refinishing might actually be the more cost-effective option compared to patching multiple spots individually. We’ve also put together a breakdown of hardwood floor polishing vs refinishing if you’re trying to figure out which service actually matches your floor’s condition.

Preventing Future Hardwood Floor Damage

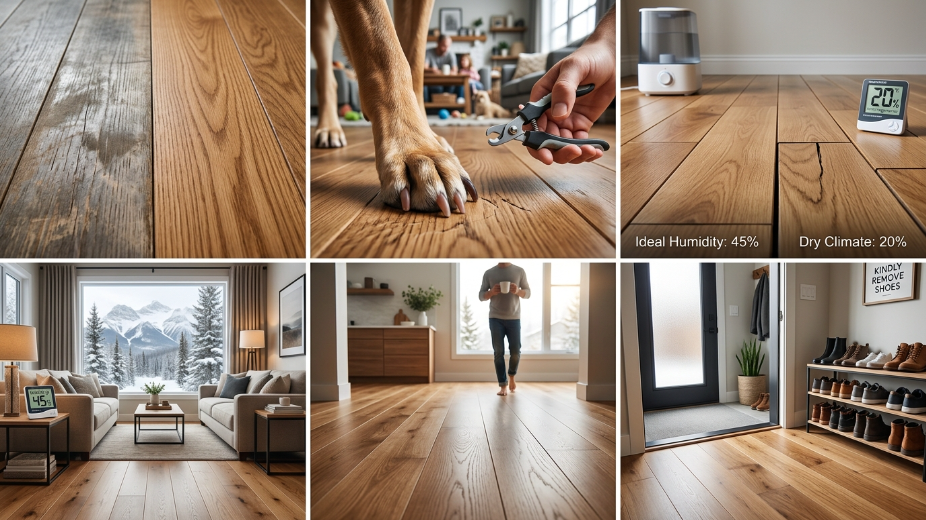
Whichever route you choose this time, a little prevention goes a long way toward avoiding a repeat repair:

  • Use felt pads under furniture legs
  • Keep humidity levels stable, especially through Alberta’s dry winters
  • Wipe up spills immediately instead of letting them sit
  • Place mats at entryways to catch grit before it scratches the finish
  • Trim pet nails regularly if you have dogs or cats on hardwood

Small habits like these can add years to the life of a repair, whether it was done by you or a professional.

It’s also worth doing a quick seasonal check twice a year. Walk through your home and look for early warning signs: a slightly raised board near a window, a dull patch that never seems to shine no matter how much you clean it, or a faint musty smell in one corner of a room. Catching these early almost always means a smaller, cheaper fix. Waiting until the damage is obvious usually means a bigger repair bill later, regardless of whether you go the DIY or professional route.

Final Thoughts

Choosing between DIY vs professional hardwood floor repair really comes down to the size and type of damage you’re dealing with. Small scratches and shallow dents are usually safe to handle yourself. Water damage, structural issues, and larger repairs are best left to people who do this every day.

If you’re still not sure which category your floor falls into, that’s exactly what we’re here for. Our team offers honest assessments, so you’re never guessing whether a repair will hold up. We also serve homeowners in nearby communities, including hardwood floor repair in Priddis, so help is closer than you might think.

Ready to get your floors looking their best again? Reach out to our hardwood floor repair team for a free assessment and honest recommendation, no pressure, just an expert opinion on what your floor actually needs.
It can be, especially for small cosmetic touch-ups before a tenant moves in. Just keep in mind that landlords often want a quicker, more uniform result, which usually favors a professional fix for anything beyond a light scratch.

Yes, in most cases. Spot repairs and single-plank replacements are common and don't require refinishing the entire room, as long as the surrounding boards are in good shape.

Water damage usually shows as cupping (edges higher than the center of the board), discoloration, or a slightly soft feel underfoot. General wear tends to look more like dullness or fine scratching spread evenly across the floor.

It can, depending on the manufacturer. Many hardwood warranties require that repairs and refinishing be performed by a certified professional, so it's worth checking your paperwork before attempting a DIY fix on a newer floor.

Most spot repairs are completed in a single day. Larger jobs involving plank replacement or water damage restoration may take two to three days, depending on drying and curing time for the finish.

Repair is almost always cheaper than replacement, unless the damage covers a large percentage of the floor or the subfloor itself is compromised. A professional assessment can tell you which option makes more financial sense for your specific situation.

How to choose a hardwood flooring contractor in Calgary

How to choose a hardwood flooring contractor in Calgary

How to choose a hardwood flooring contractor in Calgary Learn how to choose a hardwood flooring contractor in Calgary by checking experience, insurance, past projects and written quotes before you hire. Contact Us Your floors will be under your feet for 20 years or more. The person you hire to…

Hardwood Flooring Cost Calgary: 2026 Price & Installation Guide

Hardwood Flooring Cost Calgary: 2026 Price & Installation Guide

Hardwood Flooring Cost in Calgary: What You’ll Actually Pay Planning your project but unsure about hardwood flooring cost in Calgary? This guide explains installation, refinishing, and repair expenses to help you plan your flooring budget. Contact Us If you’re planning to install, repair, or refinish hardwood flooring in Calgary, understanding…

Matte vs Gloss Hardwood Flooring | Arbutus Hardwood

Matte vs Gloss Hardwood Flooring | Arbutus Hardwood

Matte vs gloss hardwood flooring: which finish is right for your home? Matte vs gloss hardwood flooring, see which finish suits Calgary homes best for durability, style & upkeep. Get expert advice from Arbutus Hardwood. Contact Us Matte vs gloss hardwood flooring feels like a small decision until you’re standing…

    DIY vs Professional Hardwood Floor Repair: Which Should You Choose? 3

    9 Hardwood Installation Mistakes That Wreck Calgary Floors

    9 Hardwood Installation Mistakes That Wreck Calgary Floors

    Calgary’s harsh weather makes hardwood floors especially prone to damage from hardwood installation mistakes. From skipping acclimation to using the wrong underlayment, these errors cause buckling, gaps, and costly repairs. Here are the 9 most common hardwood installation mistakes that wreck Calgary floors  and how to avoid them.

    A new hardwood floor is one of the best upgrades you can make to a home. It looks warm, it adds real value, and it lasts for decades when it’s done right.

    The problem is that most hardwood installation mistakes don’t show up on day one. They show up three months later, when the heat kicks on and the wood starts telling you the truth about how it was installed.

    We’ve spent over 30 years fixing floors in Calgary homes, and almost every callback traces back to one of the same handful of errors. Some are made by inexperienced DIYers. A surprising number are made by installers who skipped a step to save time. Either way, the fix is almost always more expensive than doing it right the first time.

    Here are the nine hardwood installation mistakes we see most often, why they happen, and what to do instead. Whether you’re hiring a professional crew or tackling part of the project yourself, understanding these hardwood installation mistakes before work begins can save you thousands of dollars and a lot of frustration down the road.

    1. Skipping or Rushing the Acclimation Period

    Hardwood is not like tile or vinyl. It’s a natural material that keeps reacting to the air around it long after it’s been milled and boxed.

    When boards go straight from a delivery truck to your subfloor without time to adjust, they’re still carrying the humidity level of the warehouse or the truck they came from. That almost never matches the humidity of your living room.

    What goes wrong: If the wood is drier than your home, it will absorb moisture after installation and swell, causing the boards to buckle or push against each other. If it’s more humid than your home, the opposite happens: it shrinks, and you end up with gaps you can slide a coin into.

    The fix: Boards need to sit in the actual room where they’ll be installed for at least three to five days before work begins. In a Calgary winter, when indoor air can drop to 20 to 30 percent relative humidity, this step matters even more than it does in milder climates.

    This is one of the first things a good installer checks before touching a single plank. If you’re comparing quotes, ask how the acclimation period is handled. It’s a fair question, and any experienced hardwood floor installation team should have a clear answer.

    Moisture Damage & Buckling

    2. Ignoring Subfloor Preparation

    A hardwood floor is only as good as what’s underneath it. This is the step that gets rushed most often, because it’s invisible once the planks go down.

    What goes wrong: An uneven, dirty, or structurally weak subfloor telegraphs straight through to the finished surface. You’ll notice hollow-sounding spots when you walk across the room, squeaks that never go away, and in bad cases, cracked joints between boards within the first year.

    The fix: Before installation starts, the subfloor should be checked for flatness, cleaned, and repaired where needed. Self-leveling compound handles minor dips. Larger structural issues need to be addressed before flooring goes anywhere near the room.

    Skipping this step is one of the most common reasons homeowners end up calling us for repairs a year or two after a rushed install. If your floor already has that hollow, springy feeling, it’s worth reading up on the signs your hardwood floor needs repair before the problem gets worse.

    3. Skipping Moisture Testing

    This is the mistake that causes the most expensive damage, and it’s also the easiest one to prevent.

    What goes wrong: Wood doesn’t have to look wet to hold too much moisture. A concrete slab can feel perfectly dry to the touch and still be holding enough residual moisture to ruin a floor. When hardwood is installed over a subfloor with hidden moisture, you often see cupping, where the edges of each board rise higher than the center. In worse cases, mold can start growing underneath the surface where nobody sees it until the smell shows up.

    The fix: A professional moisture meter should be used on both the hardwood itself and the subfloor before installation begins. The readings need to fall within the range the manufacturer recommends, not just whatever feels close enough. This step follows the same standards outlined in the NWFA installation guidelines, which is the industry reference most professional installers use to set moisture and acclimation benchmarks.

    If your basement or main floor sits over concrete, this step is non-negotiable, especially with Calgary’s seasonal humidity swings between a dry winter and a wetter summer.

    4. Forgetting Expansion Gaps

    Wood moves. It always has, and it always will, no matter how good the finish looks on installation day.

    What goes wrong: When planks are installed too tightly against the walls, there’s nowhere for the wood to go when it naturally expands with the seasons. The pressure builds along the perimeter until the entire floor has no choice but to buckle or lift somewhere in the middle of the room.

    The fix: A consistent gap, usually around half an inch, needs to be left around the perimeter of every room. Spacers keep this even during installation, and the gap gets covered later by baseboards, so nobody ever sees it. It’s a small detail that prevents one of the most dramatic and expensive failures a hardwood floor can have.

    5. Choosing the Wrong Installation Method for the Subfloor

    Not every hardwood installation method works with every subfloor, and this is a mistake we see even from installers who should know better.

    What goes wrong: Nailing hardwood into a concrete slab isn’t possible without the right underlayment, and gluing a floating floor system down defeats the purpose of the design. When the method doesn’t match the subfloor, adhesion fails, boards shift over time, and the floor starts making noise within months.

    The fix: The subfloor type should decide the method, not personal preference or whatever the installer is most comfortable doing. Wood subfloors typically support nail-down installation. Concrete usually calls for glue-down or a floating system. If you’re weighing your options, our guide on choosing between nail-down and glue-down methods breaks down which one fits your situation.

    6. Choosing the Wrong Wood Type for Calgary’s Climate

    This mistake happens before installation even starts, at the point where the wrong product gets ordered.

    What goes wrong: Solid hardwood is a beautiful, long-lasting product, but it’s more sensitive to humidity swings than engineered hardwood. In a climate like Calgary’s, where indoor air can be extremely dry through the winter heating season, solid wood installed without the right precautions is more prone to gapping. Homeowners who don’t know this end up disappointed by a floor that looked perfect in the showroom.

    The fix: Engineered hardwood’s layered construction resists movement better, which makes it a smart choice for basements, homes with radiant heat, and rooms with more humidity swings. Solid hardwood still works beautifully in the right rooms with the right humidity control. The key is matching the product to the space. Our breakdown of solid vs. engineered hardwood for Calgary homes covers this in more detail if you’re still deciding.

    7. Buying Low-Quality or Wrong-Grade Material

    Sometimes the mistake isn’t the installation at all. It’s what got installed.

    What goes wrong: Cheaper hardwood often uses thinner wear layers, inconsistent milling, or lower-grade wood that doesn’t hold up to daily traffic. It might look fine for the first year, then start showing wear, warping, or finish damage well before it should.

    The fix: Buying from a supplier who stands behind their product matters as much as who installs it. This is one of the reasons we handle sourcing quality hardwood flooring directly for our clients instead of leaving it to chance. If you’re shopping around, our guide to trusted hardwood flooring brands in Calgary is a good starting point before you commit to a product.

    8. Poor Nailing or Gluing Technique

    This one is purely about workmanship, and it’s a big reason experience matters more than a lower quote.

    What goes wrong: Too few nails, inconsistent spacing, or glue that doesn’t make full contact with the subfloor all lead to the same result: planks that shift under weight. Over time, that movement creates gaps, and the floor starts to pop or squeak every time someone walks across it.

    The fix: Nail spacing should follow industry standards, generally every 6 to 8 inches, and glue-down installations need full, even adhesive coverage between the subfloor and the plank. This is a detail that’s easy to rush and hard to fix later without pulling up boards.

    9. Rushing the Installation Timeline

    The last mistake ties several of the others together: trying to compress a job that needs time.

    What goes wrong: Acclimation gets cut short. Moisture readings get skipped because there’s no time to wait for them. Subfloor repairs get glossed over because the schedule doesn’t allow for delays. A rushed installation almost always means one of the earlier steps on this list got shortcut somewhere along the way.

    The fix: A realistic timeline protects every other step in the process. If you’re planning a renovation and trying to figure out scheduling, it helps to know how long hardwood installation actually takes before you lock in a move-in date or a deadline that forces shortcuts.

    Why Calgary’s Climate Makes These Mistakes More Costly

    Every one of these hardwood installation mistakes can happen anywhere. But a handful of them do more damage, faster, in a city like Calgary than they would in a more humid climate.

    Winters here are long, dry, and cold enough that furnaces run for months at a stretch. That constant heat pulls moisture out of the air, and indoor humidity can drop into the 20 to 30 percent range without a homeowner ever noticing, since it doesn’t feel uncomfortable the way summer humidity does. Wood doesn’t get that pass. It reacts to every percentage point.

    Summers bring the opposite swing. Humidity climbs, sometimes sharply after a wet spell, and wood that wasn’t given proper expansion room during installation has nowhere to go but up.

    This back-and-forth is exactly why acclimation, moisture testing, and expansion gaps matter more here than they might in a milder region. A mistake that might only cause a minor issue in a stable climate can turn into a full board replacement after one Calgary winter.

    It’s also why we lean toward engineered hardwood for a lot of local installations, and why we take humidity readings seriously on every job, not just the ones over concrete. Thirty years of watching how local homes behave through the seasons has taught us which shortcuts simply don’t hold up here, even if they’d be fine somewhere else.

     Common Mistakes at a Glance

    Common Mistakes at a Glance

    Mistake

    Common Consequence

    Prevention

    Skipped acclimation

    Buckling or gapping

    3–5 day on-site acclimation

    Poor subfloor prep

    Hollow spots, squeaks

    Level, clean, and repair subfloor first

    No moisture testing

    Cupping, mold

    Moisture meter readings before install

    No expansion gaps

    Buckling at perimeter

    1/2 inch gap, hidden by baseboards

    Wrong installation method

    Adhesion failure, shifting

    Match method to subfloor type

    Wrong wood type

    Gapping in dry climates

    Engineered hardwood for humidity-prone rooms

    Low-grade material

    Premature wear

    Buy from a trusted supplier

    Poor nailing or gluing

    Popping, squeaking

    Follow industry nail/glue spacing standards

    Rushed timeline

    All of the above, at once

    Build a realistic schedule

    What to Do If Your Hardwood Was Already Installed Incorrectly

    If your floor is already down and something feels off, whether that’s a squeak that won’t quit, a board that’s started to cup, or gaps that seem to be getting wider, it’s worth having it looked at before the damage spreads to more of the floor. Small issues caught early are usually a repair. Left alone, they tend to turn into a full replacement.

    We offer hardwood floor repair services across Calgary for exactly this situation, and in most cases, a trained eye can tell within minutes whether the problem is cosmetic or structural.

    The Bottom Line

    Most hardwood installation mistakes happen before a single board is nailed or glued down. Skipped acclimation, untested moisture levels, and rushed subfloor prep cause more damage over time than almost anything that happens during the actual installation day.

    The good news is that every mistake on this list is preventable. It just takes the right process, the right materials for your home’s climate, and an installer who won’t cut corners to hit a deadline.

    If you’re planning a new hardwood installation in Calgary, or you’re already noticing signs that something wasn’t done right the first time, our team at Arbutus Hardwood has spent over 30 years getting it right for homeowners across the city. Contact us today for a free quote, and let’s make sure your floor is one that lasts.

    Most manufacturers recommend three to five days, but in Calgary's dry winter months, some products may need closer to a full week. The goal is for the wood's moisture content to match the room, not just for a certain number of days to pass.

    Yes, but it takes more planning. Indoor heating dries the air significantly, so humidification during and after installation is often necessary to keep boards from shrinking too much once the season shifts.

    Look for gaps that seem larger than a coin's width, edges of boards sitting higher than the center, persistent squeaking, or areas that sound hollow when you walk on them. Any of these are worth a professional inspection.

    It depends on the scope. Simple, small rooms with floating floor systems can be manageable for an experienced DIYer. Glue-down installations over concrete, wide-plank solid hardwood, and anything involving moisture-prone subfloors are much harder to get right without training and the proper tools.

    Most manufacturers recommend keeping indoor relative humidity between 35 and 55 percent year-round. In Calgary, that usually means running a humidifier through the winter and, in some homes, a dehumidifier during humid summer stretches.

    It varies widely depending on the extent of the damage. A few boards with gapping or minor cupping can often be repaired without pulling up the whole floor. Widespread moisture damage or subfloor issues usually cost more, since those repairs mean removing larger sections to fix the root cause.

    How to choose a hardwood flooring contractor in Calgary

    How to choose a hardwood flooring contractor in Calgary

    How to choose a hardwood flooring contractor in Calgary Learn how to choose a hardwood flooring contractor in Calgary by checking experience, insurance, past projects and written quotes before you hire. Contact Us Your floors will be under your feet for 20 years or more. The person you hire to…

    Hardwood Flooring Cost Calgary: 2026 Price & Installation Guide

    Hardwood Flooring Cost Calgary: 2026 Price & Installation Guide

    Hardwood Flooring Cost in Calgary: What You’ll Actually Pay Planning your project but unsure about hardwood flooring cost in Calgary? This guide explains installation, refinishing, and repair expenses to help you plan your flooring budget. Contact Us If you’re planning to install, repair, or refinish hardwood flooring in Calgary, understanding…

    Matte vs Gloss Hardwood Flooring | Arbutus Hardwood

    Matte vs Gloss Hardwood Flooring | Arbutus Hardwood

    Matte vs gloss hardwood flooring: which finish is right for your home? Matte vs gloss hardwood flooring, see which finish suits Calgary homes best for durability, style & upkeep. Get expert advice from Arbutus Hardwood. Contact Us Matte vs gloss hardwood flooring feels like a small decision until you’re standing…
      9 Hardwood Installation Mistakes That Wreck Calgary Floors 7

      Red Oak vs White Oak Flooring: Best Choice for Calgary Homes

      Red Oak vs White Oak Flooring: Which One Is Right for Your Calgary Home?

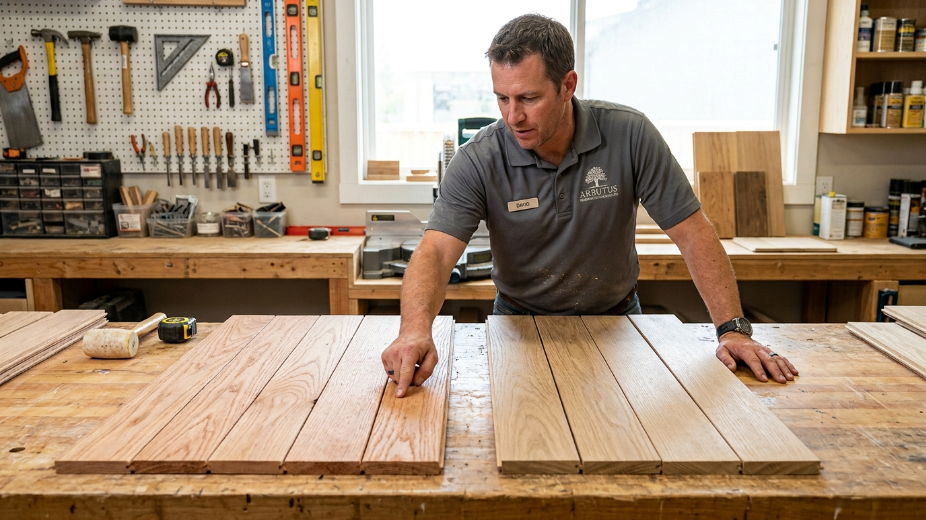
      If you’re renovating or building a home in Calgary, chances are you’ve landed on the same question almost every homeowner faces at some point: red oak vs white oak flooring, which one should you actually pick?

      It sounds like a small decision until you’re standing in a showroom staring at two boards that look almost identical. The truth is, the differences go a lot deeper than color. Hardness, grain pattern, moisture resistance, cost, and even how well the wood handles Calgary’s dry winters and humid summer swings all come into play.

      This guide breaks it all down in plain language, so by the end you’ll know exactly which oak fits your home, your budget, and your lifestyle. And if you’d rather skip the research and go straight to browsing options, our hardwood flooring supply team can walk you through samples of both species in person.

      Red Oak vs White Oak: The Quick Comparison

      Before we go deep into each category, here’s a snapshot to get you oriented.

      Feature

      Red Oak

      White Oak

      Color

      Warm, reddish-amber

      Cooler, beige to olive-brown

      Grain pattern

      Bold, open, swirling

      Tighter, straighter, more subtle

      Janka hardness

      1,290

      1,360

      Water resistance

      Moderate

      Higher

      Best for

      Traditional homes, budget renovations

      Modern homes, kitchens, high-moisture areas

      Average cost per sq ft

      $7–$9

      $11–$13

      Staining behavior

      Absorbs stain quickly, can look blotchy

      Takes stain evenly, more predictable results

      Now let’s unpack why each of these numbers matters for a Calgary home specifically.

      Color and Appearance

      Red Oak hardwood flooring

      Red Oak’s Warm, Reddish Tones

      Red oak leans into pink and amber undertones. Fresh off the mill, it can look almost peachy, and it deepens into a warmer reddish-brown as it ages and gets exposed to sunlight. If your home has a lot of warm-toned trim, oak cabinetry, or a traditional design style, red oak tends to blend right in without fighting the existing palette.

      White Oak’s Cool, Neutral Palette

      White oak sits on the cooler end of the spectrum, with tones ranging from light beige to a deeper olive-brown. It photographs beautifully in the gray-and-white interiors that have dominated new Calgary builds over the past several years. If you’re going for a Scandinavian, farmhouse, or modern minimalist look, white oak is usually the safer bet.

      One thing worth knowing: once either wood is stained dark, the color difference becomes much harder to spot with the naked eye. If you’re matching new flooring to an existing floor, bring a sample to your contractor rather than relying on memory.

      Grain Pattern Differences

      Why Red Oak Grain Looks Busier

      Red oak has larger, more open pores, which creates a grain pattern full of movement, swirls, and the occasional wavy line. This busier look is actually a practical advantage. It hides scratches, dents, and everyday wear far better than a smoother wood, which makes it a smart pick for households with kids, dogs, or a lot of foot traffic.

      Why White Oak Grain Looks Cleaner

      White oak’s grain runs tighter and straighter, with fewer visual distractions. It gives a calmer, more uniform look across a large floor area, which is why so many designers reach for it in open-concept spaces. The tradeoff is that scuffs and scratches show up a little more noticeably over time.

      Hardness and Durability

      This is where a lot of homeowners assume the two woods are basically the same. They’re close, but not identical.

      On the Janka hardness scale, red oak measures around 1,290 while white oak comes in at roughly 1,360. That’s about a 5 to 10 percent difference, which doesn’t sound dramatic, but it adds up over years of daily use.

      White oak’s tighter cell structure also makes it slightly more resistant to denting, which matters if you’ve got heavy furniture, dropped kitchenware, or an active household. Red oak still performs perfectly well for most homes. It’s simply a touch softer.

      Which Holds Up Better in High-Traffic Homes

      Tradesman checking

      For entryways, hallways, and living rooms that see constant foot traffic, either species can last decades with proper care. But if you have large dogs, frequent furniture moves, or you’re flooring a rental property, white oak’s extra hardness gives you a bit more of a buffer against wear.

      Water and Moisture Resistance

      Calgary’s climate swings between bone-dry winters and occasionally humid summer stretches, and that matters more for hardwood than most people realize.

      White oak has a closed-pore structure, meaning it’s naturally more resistant to moisture absorption. That’s a big reason it’s the preferred choice for kitchens, mudrooms, and entryways where spills and melting snow boots are a daily reality.

      Red oak’s more open pores make it slightly more prone to moisture absorption, so it’s better suited to bedrooms, living rooms, and other lower-moisture areas of the home.

      Best Rooms for White Oak

      • Kitchens
      • Entryways and mudrooms
      • Bathrooms with proper ventilation
      • Basements with engineered options

      Best Rooms for Red Oak

      • Bedrooms
      • Living rooms
      • Dining rooms
      • Home offices

      Cost Comparison in Calgary
      Budget is often the deciding factor, and it’s a fair one. Here’s roughly what you can expect to pay per square foot for each species in the Calgary market (all pricing in CAD).

      Type

      Red Oak (CAD)

      White Oak (CAD)

      Entry-level engineered

      $4 – $5 / sq. ft.

      $6 – $7 / sq. ft.

      Mid-grade solid

      $7 – $9 / sq. ft.

      $9 – $11 / sq. ft.

      Premium wide plank

      $9 – $10 / sq. ft.

      $11 – $13 / sq. ft.

      Note: The prices above reflect material supply costs in Canadian Dollars (CAD). Professional installation labor in the Greater Calgary area typically adds an additional $3 to $5 per square foot depending on subfloor preparation and layout complexity.

      White oak typically runs 20 to 40 percent more expensive than red oak of a comparable grade, largely because it’s slower growing and in higher demand for furniture, cabinetry, and whiskey barrels alongside flooring. If you’re working with a tighter renovation budget, red oak delivers excellent value without sacrificing much in performance. To see current local supply pricing and available grades, our team put together a breakdown of the best hardwood flooring brands in Calgary worth checking before you buy.

      Solid vs Engineered: Which Oak Type Fits Your Home

      Both red oak and white oak come in solid and engineered formats, and this decision matters just as much as the species itself.

      Solid hardwood is a single piece of wood from top to bottom. It can be sanded and refinished many times over its lifespan, but it’s more sensitive to humidity swings and isn’t recommended for basements or below-grade installations.

      Engineered hardwood has a real wood veneer layered over a plywood core, which makes it far more stable in fluctuating temperature and humidity. It’s a great option for Calgary basements, condos, or homes with in-floor heating.

      If you’re unsure which format suits your space, our detailed guide on solid vs engineered hardwood in Calgary walks through the pros, cons, and cost differences of each.

      Workability and Installation

      Contractors notice the difference between these two species the moment they start cutting.

      Red oak is softer and easier to work with. It cuts cleanly, doesn’t dull blades as quickly, and is more forgiving during installation. White oak’s extra hardness and density can cause blades to burn or chatter if they’re even slightly dull, and the wood is more prone to splintering if it’s fed into a saw too fast.

      For homeowners, this mostly affects labor time and, occasionally, installation cost. Either species installs beautifully in the hands of an experienced flooring crew. If you’re planning a new install, our hardwood floor installation team can advise on the right underlayment and layout for your specific home.

      Staining and Finishing Differences

      Here’s something a lot of DIY guides skip over: red oak and white oak don’t take stain the same way.

      Red oak’s larger pores soak up stain fast, which can create a blotchy, uneven finish if it isn’t sealed with a pre-stain conditioner first. White oak’s tighter grain takes stain more evenly, which is part of why it photographs so consistently in listing photos and design magazines.

      The type of finish matters too. Oil-based finishes tend to bring out warmer undertones and amber over time, while water-based finishes stay clearer and truer to the wood’s natural color for longer. If you’re trying to decide, our comparison of oil vs water-based floor finish breaks down which option suits which look.

      Refinishing and Long-Term Maintenance

      Both red oak and white oak can be sanded and refinished multiple times over their lifespan, which is one of the biggest advantages of solid hardwood over other flooring types. On average, a well-maintained oak floor can be refinished every 7 to 10 years, depending on foot traffic and how deep the original wear layer is.

      White oak’s added hardness means it typically goes a little longer between refinishing jobs. Red oak may need attention slightly sooner in high-traffic homes, but the process itself is identical for both species. If your floors are looking dull, scratched, or dated, our hardwood floor refinishing service can bring either species back to life without a full replacement.

      Custom Flooring Options for Red Oak and White Oak

      Both species also work beautifully in custom applications; herringbone patterns, wide plank designs, mixed-width layouts, and matched staircases are all popular right now in Calgary new builds and renovations. Red oak’s warmer tone suits rustic and traditional custom designs, while white oak leans into modern, minimalist layouts.

      If you have a specific vision in mind, our custom hardwood flooring service can source and install either species in a pattern that’s built around your space, not a generic showroom layout.

      Choosing the Right Oak for Calgary’s Climate, City by City

      Calgary’s weather and architectural styles vary across the region. Here is how local homeowners and builders typically choose between red oak and white oak across different communities:

      • Urban Calgary & Modern Suburbs (Airdrie, Chestermere): White oak is the top choice here, perfectly matching the modern open-concept layouts, gray/neutral color palettes, and contemporary designs of newer builds. Red oak remains popular in Calgary’s established character homes.
      • Mountain Communities (Canmore, Banff, Cochrane): In mountain environments with more dramatic humidity swings, white oak’s superior moisture resistance makes it the preferred long-term investment. Cochrane homes frequently mix both depending on whether the design is rustic or modern.
      • Traditional Towns & Value Renovations (Okotoks, High River, Strathmore): Red oak dominates these areas due to its warmth, traditional aesthetic, and exceptional cost-per-square-foot value for mid-to-large family homes.
      • Acreages & Custom Builds (De Winton, Springbank, Bearspaw, Bragg Creek): Spacious rural properties often feature red oak for its rich, rustic grain patterns. However, modern custom builds in Bearspaw, Springbank, and design-forward communities like Harmony lean toward wide-plank white oak.
      • Small Towns & Foothills (Langdon, Diamond Valley, Aldersyde): Red oak continues to be the practical, budget-friendly favorite for durable home upgrades, with white oak selected mainly for targeted kitchen and entryway renovations.

      Wherever you’re located across Southern Alberta, the right choice ultimately comes down to your home’s design aesthetic, your budget, and the specific moisture demands of each room.

      Red Oak vs White Oak: Pros and Cons


      Pros

      Cons

      Red Oak

      More affordable, forgiving grain hides wear, easier to work with, warm classic look

      Softer, more moisture-prone, can stain unevenly

      White Oak

      Harder, better moisture resistance, even stain absorption, modern neutral tone

      More expensive, harder to cut and install, shows scratches more

      Common Mistakes Homeowners Make When Choosing Oak Flooring

      • Choosing based on a small sample. Wood color shifts under different lighting, so always view samples in your actual room, at different times of day.
      • Skipping the pre-stain conditioner on red oak. This is the number one cause of blotchy finishes.
      • Installing solid hardwood in a basement. Both species need engineered formats below grade to handle humidity properly.
      • Ignoring the room’s moisture level. Placing red oak in a kitchen or mudroom without extra protection can shorten its lifespan.
      • Assuming price equals quality. Grade, plank width, and finish matter just as much as species when it comes to how a floor performs over time.

      Final Thoughts

      When it comes down to red oak vs white oak flooring, there’s no universal right answer. Red oak brings warmth, character, and a friendlier price point, while white oak delivers a harder, more moisture-resistant floor with a clean, modern look. The best choice depends on your home’s style, your budget, and which rooms you’re flooring.

      If you’re still on the fence, the easiest way to decide is to see and feel both species in person. Our hardwood flooring supply showroom carries a full range of red oak and white oak options, from entry-level engineered boards to premium wide plank solid wood, and our team can help you find the right fit for your Calgary home and budget. Reach out today to book a consultation or request a quote.

      White oak currently has a slight edge in resale appeal because it matches the neutral, modern aesthetic most buyers are searching for right now. That said, a well-maintained red oak floor in good condition still adds strong value, especially in traditional-style homes.

      Yes, many homeowners use white oak in main living areas and red oak in bedrooms or secondary spaces. Just be intentional about the transition points, like doorways or hallways, so the change feels deliberate rather than accidental.

      Yes, especially under an oil-based finish and direct sunlight. If you want to avoid an orange cast years down the road, ask about water-based finishes or UV-resistant coatings.

       For kitchens, entryways, and high-moisture areas, most flooring professionals would say yes. For bedrooms and low-traffic rooms, red oak often delivers comparable performance at a lower price.


      With proper care and periodic refinishing, both red oak and white oak can last 50 to 100 years, making them one of the longest-lasting flooring investments available.

      Red oak has historically been more common due to lower cost and wider availability, but white oak has grown significantly in popularity over the past decade as Calgary's new-build design trends have shifted toward cooler, neutral palettes.

      How to choose a hardwood flooring contractor in Calgary

      How to choose a hardwood flooring contractor in Calgary

      How to choose a hardwood flooring contractor in Calgary Learn how to choose a hardwood flooring contractor in Calgary by checking experience, insurance, past projects and written quotes before you hire. Contact Us Your floors will be under your feet for 20 years or more. The person you hire to…

      Hardwood Flooring Cost Calgary: 2026 Price & Installation Guide

      Hardwood Flooring Cost Calgary: 2026 Price & Installation Guide

      Hardwood Flooring Cost in Calgary: What You’ll Actually Pay Planning your project but unsure about hardwood flooring cost in Calgary? This guide explains installation, refinishing, and repair expenses to help you plan your flooring budget. Contact Us If you’re planning to install, repair, or refinish hardwood flooring in Calgary, understanding…

      Matte vs Gloss Hardwood Flooring | Arbutus Hardwood

      Matte vs Gloss Hardwood Flooring | Arbutus Hardwood

      Matte vs gloss hardwood flooring: which finish is right for your home? Matte vs gloss hardwood flooring, see which finish suits Calgary homes best for durability, style & upkeep. Get expert advice from Arbutus Hardwood. Contact Us Matte vs gloss hardwood flooring feels like a small decision until you’re standing…
        Red Oak vs White Oak Flooring: Best Choice for Calgary Homes 11

        Best Hardwood Flooring Brands in Calgary (2026 Guide)

        Best Hardwood Flooring Brands in Calgary (2026 Guide)

        If you’re trying to find the best hardwood flooring brands in Calgary, you’ve probably noticed something frustrating fast: every showroom claims to sell “the best” hardwood. Walk into three different stores and you’ll hear three different answers, usually pointing toward whichever brand pays the highest margin.

        We wanted to give you something different. At Arbutus Hardwood, we’ve spent more than 30 years installing, refinishing, and supplying hardwood flooring across Calgary from historic renovations in Mount Royal to new builds in Mahogany and Springbank Hill. We’ve seen firsthand which brands actually hold up in this city’s dry winters and which ones start gapping, cupping, or checking within a couple of years. This guide breaks down the best hardwood flooring brands in Calgary based on real installation experience, not a sales pitch.

        What Makes a Hardwood Flooring Brand “the Best” for Calgary Homes

        Not every great hardwood brand is a great fit for Calgary. A floor that performs beautifully in a humid coastal city can shrink, crack, or gap here within a single winter if it wasn’t built with our climate in mind.

        Built for Calgary’s Dry Climate & Humidity Swings

        Calgary’s humidity swings hard between seasons. Summers can feel almost tropical after a rainstorm, while winter indoor air routinely drops below 20% to 25% relative humidity thanks to forced-air heating. Wood is a natural material, and it moves with moisture changes whether you want it to or not.

        • Ideal Indoor Relative Humidity (RH): Most hardwood manufacturers require maintaining 30% to 50% relative humidity year-round to protect your floor and preserve your warranty.
        • Core Construction: Look for multi-ply Baltic birch or quarter-sawn core construction that resists seasonal expansion and contraction.
        • Wear Layer Specifications: For engineered flooring in Calgary’s dry climate, aim for a dry-sawn wear layer of 3mm to 4mm or thicker to prevent dry-air surface checking.

        The brands worth your money account for this. They kiln-dry their lumber to the right moisture content, use stable core construction for engineered products, and back their claims with real warranty terms rather than vague promises.

        Real Wood Warranty and Quality Standards

        A brand’s warranty tells you a lot about how confident the manufacturer actually is in their product. Look for structural warranties of at least 25 years on solid wood and finish warranties that specifically mention wear-through protection, not just “satisfaction guaranteed” language.

        It also helps to know a brand meets recognized manufacturing benchmarks. Organizations like the National Wood Flooring Association set independent quality and installation standards that reputable manufacturers design their products around, which gives you a reference point beyond marketing copy.

        Top Hardwood Flooring Brands in Calgary (2026 Picks)

        Living room with hardwood flooring

        Here are the brands we consistently recommend to Calgary homeowners, based on durability, finish quality, and how well they perform once installed in real homes across the city.

        Mirage Hardwood Flooring

        Mirage is a Canadian manufacturer known for tight tolerances and a finish called Mirage Ultra-Matte, which resists scratches and fingerprints better than most standard urethane coatings. Their engineered lines are particularly well suited to Calgary basements and homes with in-floor heating, since the multi-ply construction resists seasonal movement.

        Preverco Hardwood Flooring

        Preverco controls its production from sawmill to finished plank, which shows in the consistency of their color and grain matching. This brand tends to work well for homeowners who want a specific, curated look throughout an open-concept main floor rather than a lot of natural variation.

        Lauzon Hardwood Flooring

        Lauzon builds its reputation on a proprietary finish called Titanium Shield, which holds up remarkably well against everyday scuffs from furniture and pets. It’s a strong pick if you have an active household and want a floor that still looks new after a few years of real use.

        Mercier Hardwood Flooring

        Mercier has been producing hardwood flooring in Quebec for generations, and their solid wood lines remain a favorite for homeowners planning to refinish their floors multiple times over the decades. If longevity through repeated sanding and refinishing matters to you, Mercier is worth a close look.

        Kentwood Flooring

        Kentwood focuses heavily on wide-plank and character-grade options, which have become increasingly popular in Calgary’s newer builds and renovations. Their engineered products are a solid choice for homes where you want a wide-plank aesthetic without the movement risk of solid wood in that width. If you’re after a layout or finish that isn’t available off the shelf, we can also build this out through our custom hardwood flooring service.

        Biyork Flooring

        Biyork offers strong value without cutting corners on construction quality, making it a popular choice for homeowners balancing style with budget. Their color and texture range fits well with the greige and warm-neutral tones currently trending in Calgary interior design.

        Brand Comparison at a Glance

        Brand

        Best For

        Construction Type

        Typical Warranty

        Mirage

        Basements, in-floor heating

        Solid & Engineered

        25–35 years

        Preverco

        Consistent, curated look

        Solid & Engineered

        25 years

        Lauzon

        Active households, pets

        Solid & Engineered

        25–30 years

        Mercier

        Long-term refinishing

        Solid

        25 years

        Kentwood

        Wide-plank, character grade

        Engineered

        25 years

        Biyork

        Budget-conscious style

        Engineered

        25 years

        Warranty terms vary by product line and can change, so always confirm the current warranty directly with your installer before purchasing.

        Solid vs. Engineered: Which Brand Type Wins in Calgary?

        Every brand on this list offers both solid and engineered options, and the right choice depends more on where in your home the floor is going than on the brand itself. Solid hardwood is the classic choice for main floors with stable humidity (maintained with a furnace humidifier at 30%–50% RH), while engineered construction handles Calgary’s dry-air swings and below-grade installations far more reliably.

        We go into much more detail on this in our breakdown of solid vs. engineered hardwood in Calgary, including which rooms in a typical Calgary home benefit from each type.

        How to Choose the Right Species and Brand for Your Home

        Once you’ve narrowed down a brand, species selection is the next big decision. Each species brings a different hardness rating, grain pattern, and price point to the table.

        Species

        Janka Hardness (approx.)

        Best For

        Red Oak

        1,290 lbf

        Classic look, high traffic areas

        White Oak

        1,360 lbf

        Slightly harder, modern greige tones

        Hard Maple

        1,450 lbf

        Kitchens, high-durability needs

        Hickory

        1,820 lbf

        Rustic character, very high traffic

        Walnut

        1,010 lbf

        Formal spaces, rich dark tones

        Ash

        1,320 lbf

        Contemporary, light and airy rooms

        Hardness isn’t the only factor. A high-traffic entryway benefits from a harder species like hickory or maple, while a formal dining room can carry the softer, richer look of walnut without much wear concern.

        Installation Matters as Much as the Brand

        Hands installing hardwood flooring

        Here’s something most brand comparison articles skip entirely: even the best hardwood flooring brand will fail early if it’s installed poorly. Subfloor prep, acclimation time, and fastening method all affect how a floor performs over its lifetime, especially in a climate like Calgary’s. Our hardwood floor installation team accounts for all of this before a single plank goes down.

        Fastening method is one of the first decisions you’ll face once a brand and species are picked. If you’re deciding between nail-down and glue-down, our guide on nail down vs. glue down hardwood floors breaks down which method suits different subfloor types.

        Timing is the other piece homeowners often underestimate. If you’re planning a renovation schedule, it helps to know roughly how long hardwood installation takes in Calgary before you commit to a move-in date.

        Cost & Budget Considerations

        Pricing varies quite a bit depending on species, brand, and finish, but here is a realistic total budget range we see across Calgary projects (factoring in both materials and professional installation labor):

        Flooring Type

        Material Cost (per Sq. Ft.)

        Estimated Installation Labor

        Total Installed Range

        Engineered Hardwood (mid-range)

        $6 – $9

        $3.50 – $5.50

        $9.50 – $14.50 / sq. ft.

        Solid Hardwood (mid-range)

        $7 – $11

        $4.50 – $6.50

        $11.50 – $17.50 / sq. ft.

        Premium / Wide-Plank Engineered

        $10 – $15

        $4.00 – $6.50

        $14.00 – $21.50 / sq. ft.

        Exotic or Specialty Species

        $12 – $18+

        $5.50 – $8.00+

        $17.50 – $26.00+ / sq. ft.

        Installation labor depends on subfloor condition, layout complexity, and whether old flooring needs removal first. We always recommend getting a firsthand quote rather than budgeting off national averages, since Calgary labor and material costs shift throughout the year.

        Common Mistakes Homeowners Make When Choosing a Brand

        • Ignoring the climate factor — a beautiful floor from a brand designed for coastal humidity can struggle here without the right engineered construction and wear layer thickness.
        • Choosing based on showroom lighting alone — floors look different under natural daylight in your actual home.
        • Skipping the warranty fine print — some warranties only cover manufacturing defects, not finish wear or dry-air damage.
        • Underestimating acclimation time — wood needs to adjust to your home’s humidity (48–72 hours minimum) before installation, and skipping this step causes gaps later.
        • Focusing only on price per square foot — a cheaper brand with a weak core construction often costs more in repairs down the line.

        Why Work With a Local Calgary Installer, Not Just a Big-Box Brand

        A brand name only tells part of the story. The other half comes down to who’s actually cutting, fitting, and finishing the wood in your home. Many big-box and out-of-town contractors don’t account for how Calgary’s dry winters affect expansion gaps, subfloor moisture, or long-term stability.

        That’s the gap we fill. Beyond supplying hardwood flooring from trusted brands, we bring three decades of hands-on experience with exactly how these products behave once they’re living in a Calgary home year-round.

        Final Thoughts

        The best hardwood flooring brand for your Calgary home comes down to matching the right construction type, species, and finish to how you actually live, not just picking whatever looks best under showroom lighting. Brands like Mirage, Preverco, Lauzon, Mercier, Kentwood, and Biyork all bring something different to the table, and the right fit depends on your rooms, your budget, and how your home handles our dry winters.

        If you’re ready to see these brands in person and get advice from a team that’s installed and refinished hardwood across Calgary for over 30 years, get your free quote today and let’s find the right floor for your home.

        Durability depends on both the wood species and the finish technology used. Brands like Lauzon (Titanium Shield) and Mirage (Nanolinx Ultra-Matte) use enhanced finish coatings that resist scratching better than standard urethane, while species like hickory and maple offer the highest natural hardness.

        Engineered hardwood isn't "lesser" it's simply built differently. For Calgary's climate, engineered construction often performs better in basements and areas prone to humidity swings, while solid hardwood remains ideal for stable main-floor spaces maintained with proper humidification.

        Check the warranty length, the wear layer thickness on engineered products (3mm+ is ideal for Calgary), and whether the brand publishes independent testing or certifications. Avoid brands that are vague about construction details.

        Canadian-made brands like Mirage, Preverco, Lauzon, and Mercier are manufactured with Canadian climate conditions in mind, which often makes them a safer bet for Calgary homes compared to imported lines built for different environments.

        Yes, though it's more common to keep one brand and species on a single level for a seamless look, then choose a different option for basements or secondary areas where engineered construction makes more sense.

        Most solid hardwood floors can be refinished every 7 to 10 years depending on traffic and wear, though this varies by species and finish type. Our hardwood floor refinishing team can also assess your current floors and let you know exactly where they stand.

        How to choose a hardwood flooring contractor in Calgary

        How to choose a hardwood flooring contractor in Calgary

        How to choose a hardwood flooring contractor in Calgary Learn how to choose a hardwood flooring contractor in Calgary by checking experience, insurance, past projects and written quotes before you hire. Contact Us Your floors will be under your feet for 20 years or more. The person you hire to…

        Hardwood Flooring Cost Calgary: 2026 Price & Installation Guide

        Hardwood Flooring Cost Calgary: 2026 Price & Installation Guide

        Hardwood Flooring Cost in Calgary: What You’ll Actually Pay Planning your project but unsure about hardwood flooring cost in Calgary? This guide explains installation, refinishing, and repair expenses to help you plan your flooring budget. Contact Us If you’re planning to install, repair, or refinish hardwood flooring in Calgary, understanding…

        Matte vs Gloss Hardwood Flooring | Arbutus Hardwood

        Matte vs Gloss Hardwood Flooring | Arbutus Hardwood

        Matte vs gloss hardwood flooring: which finish is right for your home? Matte vs gloss hardwood flooring, see which finish suits Calgary homes best for durability, style & upkeep. Get expert advice from Arbutus Hardwood. Contact Us Matte vs gloss hardwood flooring feels like a small decision until you’re standing…
          Best Hardwood Flooring Brands in Calgary (2026 Guide) 15

          How Long Does Hardwood Floor Installation Time in Calgary?

          How Long Does Hardwood Floor Installation Take in Calgary?

          Hardwood floor installation time in Calgary typically ranges from 1 to 5 days for installation, plus 3 to 7 days for proper acclimation before work begins. The exact timeline depends on factors like your flooring type, home size, subfloor condition, and the complexity of the project. This guide explains every stage so you know exactly what to expect.

          If you’re planning new floors, the first question is almost never about wood species or finish. It’s this: how long is my house going to be turned upside down?

          Fair question. Hardwood floor installation time in Calgary usually runs 1 to 5 days for the actual installation, plus 3 to 7 days of acclimation before anyone even picks up a hammer. For a full-home project, total project time (delivery to final walkthrough) often lands somewhere between one and two weeks.

          But that range hides a lot of detail, and the “it depends” answer that most flooring sites give you isn’t very useful when you’re trying to book time off work or figure out when the movers should show up. So this guide breaks down exactly what happens at each stage, what stretches the timeline, and why Calgary’s climate specifically plays a bigger role here than most articles mention.

          How Long Does Hardwood Floor Installation Really Take?

          Before we get into the step-by-step process, here’s the short version most homeowners actually want:

          Project Size

          Installation Time

          Total Time (incl. Acclimation)

          Single room (up to 300 sq ft)

          1 day

          4–8 days

          Multiple rooms (500–1,000 sq ft)

          1–2 days

          5–10 days

          Main floor (1,000–2,000 sq ft)

          2–4 days

          7–12 days

          Whole home (2,000+ sq ft)

          3–5 days

          10–14 days

          Baseline Speed: A two-person installation crew typically covers 750 to 1,000 square feet per day under normal conditions, open layout, no major obstacles, no pattern work. That number is the baseline everything else in this article adjusts up or down from.

          Hardwood Floor Installation Time: Step-by-Step Breakdown  Hardwood flooring planks in room

          Understanding what actually happens during each phase makes the total timeline make a lot more sense.

          Step 1: In-Home Consultation and Measurement

          Most projects start with a walkthrough where a professional measures the space, checks the subfloor, and helps you settle on a wood type. This usually takes an hour or two and happens days or weeks before installation begins. If you’re comparing companies for hardwood floor installation  in Calgary, this is also the point where you’ll get an honest, project-specific timeline instead of a generic estimate.

          Step 2: Acclimation (Why Calgary’s Climate Matters Here)

          Acclimation means letting the wood adjust to the humidity and temperature of your home before it’s installed. Skip this step, and you risk gaps, cupping, or buckling months later.

          Solid hardwood generally needs 5 to 7 days to acclimate. Engineered hardwood is more dimensionally stable and often needs only 1 to 3 days. This stage follows the standards laid out in the NWFA installation guidelines , which require the wood’s moisture content to fall within a small percentage of the subfloor’s moisture content before installation can safely begin.

          Here’s the part most guides skip: Calgary’s climate makes this step more important than it is in milder regions. Winters here are extremely dry, and chinook winds can swing temperature and humidity dramatically within 24 hours. That combination stresses wood flooring more than a steady, humid climate would. Rushing acclimation in a Calgary home is one of the most common reasons floors develop problems within the first year.

          Step 3: Old Flooring Removal

          If you’re replacing carpet, tile, or old hardwood, this adds time before the new floor can go down. Carpet removal is quick, usually 2 to 4 hours for an average room. Tile and old hardwood removal takes longer, sometimes a full day for larger areas, since it often involves scraping adhesive or dealing with nails.

          Step 4: Subfloor Preparation

          The subfloor needs to be clean, level, dry, and structurally sound. Squeaks, soft spots, or uneven areas need to be fixed before installation starts. This is one of the biggest wildcards in any timeline. A subfloor in good shape adds almost no time. One with hidden moisture damage or serious leveling issues can add one to two extra days, sometimes more.

          If your existing floor shows signs of water damage or structural issues before you even get to this stage, it’s worth having a hardwood floor repair assessment done first, rather than discovering the problem mid-installation.

          Step 5: Installation Day(s)

          This is the main event. Installers lay, cut, and secure the planks using whichever method fits your flooring type: nailing, gluing, or floating. For a straightforward room with no major obstacles, this can be done in a single day. Larger or more complex spaces take longer, and we’ll cover exactly why in the next section.

          Step 6: Finishing (If You Chose Unfinished Hardwood)

          If you went with site-finished hardwood, the floor gets sanded, stained (if desired), and sealed with multiple coats of finish after installation. Each coat needs drying time, usually 24 hours, and most floors need two to three coats. This adds 2 to 4 extra days compared to prefinished flooring, which arrives ready to walk on.

          Step 7: Final Walkthrough and Cleanup

          Once everything is installed and cured enough to walk on, your installer should do a final walkthrough with you, check for any gaps or issues, and clean the site. This is usually quick, under an hour for most homes.

          What Affects Hardwood Floor Installation Time?

          Hands installing hardwood flooring

          Two projects of the same square footage can take very different amounts of time. Here’s what actually moves the needle.

          Solid vs. Engineered Hardwood:

           Solid hardwood needs longer acclimation and is more sensitive to humidity swings, which matters more in a Calgary winter than almost anywhere else in Canada. Engineered hardwood is built with cross-layered cores that resist movement, so it acclimates and installs faster. If you’re still deciding between the two, this solid vs engineered hardwood comparison breaks down how each performs in Alberta homes specifically.

          Installation Method (Nail-Down, Glue-Down, or Floating):

           The method you choose changes both the install speed and the skill required. Nail-down is the traditional approach for solid wood and takes longer per square foot. Glue-down requires curing time for the adhesive. Floating floors, often used with engineered wood, go down fastest since planks click together without nails or glue. If you’re weighing your options, this guide on nail-down vs. glue-down hardwood floors walks through the trade-offs in more detail.

          Prefinished vs. Unfinished Flooring:

           Prefinished floors arrive stained and sealed from the factory, so you can walk on them almost immediately after installation. Unfinished flooring needs onsite sanding and finishing, which is where most of the extra days in a “site-finished” project come from.

          Room Layout and Obstacles:

           Open, rectangular rooms are the fastest to install. Add cabinets, fireplaces, closets, or staircases, and the crew has to cut around each one individually. A staircase alone can add a full day, since each step is essentially its own custom installation.

          Pattern Choice:

           Standard straight-plank installation is the quickest layout. Herringbone or parquet patterns require significantly more precision and cutting, and can take two to three times longer than a standard install for the same square footage.

          Subfloor Condition:

           As mentioned earlier, this is often the biggest hidden variable. A flat, dry, structurally sound subfloor barely affects your timeline. A damaged or uneven one can turn a two-day job into a four-day job.

          Removing Old Flooring:

           Multiple layers of old flooring, stubborn adhesive, or nails left behind from a previous install all add hours to the prep stage before new hardwood can even be laid down.

          Hardwood Floor Installation Time by Type

          Hardwood Type

          Typical Acclimation

          Typical Installation Speed

          Best For

          Solid Hardwood (Nail-Down)

          5–7 days

          750–1,000 sq ft/day

          Traditional homes, long-term durability

          Engineered Hardwood (Floating/Glue)

          1–3 days

          800–1,200 sq ft/day

          Faster projects, basements, radiant heat

          Prefinished Hardwood

          Same as above by type

          Same as above, no added finishing time

          Homeowners wanting quick move-back-in

          Unfinished Hardwood

          Same as above by type

          Add 2–4 days for onsite sanding/finishing

          Custom stain matching, high-end finishes

          Hardwood Floor Installation Time vs. Cost: A Quick Reality Check

          Time and cost move together more than most homeowners expect. Faster installation methods, like floating engineered floors, tend to cost less in labour hours. Longer processes, like unfinished solid hardwood with a custom pattern, cost more partly because of the extra days involved in sanding, staining, and curing.

          If your quote seems to have a wide time range, ask your installer to break down which stage (acclimation, subfloor repair, or finishing) is driving that range. A detailed, honest breakdown is a good sign you’re working with a professional rather than getting a rough guess.

          How to Speed Up Your Hardwood Floor Installation

          Finished result hardwood flooring

          A few things are within your control, and they genuinely shave time off the process:

          • Clear the space before installers arrive: Moving furniture yourself instead of having the crew do it can save hours per room.
          • Book your consultation early: Ordering flooring and starting acclimation ahead of time means installation day isn’t delayed waiting on materials.
          • Get your subfloor checked in advance: Catching problems before installation day avoids mid-project surprises.
          • Choose prefinished flooring: Ideal if timeline matters more than custom finish options.
          • Keep pets and kids out of the work zone: It sounds minor, but it genuinely keeps installers working at full speed.
          • Ask about HVAC requirements ahead of time: Some finishes need a specific temperature range to cure properly, and Calgary’s dry indoor heat in winter can affect this more than people expect.

          Common Mistakes That Delay Hardwood Floor Installation

          1. Skipping or rushing acclimation to save a few days (which often causes gaps or cupping later).
          2. Not addressing subfloor issues early, leading to repairs discovered mid-installation.
          3. Underestimating obstacles like staircases, cabinetry, or fireplaces when asking for a timeline.
          4. Choosing a complex pattern without budgeting extra time for the cutting and layout work it requires.
          5. Not clearing furniture ahead of time, which pushes back the actual installation start.

          What About Repairs and Refinishing Timelines?

          If your existing hardwood just needs restoring rather than full replacement, the timeline is different from a new installation. Refinishing typically takes less time overall since there’s no acclimation stage for new material, but sanding, staining, and multiple coats of finish still apply.

          If that sounds closer to your situation, this breakdown of how long hardwood floor refinishing takes covers it in detail, and our hardwood floor refinishing service page has more on the process itself.


          Final Thoughts

          Hardwood floor installation time really comes down to a handful of factors: the size of your space, the type of wood you choose, the condition of your subfloor, and how much prep work is needed before the crew even starts. In Calgary, the added variable is climate. Between dry winters and chinook swings, giving your flooring proper time to acclimate matters more here than in most parts of the country.

          Most projects, from delivery to final walkthrough, wrap up somewhere between one and two weeks, with the actual installation itself taking just one to five days depending on scope. If you want an exact timeline instead of a general range, the only way to get one is a proper in-home assessment.

          If you’re ready to get a clear, honest timeline for your own home, visit Arbutus Hardwood or reach out for a free estimate and we’ll walk you through exactly what to expect, start to finish.

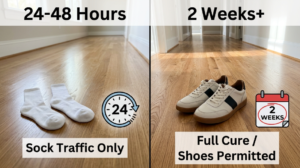
          With prefinished hardwood, yes, usually right after installation. Light furniture can go back after 24 hours, and heavier pieces after 48 hours. Unfinished floors need longer, since the finish coats need time to cure before regular foot traffic.

          For a single room or two, most homeowners stay in their home without issue. For whole-home installations, some people choose to stay elsewhere for a few days, mainly due to dust, noise, and limited access to certain rooms.

          If it's prefinished, there's no drying time since the finish was applied at the factory. If it's unfinished and sanded on site, each coat of finish typically needs about 24 hours to dry, with full curing taking up to 30 days.

          Not necessarily longer to install, but acclimation can behave differently. Calgary's dry winter air and chinook-driven humidity swings mean it's especially important not to rush the acclimation period during colder months.

          Prefinished engineered hardwood with a floating or click-lock installation is generally the quickest option, since it skips onsite finishing and has a shorter acclimation window than solid wood.

          Yes. Hidden subfloor damage, unexpected moisture issues, or discovering the floor isn't level are common reasons a timeline shifts once work begins. A good installer will flag this early and explain what it means for your schedule.

          How to choose a hardwood flooring contractor in Calgary

          How to choose a hardwood flooring contractor in Calgary

          How to choose a hardwood flooring contractor in Calgary Learn how to choose a hardwood flooring contractor in Calgary by checking experience, insurance, past projects and written quotes before you hire. Contact Us Your floors will be under your feet for 20 years or more. The person you hire to…

          Hardwood Flooring Cost Calgary: 2026 Price & Installation Guide

          Hardwood Flooring Cost Calgary: 2026 Price & Installation Guide

          Hardwood Flooring Cost in Calgary: What You’ll Actually Pay Planning your project but unsure about hardwood flooring cost in Calgary? This guide explains installation, refinishing, and repair expenses to help you plan your flooring budget. Contact Us If you’re planning to install, repair, or refinish hardwood flooring in Calgary, understanding…

          Matte vs Gloss Hardwood Flooring | Arbutus Hardwood

          Matte vs Gloss Hardwood Flooring | Arbutus Hardwood

          Matte vs gloss hardwood flooring: which finish is right for your home? Matte vs gloss hardwood flooring, see which finish suits Calgary homes best for durability, style & upkeep. Get expert advice from Arbutus Hardwood. Contact Us Matte vs gloss hardwood flooring feels like a small decision until you’re standing…
            How Long Does Hardwood Floor Installation Time in Calgary? 19

            Solid vs Engineered Hardwood: Which Is Best for Calgary?

            Solid vs Engineered Hardwood: Which Is Best for Calgary Homes?

            Choosing between solid and engineered hardwood comes down to how well each handles Calgary’s extreme, dry climate. While solid wood offers timeless luxury, engineered hardwood provides superior stability against seasonal gapping and warping. Weighing durability, budget, and long-term performance is key to making the right choice for your home.

            If you’re renovating or building in Calgary, you’ve probably hit the same wall every homeowner does: solid hardwood or engineered hardwood? Both look stunning in showroom photos. Both are marketed as “the better choice.” And neither salesperson is going to tell you which one actually holds up once our winters get involved.

            That’s the real question behind solid vs engineered hardwood: not which one is objectively superior, but which one survives Calgary’s dry air, sudden Chinook swings, and finished basements without turning into a five-year headache.

            We’ve spent years refinishing and repairing floors across Calgary and the surrounding communities, and we’ve seen firsthand what actually happens to each type of flooring once the honeymoon phase ends. This guide breaks it down honestly, including the parts most flooring blogs skip over.

            What’s Actually Different Between Solid and Engineered Hardwood?

            Before comparing performance, it helps to understand what you’re buying. These aren’t just two grades of the same product. They’re built differently, and that construction is what determines how they behave in your home.

            What Is Solid Hardwood Flooring?

            Solid hardwood is one piece of wood, top to bottom, usually around ¾ inch thick. Oak, maple, walnut, and hickory are the most common species used in Calgary homes. Because the entire plank is a single piece of timber, it reacts to humidity the same way a tree does: it swells when moist air is around and shrinks when the air dries out.

            If you’d rather move beyond the standard oak or maple look, wider planks, unique stains, herringbone or chevron patterns, and less common species are all achievable through a custom hardwood flooring project rather than off-the-shelf material.

            That’s not a flaw. It’s just wood being wood. The trade-off is that solid hardwood can be sanded and refinished repeatedly over its lifetime, often five to seven times, which is a big part of why it’s still considered a long-term investment rather than a disposable finish.

            What Is Engineered Hardwood Flooring?

            Engineered hardwood has a real wood veneer on top, bonded to several layers of plywood or high-density fiberboard underneath. Each layer runs in a different direction, which is what makes it more dimensionally stable than solid wood.

            This layered structure is why engineered hardwood tends to handle humidity swings better and why it’s the go-to option for basements or floors installed over radiant heating, spaces where solid hardwood typically isn’t recommended.

            Why Calgary’s Climate Changes the Answer

            Hardwood floor gap visible

            This is the part most comparison articles gloss over, and it’s the reason a flooring choice that works fine in Vancouver or Toronto can fail here.

            Calgary winters routinely drop indoor relative humidity below 20 percent once central furnace heating kicks in for months on end. Then summer arrives and relative humidity rises. Add rapid Chinook wind events which can swing outdoor temperatures by 15°C to 20°C within a few hours and wood flooring in Alberta is under far more structural stress than in almost any other Canadian market.This is also why gaps between boards are so common here, and you can read more about why gaps appear in Calgary winters and what to do about them. 

            According to Environment Canada’s climate normals data for Calgary,Calgary regularly experiences some of the widest daily temperature swings in the country, largely due to Chinook events. That’s not marketing language. It’s a documented weather pattern, and it’s exactly why local installation and care matter more here than the national average advice you’ll find online.

            The Critical Acclimation Factor Before a single plank is installed, wood must reach Equilibrium Moisture Content (EMC) inside your home. In Calgary’s dry climate, solid hardwood requires a minimum of 5 to 7 days to acclimate inside a temperature-controlled environment. Engineered hardwood typically needs 48 to 72 hours. Rushing or skipping acclimation in southern Alberta is the single leading cause of winter gapping, board warping, and floor squeaks.

            Solid vs Engineered Hardwood: Side-by-Side Comparison

            Factor

            Solid Hardwood

            Engineered Hardwood

            Construction

            Single piece of wood

            Wood veneer over plywood/HDF core

            Humidity Stability

            Requires humidity control

            Naturally more stable

            Refinishing

            5–7 times over its lifespan

            1–2 times, depending on wear layer

            Basement Installation

            Not recommended

            Suitable

            Radiant Heat Compatible

            Not recommended

            Yes

            Upfront Cost

            Higher

            Generally lower

            Lifespan (with care)

            50–100+ years

            25–30 years

            Resale Perception

            Premium, traditional

            Modern, practical

            Refinishing and Lifespan: The Difference That Matters Most

            Floor sander refinishing oak floor

            Here’s what a lot of homeowners don’t realize until they’re a decade into owning their floors: refinishing potential is the single biggest long-term difference between these two products.

            Solid hardwood’s biggest advantage is that it can be sanded down and refinished multiple times over its lifetime—typically 5 to 7 times depending on the depth of the groove. Scratches from pets or moving furniture, worn traffic paths near doorways, or a stain color you no longer like can all be corrected with proper hardwood floor refinishing. We’ve refinished 30-year-old solid oak floors across Calgary and had them come out looking better than the day they were installed.

            Engineered hardwood can also be refinished, but only if the top wear layer (lamella) is thick enough.

            • 1mm – 2mm wear layer: Cannot be sanded with a heavy belt sander. It can only be lightly buffed and recoated.
            • 3mm – 4mm wear layer: Can typically be fully sanded and refinished 1 to 2 times.
            • 5mm – 6mm wear layer: Can be refinished 2 to 3 times, performing almost on par with solid wood.

            Once you sand past that real wood veneer, you hit the plywood or fiberboard core, causing irreversible damage. If you’re choosing engineered hardwood, always check the exact wear layer thickness on the spec sheet before buying.

            Installation Differences You Should Know

            Nail-Down vs Glue-Down

            Solid hardwood is almost always nail-down or staple-down onto a plywood subfloor. Engineered hardwood is more flexible here. It can be nailed, glued, or even floated depending on the product, which is part of why it works over concrete slabs and radiant heat systems where nailing isn’t an option.

            If you’re comparing installation methods for your specific subfloor, our breakdown of nail-down vs glue-down hardwood floors covers which method suits different room types and why it matters for long-term stability.

            Basements, Concrete Slabs, and Radiant Heat

            This is a straightforward technical rule: Solid hardwood should never be installed directly over concrete or in below-grade basements. Concrete slabs naturally absorb and transfer moisture from the surrounding soil. Over time, that vapor migrates into solid wood planks, causing cupping, crowning, or severe structural warping.

            Engineered hardwood’s criss-cross layered core resists multidirectional movement, making it the industry standard for basement renovations and homes with in-floor radiant heating systems.

            However, engineered wood isn’t immune to moisture. Before installing engineered floors over a Calgary basement slab, a proper concrete relative humidity (RH) moisture test must be performed. Even dimensional stability requires a proper moisture barrier underlayment or epoxy sealer to protect your investment long-term.

            Engineered Hardwood in Calgary: What to Know Before You Buy

            Engineered hardwood is one of the most practical flooring choices for Calgary homes. Its layered core resists the expansion and shrinking caused by our dry winters and Chinook swings, and it can be installed over concrete slabs, in basements and over radiant heat, where solid hardwood isn’t recommended. A real wood veneer on top means you still get the look and feel of hardwood.

            Engineered oak typically costs $8 to $13 per square foot installed in Calgary, depending on the product and subfloor. When choosing a product, check the wear layer thickness first: a wear layer of 3 mm or more allows the floor to be refinished at least once. You can source quality engineered flooring through our hardwood flooring supply service.


            Finish Options for Both Types

            Both solid and engineered hardwood need a protective topcoat, and the finish you choose affects durability just as much as the wood itself. Water-based polyurethane dries fast and stays clear. Oil-based polyurethane gives that warm amber tone but takes longer to cure. Hard wax oils sit into the wood rather than on top, which makes small scratches easier to spot-repair.

            If you’re deciding between finish types, our comparison of oil vs water-based floor finish goes deeper into drying time, smell, durability, and which option holds up best against Calgary’s dry indoor air.

            Cost Comparison: Solid vs Engineered Hardwood in Calgary

            Cost Factor

            Solid Hardwood

            Engineered Hardwood

            Material Cost (per sq ft)

            $6.00 – $14.00

            $4.00 – $10.00

            Installation Labor (per sq ft)

            $4.00 – $8.00

            $3.00 – $7.00

            Subfloor Prep / Moisture Testing

            $1.00 – $2.50 / sq ft

            $1.00 – $3.00 / sq ft (Slab prep)

            Old Floor Removal & Disposal

            $1.50 – $3.00 / sq ft

            $1.50 – $3.00 / sq ft

            Refinishing Cost (per sq ft)

            $4.00 – $7.50

            $4.00 – $7.50 (Wear layer dependent)

            Expected Lifespan

            50 – 100+ Years

            25 – 35 Years

            Engineered hardwood usually wins on upfront price. But if you’re planning to stay in your home for decades, solid hardwood’s refinishing lifespan often makes it the cheaper option long-term, since you’re not paying for full replacement every 20-25 years.

            Pricing also depends heavily on where the material comes from. Working directly with a hardwood flooring supply source instead of a big-box retailer usually means better species selection, accurate stock availability, and pricing that reflects the actual grade of wood you’re getting.

            Moisture, Water Damage, and Long-Term Care

            Wood and moisture don’t mix well, regardless of which type you choose. Solid hardwood is more vulnerable simply because there’s no protective layered core beneath it. A slow leak under a dishwasher or a forgotten spill near a plant can cause staining, cupping, or even structural damage if it’s not caught early.

            Engineered hardwood handles minor moisture exposure better, but it isn’t waterproof. Standing water for extended periods will still damage the veneer and, eventually, the core layers underneath.

            If you’ve noticed dark spots, soft areas, or a musty smell near your flooring, don’t wait. Our guide on water-damaged hardwood repair walks through what can typically be saved and when replacement of a section becomes necessary.

            Not every issue needs a full refinish, either. A handful of damaged boards, a squeak, or a dent from dropped furniture is often better solved with targeted hardwood floor repair rather than sanding and refinishing an entire room.

            For reference on humidity best practices, the National Wood Flooring Association’s technical guidelines recommend keeping indoor relative humidity between 30 and 50 percent to protect any hardwood installation, a range that lines up closely with what we recommend to Calgary clients running furnace humidifiers through the winter.

            Which One Should You Choose?

            There’s no universal right answer here. It genuinely comes down to where the floor is going and how long you plan to keep it.

            Choose Solid Hardwood If:

            • You’re flooring a main or upper level, not a basement
            • You’re willing to run a humidifier during winter months
            • You want a floor that can be refinished multiple times over decades
            • You’re planning to stay in the home long-term or want to preserve resale value
            • You like the authentic feel and sound of real, single-piece wood underfoot

            Choose Engineered Hardwood If:

            • You’re finishing a basement or installing over radiant heat
            • You want more built-in stability without babysitting humidity levels
            • Your budget favors a lower upfront cost
            • You’re renovating a rental property or a secondary home
            • You still want the look and feel of real wood, just with less maintenance

            Solid vs Engineered Hardwood for Calgary’s Nearby Communities

            Flooring decisions don’t change much once you leave city limits, but local conditions can shift slightly depending on the community.

            In Airdrie and Chestermere, newer builds often have concrete basements ideal for engineered hardwood, while main floors handle solid hardwood well with proper humidity control. Cochrane homeowners dealing with older character homes often lean toward solid hardwood for refinishing flexibility, especially in heritage properties where matching original wood tones matters.

            In Okotoks, we regularly install and refinish both types depending on the home’s age and layout. If you’re in the area, our hardwood floor refinishing in Okotoks service covers exactly this kind of solid-vs-engineered assessment on-site.

            Acreage properties around Priddis and Strathmore tend to see more seasonal humidity swings due to their exposure, which is why we often recommend engineered hardwood for lower levels and solid hardwood for main living spaces. If repair work comes up in that area, our hardwood floor repair in Priddis team handles both types.

            Wherever you’re located around Calgary, the underlying advice stays the same: match the flooring type to the room’s conditions, not just to personal preference.

            Common Mistakes Homeowners Make

            Skipping the humidifier during winter: Operating solid hardwood without a furnace humidifier during a Calgary winter leads to unsightly gapping between boards and potential surface checking (cracking).

            Rushing the acclimation phase: Installing wood materials straight off the delivery truck without letting them adjust to indoor relative humidity guarantees post-installation movement.

            Ignoring wear layer specifications: Buying engineered wood based solely on overall plank thickness rather than the actual top veneer thickness.

            Installing solid hardwood over concrete or in basements: Pushing solid wood into below-grade moisture conditions almost always leads to board cupping and failure within a few seasons.

            Skipping subfloor moisture testing: Failing to test basement slab emissions before laying engineered flooring over concrete.

            Final Thoughts

            Both solid and engineered hardwood can perform beautifully in a Calgary home, but only if they’re matched to the right space and maintained with our climate in mind. Solid hardwood rewards homeowners who are willing to manage indoor humidity and want a floor that can be refinished for generations. Engineered hardwood rewards homeowners who need stability in basements, radiant-heated spaces, or budget-conscious renovations.

            If you’re still not sure which one makes sense for your home, or your existing floors need attention either way, Arbutus Hardwood has spent over three decades helping Calgary homeowners make this exact decision. Reach out for a consultation, and we’ll take a look at your specific space before recommending anything.

            It depends on the application. Engineered hardwood performs better in basements and humid-prone areas, while solid hardwood offers more refinishing potential and a longer overall lifespan on main floors.

            Yes, but only if the wear layer is thick enough, typically once or twice compared to solid hardwood's five to seven refinishes.

             Not necessarily. High-quality engineered hardwood uses real wood veneers and can be visually indistinguishable from solid hardwood once installed.

            Generally, yes. Buyers still associate solid hardwood with quality, and its long refinishing lifespan means the floor can look brand new at resale time with minimal work.


             Check a doorway transition or vent cutout if possible. Solid hardwood shows consistent wood grain all the way through the plank edge, while engineered hardwood shows visible layered plywood underneath the veneer.

            Yes, and it's actually common. Many Calgary homeowners use engineered hardwood in basements and solid hardwood on main and upper levels to get the benefits of both.

            Yes, in many cases. Engineered hardwood handles Calgary's dry winters and humidity swings better than solid hardwood, and it's suitable for basements, concrete slabs and radiant heat. The trade-off is that it can only be refinished once or twice, depending on the wear layer, so check the thickness before you buy. Not sure which fits your home? Contact us for a free consultation.

            How to choose a hardwood flooring contractor in Calgary

            How to choose a hardwood flooring contractor in Calgary

            How to choose a hardwood flooring contractor in Calgary Learn how to choose a hardwood flooring contractor in Calgary by checking experience, insurance, past projects and written quotes before you hire. Contact Us Your floors will be under your feet for 20 years or more. The person you hire to…

            Hardwood Flooring Cost Calgary: 2026 Price & Installation Guide

            Hardwood Flooring Cost Calgary: 2026 Price & Installation Guide

            Hardwood Flooring Cost in Calgary: What You’ll Actually Pay Planning your project but unsure about hardwood flooring cost in Calgary? This guide explains installation, refinishing, and repair expenses to help you plan your flooring budget. Contact Us If you’re planning to install, repair, or refinish hardwood flooring in Calgary, understanding…

            Matte vs Gloss Hardwood Flooring | Arbutus Hardwood

            Matte vs Gloss Hardwood Flooring | Arbutus Hardwood

            Matte vs gloss hardwood flooring: which finish is right for your home? Matte vs gloss hardwood flooring, see which finish suits Calgary homes best for durability, style & upkeep. Get expert advice from Arbutus Hardwood. Contact Us Matte vs gloss hardwood flooring feels like a small decision until you’re standing…
              Solid vs Engineered Hardwood: Which Is Best for Calgary? 23

              Hardwood Floor Maintenance After Refinishing: Complete Care Guide (2026)

              How to Maintain Hardwood Floors After Refinishing

              Proper maintenance after refinishing is essential to protect your investment and prevent early damage. This complete guide covers curing timelines, safe cleaning practices, and climate care to help you maintain hardwood floors after refinishing for long-lasting shine.

              Getting your hardwood floors refinished is one of the best upgrades you can make to your home. The wood looks new again, the scratches are gone, and that fresh coat of finish brings out a warmth that old, worn floors just can’t match.

              But here’s the part a lot of homeowners miss: what you do in the days and months after refinishing matters just as much as the refinishing job itself. A brand new finish is actually more vulnerable than you’d think, and a few wrong moves in the first month can undo weeks of careful sanding and coating.

              If you’re wondering how to maintain hardwood floors after refinishing so they stay beautiful for years instead of months, this guide covers the curing period, daily care, long-term protection, and the mistakes that quietly wreck a fresh finish.

              Most of what damages a new finish early on isn’t dramatic. It’s small, everyday things like moving furniture back too soon, using the wrong cleaner, or not accounting for Calgary’s dry winters. None of these mistakes are obvious until months later, when you notice dull patches, faint scratches, or gaps between boards that weren’t there before. The good news is that almost all of it is avoidable once you know what to watch for.

              Understanding the Curing Process: Water-Based vs Oil-Based Finish Cure Time

              Floor finish comparison infographic

              This is where most confusion starts, so it’s worth clearing up first.

              There’s a difference between a floor being dry and a floor being fully cured. Most water-based finishes feel dry to the touch within a few hours, and you can usually walk on the floor in socks within 24 hours. Some homeowners are told it’s safe to walk on in as little as 3 to 4 hours after the final coat.

              But “walkable” isn’t the same as “ready for normal life.” The finish is still hardening underneath the surface, and that process can take 7 to 14 days for water-based finishes, and up to 30 days for oil-based ones. If you’re weighing oil vs water based finishes for your Calgary home, cure time is one of the biggest practical differences between the two. During this window, the finish is soft enough to scuff, dent, or scratch far more easily than once fully cured. This is exactly why homeowners who move furniture back too soon often see marks appear almost immediately.

              Quick Curing Timeline & Walkability

              Time After Final Coat

              What You Can Do

              3–4 hours

              Walk on the floor in socks or bare feet

              24–48 hours

              Light foot traffic, no hard-soled shoes

              5–7 days

              Move light furniture carefully, avoid rugs

              14 days

              Place rugs and mats (with caution)

              30 days

              Resume completely normal use, deep cleaning

              If your floor was finished with an oil-based product, add extra time to each step above. When in doubt, ask your installer what product they used and how long they recommend waiting.

              The First 30 Days: Critical Care Rules & How Long After Refinishing Floors Can You Put Furniture Back

              Chair leg on refinished floor

              Think of the first month as a probation period for your floor. It looks finished, but it hasn’t fully hardened yet, and it needs a bit of extra care.

              • Keep rugs and mats off direct sunlight areas: Placing rugs down too early, especially in sunny spots, can trap moisture or create uneven fading once the rug is removed. Wait at least two weeks, and avoid heavy rubber-backed mats until the floor has cured.
              • Never drag furniture across the floor: This causes more damage than almost anything else. Dragging a couch, table, or bookshelf across a curing floor can gouge straight through the finish. Instead, lift furniture completely when moving it, use felt pads on every leg, and use a rubber-wheeled dolly for heavier pieces.
              • Keep blinds and curtains closed: Direct UV exposure during curing can cause uneven color development across the room.
              • Rotate items occasionally: Rugs, plants, or furniture left in one spot for weeks can leave faint discoloration once moved. Shifting items every so often during the first couple of months avoids obvious sun-bleaching patterns.
              • Be careful with tape: If you need to tape down protective paper during a move, use only low-tack painter’s tape and remove it within a few hours. Regular tape can pull up the finish.

              Daily and Weekly Hardwood Floor Cleaning Routine

              arbutus hardwood cleaner

              Once your floor is past the initial curing period, the goal shifts from protection to ongoing maintenance. A consistent, gentle cleaning routine is the single biggest factor in how long your refinish actually lasts.

              Daily Cleaning Habits:

              • Sweep or dry-mop with a microfiber cloth to remove grit before it gets ground into the finish
              • If vacuuming, use the hardwood attachment, never the rotating beater bar
              • Wipe up spills immediately with a soft, absorbent cloth

              Weekly Deep Cleaning Routine:

              • Use the best cleaner for refinished hardwood floors (specifically formulated for hardwood, never an all-purpose cleaner or vinegar solution)
              • Apply cleaner to a damp microfiber mop rather than pouring it directly onto the floor
              • Avoid soaking the floor. Standing water is one of the fastest ways to damage wood, even freshly refinished wood

              What to Avoid Completely:

              • Steam mops: the heat and moisture can break down the finish and even affect the wood underneath
              • Vinegar and water mixes: vinegar is acidic and can dull a fresh finish over time
              • Wax-based products: these build up on modern finishes and make future recoats harder

              If your floor already has water exposure or staining from a spill that sat too long, it’s worth reading up on how to repair water-damaged hardwood floors before trying a DIY fix, since some water damage looks minor on the surface but runs deeper into the boards.

              Once you’re past the first few months, maintenance becomes more about prevention than reaction.

              • Control indoor humidity: Wood expands and contracts with humidity changes. In Calgary’s climate, with dry winters and humid summers, this movement can eventually cause gaps between boards or, in more extreme cases, cupping and warping. The National Wood Flooring Association recommends keeping indoor relative humidity between 35% and 55% and temperature between 60°F and 80°F year-round to keep wood flooring performing as it should.
              •  Manage sun exposure. UV rays don’t just fade the finish, they can fade the wood itself over time, creating visible patterns where furniture or rugs block the light. UV-filtering window film or simply keeping blinds partially closed during peak sun hours slows this down.
              • Protect high-traffic areas. Entryways, hallways, and kitchen walkways take the most abuse. Use walk-off mats at exterior doors, consider a no-shoes policy, and check furniture pads periodically since they wear down over time.
              • Living with pets. Dog nails in particular can leave fine scratches across a finish faster than almost anything else in the house. Keep nails trimmed short, wipe paws before pets come inside, and consider keeping high-energy play off the hardwood.

              Maintenance Coat vs. Full Refinish: Which Do You Need?

              This is one of the most common questions homeowners have a few years after refinishing.

              A maintenance coat, sometimes called a screen-and-recoat, adds a fresh layer of finish on top of the existing one without sanding down to bare wood. It’s fast, usually done in a single day, and roughly a third of the cost of a full refinish. It only works if the existing finish hasn’t worn through to raw wood.

              A full hardwood floor refinishing involves sanding the floor down completely and starting over, which becomes necessary once the wood itself is exposed or the damage runs too deep for a surface-level fix. If you’re not sure which one your floor needs, a quick inspection is usually the fastest way to find out and to get an accurate sense of cost before committing either way. 

              How to Tell Which One You Need

              Sign

              Likely Fix

              Dull finish, light surface scratches

              Maintenance coat / polishing

              Water spots or minor surface discoloration

              Maintenance coat

              Bare wood visible in high-traffic spots

              Full refinish

              Deep gouges, stains, or board damage

              Hardwood floor repair

              Floor hasn’t been recoated in 5+ years

              Inspection recommended

              As a general rule, a maintenance coat every 3 to 5 years extends the life of your floor significantly and delays the need for a full, more expensive refinish. Waiting until the finish wears through to bare wood almost always means you’ve missed the window for the cheaper option.

              When to Handle Maintenance Yourself vs. Calling a Hardwood Professional

              Day-to-day care, sweeping, mopping, humidity control, is something every homeowner can and should handle on their own. It doesn’t require special tools or training, just consistency.

              Where it makes sense to bring in a professional is anything that touches the finish itself. Screen-and-recoat work, buffing out deeper scratches, or assessing whether a water-damaged area needs board replacement all require judgment that’s hard to get right on the first try. A DIY recoat gone wrong, using the wrong abrasion level or an incompatible product, can actually make the floor harder to fix later.

              If you’re weighing a DIY approach against calling someone in, it also depends on the type of flooring you have. For example, homeowners comparing nail-down vs glue-down hardwood flooring often find that the installation method affects how forgiving the floor is of minor repairs, which is worth understanding before attempting anything beyond basic cleaning. 

              A good rule of thumb: if the fix involves sanding, staining, or reapplying finish, it’s worth getting a professional opinion first, even if you end up doing some of the prep work yourself.

              Common Mistakes That Damage a Fresh Refinish

              Even careful homeowners make a few of these without realizing it:

              • Moving back in too fast: rushing furniture and rugs back before the cure period ends is the top cause of early damage
              • Using the wrong cleaner: vinegar and all-purpose cleaners slowly dull and degrade the finish
              • Skipping felt pads: a single chair dragged without pads can leave a mark that lasts for years
              • Ignoring humidity swings: many homeowners don’t connect seasonal gapping to humidity until it’s already happened
              • Waiting too long for a maintenance coat: letting the finish wear through means paying for a full refinish that could’ve been avoided
              • Letting spills sit: even a small puddle left overnight can leave a permanent water mark.

              Final Thoughts

              Knowing how to maintain hardwood floors after refinishing really comes down to two things: patience during the curing period, and consistency afterward. Give the finish time to fully harden before moving furniture and rugs back in, stick to the right cleaning products, and stay ahead of wear with a maintenance coat every few years instead of waiting for damage to show.

              Done right, a refinished hardwood floor can look great for well over a decade before it needs sanding again. If you’re not sure whether your floor needs a simple maintenance coat, polishing, or a full refinish, it’s worth getting a professional opinion before small issues turn into bigger, more expensive ones.

              Have questions about your specific floor, or ready to schedule a maintenance coat before the next season change? Contact Arbutus Hardwood for a quick assessment and a straightforward recommendation.

              Most water-based finishes are safe to walk on in socks within 3 to 4 hours, but full cure time takes 1 to 2 weeks. Avoid shoes and heavy foot traffic during that window.

              It's best to wait at least two weeks before placing rugs, and avoid rubber-backed mats until the floor has fully cured, since they can trap moisture against the finish.

              A pH-neutral cleaner made specifically for hardwood floors is the safest choice. Avoid vinegar, oil soaps, and any cleaner with wax, as these can dull or damage the finish over time.

              Most floors benefit from a maintenance coat every 3 to 5 years, depending on foot traffic and how well the floor has been cared for in between.

              Yes. Wood naturally expands and contracts with humidity changes, and keeping indoor levels between 35% and 55% helps prevent gaps, cupping, or warping over time, especially through Calgary's dry winters.

              No. Steam mops introduce heat and moisture that can break down the finish and potentially damage the wood underneath, even on floors that were recently refinished.

              How to choose a hardwood flooring contractor in Calgary

              How to choose a hardwood flooring contractor in Calgary

              How to choose a hardwood flooring contractor in Calgary Learn how to choose a hardwood flooring contractor in Calgary by checking experience, insurance, past projects and written quotes before you hire. Contact Us Your floors will be under your feet for 20 years or more. The person you hire to…

              Hardwood Flooring Cost Calgary: 2026 Price & Installation Guide

              Hardwood Flooring Cost Calgary: 2026 Price & Installation Guide

              Hardwood Flooring Cost in Calgary: What You’ll Actually Pay Planning your project but unsure about hardwood flooring cost in Calgary? This guide explains installation, refinishing, and repair expenses to help you plan your flooring budget. Contact Us If you’re planning to install, repair, or refinish hardwood flooring in Calgary, understanding…

              Matte vs Gloss Hardwood Flooring | Arbutus Hardwood

              Matte vs Gloss Hardwood Flooring | Arbutus Hardwood

              Matte vs gloss hardwood flooring: which finish is right for your home? Matte vs gloss hardwood flooring, see which finish suits Calgary homes best for durability, style & upkeep. Get expert advice from Arbutus Hardwood. Contact Us Matte vs gloss hardwood flooring feels like a small decision until you’re standing…
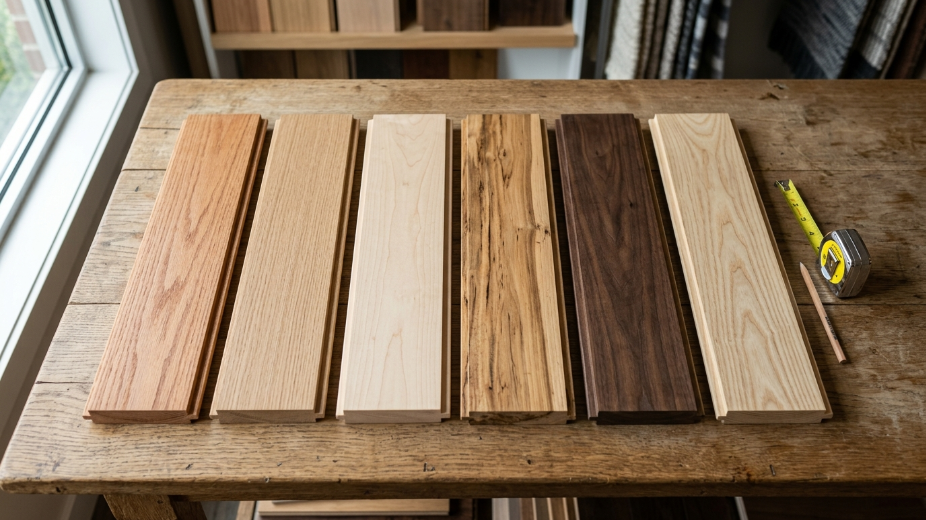
                Hardwood Floor Maintenance After Refinishing: Complete Care Guide (2026) 27

                Why Is Your Hardwood Floor Losing Its Shine? (Complete Calgary Guide)

                Why Is calgary Hardwood Floor Losing Shine?| causes & fixes

                If you are noticing your hardwood floor losing shine, it is usually due to everyday wear or Calgary’s dry climate rather than permanent damage. A simple diagnostic test will quickly tell you if you need a basic deep clean, a screen and recoat, or a full professional refinishing.

                You walk into your living room, look down, and something feels off. The floor that used to catch the light and glow now looks flat. Maybe it’s streaky. Maybe it just looks tired. If your hardwood floor is losing shine, you’re dealing with one of the most common issues homeowners run into, and it happens for very specific, identifiable reasons.

                The good news is that a hardwood floor losing shine almost never means the floor is ruined. In most cases, it’s a sign of normal wear that can be diagnosed and fixed, sometimes with a simple cleaning correction, and sometimes with professional refinishing. This guide walks through exactly why it happens, how to tell which cause applies to your floor, and what your realistic options are, with a specific focus on what Calgary’s climate does to hardwood over time.

                What Does It Actually Mean When a Floor “Loses Its Shine”?

                Hardwood floors aren’t shiny because the wood itself is glossy. The shine comes from a clear protective topcoat, usually polyurethane, applied over the wood after installation or refinishing. This topcoat is smooth and reflects light evenly, which is what creates that glossy or satin look.

                When people say their floor looks dull, one of three things is usually happening:

                • Something is sitting on top of the finish, blocking the reflection (buildup or grime).
                • The finish itself has thinned or worn away in patches (wear).
                • The surface has been physically altered by scratches or micro-abrasions (damage).

                Knowing which one of these applies to your floor changes everything about the fix, which is exactly what we’ll cover next.

                Common Causes of Hardwood Floor Losing Shine

                Person testing hardwood floor

                1. Worn-Out Protective Finish

                Every time you walk across a hardwood floor, you’re putting tiny amounts of pressure and friction on the finish. Over years, especially in high-traffic areas like hallways, kitchens, and in front of couches, that finish gradually thins out. Eventually, it wears through completely in patches, and those patches lose their ability to reflect light the same way the rest of the floor does. This is the single most common reason older hardwood floors lose their shine.

                2. Wax and Cleaning Product Buildup

                This one surprises a lot of homeowners. Many popular “floor shine” or “floor restorer” products sold at grocery stores don’t actually clean the floor. They leave behind a thin waxy or polymer layer. The first application often looks great. But each additional application adds another layer on top of the last one, and these layers trap dust, hair, and grime between them. After a while, the floor looks hazy or streaky no matter how often it’s mopped, because you’re not looking at the wood finish anymore. You’re looking through several layers of old products.

                3. Micro-Scratches From Everyday Life

                Pet nails, sliding chairs, grit tracked in from shoes, and vacuum cleaner wheels all create extremely fine scratches in the finish. On their own, these scratches are nearly invisible. But hardwood floors accumulate thousands of them over time, and collectively, they scatter light in every direction instead of reflecting it cleanly. This is why floors in busy households, or homes with dogs, tend to look dull faster even if the finish technically isn’t worn through yet.

                4. Using the Wrong Cleaning Products

                Steam mops, vinegar-based cleaners, ammonia products, and oil soaps are frequently marketed as safe for “all floors,” but they are genuinely damaging to hardwood finishes. Steam can cloud the finish or even push moisture into the seams between boards. Vinegar and ammonia are both acidic or alkaline enough to slowly break down polyurethane over repeated use. If your floor has looked progressively duller since you switched cleaning products, this is worth investigating first.

                5. Calgary’s Dry Climate

                This is a factor a lot of flooring companies from outside the region don’t fully account for. Calgary experiences long, dry winters with very low indoor humidity, often well under 30 percent when furnaces are running constantly. Wood naturally expands and contracts with moisture levels, and finishes are somewhat flexible to accommodate this. But repeated, extreme dry-out cycles each winter can cause micro-cracking in the finish layer over the years, which shows up as a duller, sometimes slightly textured surface, particularly along board edges.

                6. Sunlight and UV Exposure

                Rooms with large south or west-facing windows often show uneven shine, with sun-exposed areas looking duller or even slightly different in color compared to areas that stay shaded, like under rugs or furniture. UV exposure breaks down finish molecules over time, which is why floors near patio doors or big windows are often the first place homeowners notice a problem.

                How to Diagnose What’s Actually Causing the Dullness

                Before deciding on a fix, it helps to figure out which category your floor falls into. Here’s a simple test and a quick reference table.

                The Mineral Spirits Test

                Apply a small amount of mineral spirits to a soft cloth and rub it gently on a small, inconspicuous section of the floor.

                • If the shine comes back immediately, you’re dealing with wax or product buildup.
                • If the area stays dull or feels slightly rough, the finish has worn down and buildup isn’t the main issue.

                Symptom

                Likely Cause

                Suggested Next Step

                Streaky or hazy look, especially near entryways

                Wax or cleaner buildup

                Deep clean or professional polishing

                Dull patches only in high-traffic paths

                Finish wear

                Screen and recoat

                Fine scratches visible at certain angles

                Micro-scratching

                Screen and recoat, or full refinish if extensive

                Uneven shine near windows

                UV/sun exposure

                Full refinish for even color and sheen

                Cracks, raised edges, or bare wood

                Deeper finish or board damage

                Hardwood floor repair

                Dullness appears worse every winter

                Dry climate effects

                Full refinish with a climate-appropriate finish system

                DIY Fixes You Can Try First

                If your test points to buildup rather than worn finish, you may be able to improve things yourself before booking a professional service.

                Deep Cleaning Correctly

                • Use a hardwood-specific cleaner, not an all-purpose spray.
                • Use a slightly damp microfiber mop, never a wet one.
                • Avoid steam mops entirely.
                • Clean in the direction of the wood grain for a more even result.

                When Store-Bought Restorer Products Help (And When They Don’t)

                These products can genuinely help if your finish is otherwise intact and the dullness is purely surface-level grime. But if you apply a restorer over a finish that’s already worn through in spots, it tends to highlight the difference between worn and intact areas rather than fixing it. If you’ve already tried one round of deep cleaning and the dullness hasn’t improved, that’s usually a sign you’re dealing with actual finish wear, not buildup.

                Professional Solutions: Screen and Recoat vs. Full Refinishing

                screen and recoat service

                Once finish wear is confirmed, there are two standard professional paths, and choosing the right one depends on how far along the wear actually is.

                Factor

                Screen and Recoat

                Full Sanding and Refinishing

                What it involves

                Light abrasion of the existing finish, followed by a fresh topcoat

                Complete removal of old finish down to bare wood, then refinished

                Best for

                Floors with even wear, no deep scratches or bare patches

                Floors with worn-through areas, deep scratches, discoloration, or board damage

                Typical timeline

                1 to 2 days

                3 to 5 days depending on square footage

                General cost range

                Lower cost per square foot

                Higher cost per square foot, but resets the floor completely

                Result

                Restores shine and adds protection

                Restores shine, removes damage, and evens out color

                Exact pricing depends on square footage, wood species, and finish type, so it’s best to get a specific quote through a free consultation rather than rely on general averages, but this table gives a realistic starting point for planning.

                How Arbutus Hardwood Restores Shine to Calgary Homes

                With more than 30 years in the trade and over 500 completed projects across Calgary, we’ve seen this exact problem in nearly every type of home, from older character houses in Inglewood to newer builds in Mahogany and Seton. Our approach includes:

                • Dustless sanding, so your home doesn’t end up covered in fine dust during the job.
                • Bona-certified finish systems, chosen for durability and a consistent, professional result.
                • Custom sheen matching, whether you prefer satin, semi-gloss, or high-gloss.
                • Climate-aware application, applying and curing finishes with Calgary’s dry winters specifically in mind, so the result actually holds up.

                If you’re not sure whether your floor needs a simple recoat or a full refinish, our hardwood floor refinishing team can assess it in person and give you a straightforward recommendation, without pushing you toward the more expensive option unnecessarily.

                Preventing Your Hardwood Floor From Losing Its Shine Again

                Woman applying felt pad chair

                Once your floor is restored, a few habits go a long way toward keeping it that way:

                • Use felt pads under all furniture legs, and check them periodically since they wear down.
                • Place a doormat at every entry point to reduce grit tracked in from outside.
                • Trim pets’ nails on a regular schedule.
                • Stick to hardwood-approved cleaners only, and avoid steam mops permanently.
                • Run a humidifier during winter months to reduce the dry-out cycles that stress the finish.
                • Rotate rugs and furniture occasionally so sun exposure doesn’t create uneven wear patterns.

                Does Wood Species Affect How Long the Shine Lasts?

                Yes, to some degree. Harder wood species like oak and maple resist scratching better than softer species like walnut or cherry, which means the finish stays intact longer under normal foot traffic. Engineered hardwood, because of its layered construction, tends to handle Calgary’s humidity swings slightly better than solid hardwood, which can mean fewer finished micro-cracks over time. If you’re deciding between species for a future installation or refinishing project, our guides on hardwood flooring species and types of hardwood flooring go into this in more detail.

                Mistakes to Avoid When Trying to Restore Shine

                • Layering more wax on top of existing buildup. This almost always makes the problem worse, not better.
                • Using a steam mop to “deep clean” a dull floor. This is one of the fastest ways to damage a finish permanently.
                • Assuming a dull floor needs full replacement. In the vast majority of cases, refinishing restores the floor completely, at a fraction of replacement cost.
                • Waiting too long once bare wood is visible. Once the finish wears through completely in a spot, the exposed wood can absorb moisture and dirt, which makes the eventual refinish more involved.
                • Choosing a contractor unfamiliar with local climate conditions. Finish systems and curing times that work in more humid regions don’t always hold up the same way in Calgary’s dry winters.

                A Real Example: Why Getting the Diagnosis Right Matters

                We once visited a home in Panorama Hills where the owners had already spent a full weekend applying a store-bought floor restorer, twice, because the first coat didn’t seem to help. The floor still looked streaky and, if anything, slightly worse in the high-traffic hallway. When we tested it, the mineral spirits brought the shine back instantly in most rooms, confirming buildup. But in the hallway itself, the test showed no change at all. That section had worn through to bare finish years earlier, and the two rounds of restorer had simply added more product on top of already-compromised wood.

                The fix ended up being a straightforward professional deep clean for most of the home, paired with a screen and recoat in the hallway. Had they continued guessing and applying more product, the hallway would have eventually needed a full refinish instead of the lighter, less expensive fix. This is a good example of why a quick diagnosis before choosing a fix saves both time and money.

                Best Time of Year to Refinish Hardwood Floors in Calgary

                Timing matters more in Calgary than in most cities because of how dramatically indoor humidity shifts between seasons. Late spring through early fall tends to be the ideal window for refinishing projects, since indoor humidity is more stable and finishes cure more predictably without the extreme dryness caused by winter furnace use.

                That said, refinishing can be done successfully year-round with the right approach. If a project does happen during winter, using a humidifier in the space for a few days before and after the job helps the new finish cure evenly and reduces the odds of early micro-cracking. This is one of those details that matters more than most homeowners realize, and it’s part of why local experience with Calgary’s climate makes a measurable difference in how long a refinished floor keeps its shine.

                Final Thoughts

                A hardwood floor losing shine is frustrating to notice, but it’s rarely a sign of serious damage. Whether the cause is wax buildup, worn finish, everyday scratching, or the effects of Calgary’s dry winters, the right diagnosis makes the fix straightforward. A simple deep clean solves some cases. Others need a screen and recoat, or a full refinish to bring the floor back to the way it looked when it was first installed.

                If your floor is looking dull, streaky, or worn, don’t wait for it to get worse. Contact Arbutus Hardwood for a straightforward, no-pressure assessment, and we’ll tell you honestly what your floor actually needs.

                📞 Call us today at 403-371-7531 proudly serving Calgary, Airdrie, Cochrane, Okotoks, Chestermere, and surrounding areas.

                A screen and recoat can often be completed in one to two days, while a full sanding and refinishing project typically takes three to five days depending on the size of the space and drying time between coats.

                Yes. New floors installed during Calgary's dry winter months can sometimes appear duller within the first year if the home's indoor humidity isn't managed with a humidifier, since the finish is still adjusting to seasonal moisture changes.

                In most cases, yes. A full sanding and refinishing process removes the top layer of wood along with the old finish, which eliminates surface-level pet scratches. Deeper gouges may need spot repair first.

                Most hardwood floors benefit from a screen and recoat every three to five years in normal households, with a full refinish typically needed every eight to ten years, though this varies based on traffic and maintenance habits.

                Yes. Areas under rugs or furniture are shielded from sunlight and foot traffic, so they often stay glossier longer, which creates a visible sheen difference once the furniture is moved or the rug is removed.

                Water-based finishes tend to be more resistant to yellowing but can show wear patterns slightly sooner in high-traffic areas, while oil-based finishes are generally more durable but take longer to cure. Both perform well when properly maintained.

                How to choose a hardwood flooring contractor in Calgary

                How to choose a hardwood flooring contractor in Calgary

                How to choose a hardwood flooring contractor in Calgary Learn how to choose a hardwood flooring contractor in Calgary by checking experience, insurance, past projects and written quotes before you hire. Contact Us Your floors will be under your feet for 20 years or more. The person you hire to…

                Hardwood Flooring Cost Calgary: 2026 Price & Installation Guide

                Hardwood Flooring Cost Calgary: 2026 Price & Installation Guide

                Hardwood Flooring Cost in Calgary: What You’ll Actually Pay Planning your project but unsure about hardwood flooring cost in Calgary? This guide explains installation, refinishing, and repair expenses to help you plan your flooring budget. Contact Us If you’re planning to install, repair, or refinish hardwood flooring in Calgary, understanding…

                Matte vs Gloss Hardwood Flooring | Arbutus Hardwood

                Matte vs Gloss Hardwood Flooring | Arbutus Hardwood

                Matte vs gloss hardwood flooring: which finish is right for your home? Matte vs gloss hardwood flooring, see which finish suits Calgary homes best for durability, style & upkeep. Get expert advice from Arbutus Hardwood. Contact Us Matte vs gloss hardwood flooring feels like a small decision until you’re standing…
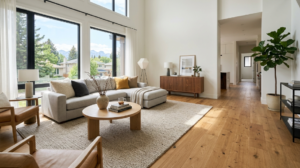
                  Why Is Your Hardwood Floor Losing Its Shine? (Complete Calgary Guide) 31

                  Hardwood Floor Installation Cost Calgary | 2026 Guide

                  Hardwood Floor Installation Cost Calgary: A Complete Pricing Guide

                  Planning a home renovation? Discover the actual hardwood floor installation cost in Calgary for 2026, including how local climate factors drive pricing. This guide covers what you will pay per square foot for a professional hardwood floor installation in Calgary and nearby areas like Okotoks, Airdrie, and Cochrane.

                  If you’re planning a renovation, the hardwood floor installation cost in Calgary is probably the first number you want to nail down. It makes sense. Hardwood is one of the bigger investments you’ll make in your home, and the price can swing a lot depending on the wood you pick, the shape your subfloor is in, and how the crew installs it.

                  At Arbutus Hardwood, we’ve spent more than 30 years installing, refinishing, and repairing floors across Calgary, so we see these budgets play out in real homes every week. This guide breaks down exactly what you’ll pay in 2026, what pushes the price up, and how to avoid the surprise costs that catch a lot of homeowners off guard.

                  How Much Does Hardwood Floor Installation Cost in Calgary?

                  For a quick answer: most Calgary homeowners pay somewhere between $10 and $22 per square foot for hardwood floor installation, including materials and labour. That range covers everything from budget-friendly engineered hardwood to premium solid wood with a more involved layout.

                  For a typical 1,000-square-foot main floor, that works out to roughly $10,000 to $22,000 for a standard installation. Choose a rare or exotic species, a custom pattern like herringbone, or a site-finished floor, and the total can climb higher.

                  Here’s a quick snapshot before we dig into the details:

                  Project Type

                  Typical Cost Per Sq Ft

                  1,000 Sq Ft Total

                  Engineered hardwood, standard install

                  $10 – $17

                  $10,000 – $17,000

                  Solid hardwood, standard install

                  $12 – $22

                  $12,000 – $22,000

                  Prefinished hardwood, click-lock

                  $9 – $15

                  $9,000 – $15,000

                  Site-finished solid hardwood

                  $14 – $26

                  $14,000 – $26,000

                  Custom pattern (herringbone, chevron, parquet)

                  $18 – $30+

                  $18,000 – $30,000+

                  These numbers are a starting point, not a quote. The only way to get an accurate figure for your home is a proper on-site assessment, since subfloor condition and layout complexity can move the price a lot in either direction.

                  What Affects Hardwood Floor Installation Cost in Calgary

                  Installation in Progress

                  A handful of factors decide where your project lands on that price range. Understanding them helps you budget realistically and spot a fair quote when you see one.

                  Wood Species and Material Grade

                  The wood itself is usually the biggest line item. Domestic species like oak, maple, and ash tend to sit at the more affordable end, while walnut, cherry, and exotic imports push costs higher. Grade matters too. Select and better grade boards, with fewer knots and more consistent colour, cost more than character or rustic grades.

                  Solid vs Engineered Hardwood

                  Hardwood flooring samples side

                  Solid hardwood is milled from a single piece of wood, which makes it durable and easy to sand and refinish many times over its life. Engineered hardwood has a real wood veneer over a plywood core, which makes it more stable in Calgary’s dry climate and often a bit cheaper to install, especially over concrete.

                  Feature

                  Solid Hardwood

                  Engineered Hardwood

                  Typical cost per sq ft

                  $12 – $26

                  $10 – $22

                  Refinishing potential

                  Multiple times over decades

                  Once or twice, depending on veneer thickness

                  Best for

                  Main floors, living areas

                  Basements, condos, over concrete

                  Climate stability

                  Can shrink or gap in dry winters

                  More resistant to humidity swings

                  Installation method

                  Nail-down or staple-down

                  Glue-down, staple-down, or click-lock

                  Subfloor Condition and Prep Work

                  If your subfloor has high spots, squeaks, or moisture issues, it needs to be corrected before any hardwood goes down. Subfloor repair and levelling is one of the most common hidden costs on a flooring project, and it’s worth asking your installer to inspect this before you finalize a budget.

                  Installation Method

                  There are four main ways hardwood gets installed, and each has its own labour cost:

                  • Nail-down: the traditional method for solid wood over a wooden subfloor, prized for long-term durability.
                  • Staple-down: common for engineered hardwood, offering solid stability at a slightly lower labour cost.
                  • Glue-down: used mostly over concrete subfloors, common in basements and condos.
                  • Click-lock (floating): planks lock together without nails or glue, usually the fastest and most budget-friendly option.

                  Pattern Complexity

                  Standard straight-plank layouts are the most economical. Herringbone, chevron, and parquet patterns require far more precision and time, since even small alignment errors are noticeable across the whole room. These patterns typically add several dollars per square foot to the labour cost. If you’re drawn to a distinctive layout, our custom hardwood flooring service covers pattern design, stain matching, and full installation.

                  Removal and Disposal of Old Flooring

                  Tearing out old carpet, tile, or flooring adds to your total. Carpet removal is usually the simplest and cheapest, while glued-down tile or old hardwood can be more labour-intensive to pull out and haul away.

                  Finishing: Prefinished vs Site-Finished

                  Prefinished hardwood arrives with the stain and topcoat already applied at the factory, which makes for a faster, cleaner installation. Site-finished, or unfinished, hardwood is sanded and coated after installation. It costs more in labour and time, but it delivers a perfectly flat surface with no bevelled edges and complete control over stain colour.

                  Stairs and Transitions

                  Stairs are priced per step rather than per square foot, and hardwood stairs generally cost more than flat flooring because of the nosing, risers, and precision cutting involved.

                  Calgary’s Climate and Acclimation

                  Calgary sits at a high altitude with very low indoor humidity in winter, sometimes dropping to 10% or lower. Hardwood needs to acclimate in your home for several days before installation to prevent gapping, cupping, or warping later. Skipping this step is one of the most common causes of hardwood floor damage we see on repair calls, so a good installer will always build acclimation time into your schedule.

                  Best Time of Year to Install Hardwood Floors in Calgary

                  Timing your installation can actually affect both cost and long-term performance. Calgary’s humidity swings hard between seasons, and that matters more for hardwood than most homeowners realize.

                  Late spring through early fall tends to be the busiest season for flooring contractors, since it lines up with most renovation projects and home sales. Booking during this window sometimes means a longer wait for an installer, though pricing itself usually stays consistent.

                  Installing during the depths of winter isn’t a problem as long as your contractor accounts for the low indoor humidity. Wood needs to sit and acclimate in the room where it will be installed, sometimes for several days longer in winter than in summer, so the boards settle at the moisture level they’ll actually live at. Skipping or rushing this step is one of the fastest ways to end up with gaps between boards by the following spring.

                  If your schedule is flexible, shoulder seasons like early spring or late fall can sometimes mean shorter wait times for booking a crew, without sacrificing quality.

                  Cost to Install Hardwood by Room

                  Whole-home projects usually get better per-square-foot pricing than single small rooms, since a contractor can move through the job more efficiently. Here’s roughly what homeowners in Calgary can expect for common project sizes, based on mid-range engineered hardwood:

                  Room or Area

                  Approx. Size

                  Estimated Cost

                  Bedroom

                  150 sq ft

                  $1,800 – $3,200

                  Living room

                  300 sq ft

                  $3,600 – $6,300

                  Kitchen

                  200 sq ft

                  $2,400 – $4,200

                  Main floor (open concept)

                  800 sq ft

                  $9,600 – $16,800

                  Whole main floor plus stairs

                  1,000 sq ft + 14 stairs

                  $11,700 – $20,800

                  Smaller, single-room jobs often carry a slightly higher per-square-foot rate because setup, material delivery, and site protection cost roughly the same whether you’re doing 150 square feet or 1,500.

                  Common Mistakes That Inflate Hardwood Installation Cost

                  A few avoidable missteps tend to push project costs higher than they need to be:

                  • Skipping the subfloor inspection. Problems discovered mid-job almost always cost more to fix than issues caught during the initial assessment.
                  • Choosing a quote without a home visit. Phone or online-only estimates rarely account for your specific subfloor, layout, or square footage accurately.
                  • Not budgeting for stairs and transitions separately. These are commonly left out of a base square-footage number, then added on later as a surprise.
                  • Rushing the acclimation period. A shorter timeline can mean a lower quote up front, but it raises the risk of costly repairs down the road.
                  • Mixing incompatible installation methods. For example, gluing solid hardwood directly to concrete without the right underlayment can lead to failures that require a full redo.

                  Asking your installer directly how they handle each of these points is one of the simplest ways to protect your budget.

                  Hardwood Flooring Cost by Popular Species in Calgary

                  Wood Species

                  Style

                  Approx. Cost Per Sq Ft (Installed)

                  Red Oak

                  Classic

                  $12 – $18

                  White Oak

                  Classic, modern-neutral

                  $13 – $20

                  Maple

                  Classic, smooth grain

                  $12 – $19

                  Ash

                  Classic, durable

                  $12 – $18

                  Hickory

                  Rustic, high durability

                  $14 – $21

                  Walnut

                  Bold, rich tone

                  $18 – $28

                  Cherry

                  Bold, warm tone

                  $17 – $26

                  Acacia

                  Exotic, unique grain

                  $16 – $24

                  Prices shift based on plank width, board length, finish, and current supply. A wider select-grade plank in a premium species will always land at the top of these ranges.

                  Hidden Costs Homeowners Often Miss

                  A per-square-foot number rarely tells the whole story. Before you commit to a budget, ask your contractor whether these are included:

                  • Subfloor repair or levelling, typically $1 to $4 per square foot in problem areas
                  • Moisture barrier or underlayment, especially over concrete
                  • Old flooring removal and disposal
                  • Baseboard or trim removal and reinstallation
                  • Stair installation, priced separately from flooring
                  • Transition strips between rooms or flooring types

                  A detailed, written quote should spell out each of these so you’re not hit with add-ons partway through the job.

                  DIY vs Professional Hardwood Installation

                  Technically, you can install hardwood yourself, and some homeowners do it for smaller, simple rooms. But hardwood is unforgiving of mistakes. Incorrect acclimation, poor subfloor prep, or uneven nailing can lead to squeaks, gaps, or a floor that needs to be pulled up and redone within a few years. For most homeowners, the labour savings from a DIY install don’t outweigh the risk, especially for anything beyond a small, low-traffic space.

                  Professional installers also carry the tools, like flooring nailers and moisture meters, that make a floor perform well over the long run. According to the National Wood Flooring Association, proper acclimation and moisture testing are among the most important steps in a lasting hardwood installation, and both are easy to get wrong without experience.

                  How to Get an Accurate Hardwood Flooring Quote in Calgary

                  Online cost guides, including this one, can only give you a ballpark. To get a number you can actually budget around, look for a quote that includes:

                  1. An in-person subfloor and moisture assessment
                  2. A clear breakdown of material, labour, and prep costs
                  3. The specific wood species, grade, and finish you’re choosing
                  4. Stair or transition pricing, if applicable
                  5. A written timeline for the project

                  Be cautious of quotes given without a home visit. They often miss subfloor issues that show up later as unexpected charges.

                  Why Hardwood Flooring Is Worth the Investment

                  Home interior with hardwood floor

                  Hardwood floors add real, lasting value to a Calgary home. They’re durable, easy to clean, and can be sanded and refinished many times rather than replaced, which makes the long-term cost per year often lower than cheaper flooring that needs replacing sooner. Hardwood also tends to be a strong selling point for resale, since buyers consistently favour it over carpet or laminate.

                  If your current floors are structurally sound but showing scratches, dullness, or a worn finish, a full replacement isn’t always necessary. Our hardwood floor refinishing service restores that original shine at a fraction of the cost of new installation. And if the damage is more specific, like water stains, loose boards, or gaps from a dry Calgary winter, our hardwood floor repair service can often fix the problem area without touching the rest of the floor.

                  Final Thoughts on Hardwood Floor Installation Cost in Calgary

                  Budgeting for hardwood floor installation cost in Calgary comes down to a few key decisions: the wood species, solid versus engineered, the installation method, and how much prep your subfloor needs. Most projects land between $10 and $22 per square foot, but the only way to know your real number is a proper in-home assessment.

                  At Arbutus Hardwood, we’ve been helping Calgary homeowners plan and install hardwood floors for over 30 years, and we know exactly how this city’s dry climate affects wood over time. Whether you need a full hardwood floor installation, a custom pattern, a refinish, or a repair on an existing floor, we’re happy to walk through your space and give you a clear, honest quote.

                  Ready to get a real number for your project?

                  Contact Dave and the team at Arbutus Hardwood for a free, no-pressure quote, or call 403.371.7531.

                  Generally, yes. Engineered hardwood tends to sit slightly lower on the price range, especially when installed with a glue-down or click-lock method, though premium engineered products can cost as much as mid-range solid wood.

                  A standard 1,000-square-foot installation usually takes three to five days, including acclimation time, prep work, and installation. Site-finished floors take longer because of on-site sanding and coating.

                  It depends on the contractor. Some include basic furniture moving in their quote, while others expect the space to be cleared beforehand. Always confirm this before the job starts.

                  Solid hardwood isn't recommended below grade due to moisture risk. Engineered hardwood, installed with a proper moisture barrier, is a much safer option for basements.

                  Often, yes, but it's usually cheaper than replacement. Loose boards, minor water stains, and surface scratches can typically be repaired and then refinished, saving a large portion of the cost of a full tear-out.

                  Yes. Hardwood is consistently one of the most requested flooring types among buyers, and a well-maintained hardwood floor can support a stronger resale price compared to carpet or laminate.

                  How to choose a hardwood flooring contractor in Calgary

                  How to choose a hardwood flooring contractor in Calgary

                  How to choose a hardwood flooring contractor in Calgary Learn how to choose a hardwood flooring contractor in Calgary by checking experience, insurance, past projects and written quotes before you hire. Contact Us Your floors will be under your feet for 20 years or more. The person you hire to…

                  Hardwood Flooring Cost Calgary: 2026 Price & Installation Guide

                  Hardwood Flooring Cost Calgary: 2026 Price & Installation Guide

                  Hardwood Flooring Cost in Calgary: What You’ll Actually Pay Planning your project but unsure about hardwood flooring cost in Calgary? This guide explains installation, refinishing, and repair expenses to help you plan your flooring budget. Contact Us If you’re planning to install, repair, or refinish hardwood flooring in Calgary, understanding…

                  Matte vs Gloss Hardwood Flooring | Arbutus Hardwood

                  Matte vs Gloss Hardwood Flooring | Arbutus Hardwood

                  Matte vs gloss hardwood flooring: which finish is right for your home? Matte vs gloss hardwood flooring, see which finish suits Calgary homes best for durability, style & upkeep. Get expert advice from Arbutus Hardwood. Contact Us Matte vs gloss hardwood flooring feels like a small decision until you’re standing…
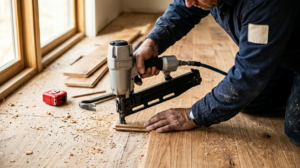
                  Need Help in Hardwood Floor Installation?

                  Choosing the right hardwood flooring species is one of the most important steps in creating a durable and visually appealing home. Calgary’s climate requires careful consideration, making it essential to select a species that can handle environmental changes without compromising performance. If you’re planning to install hardwood flooring contact us today to get the best results from your investment.

                    Hardwood Floor Installation Cost Calgary | 2026 Guide 35

                    How Long Does Hardwood Floor Refinishing Take?

                    How Long Does Hardwood Floor Refinishing Take? (Calgary Guide)

                    Dealing with water-damaged hardwood floors? Our flooring specialists can assess the damage, recommend the right repair solution, and restore your floors to their original beauty. From minor stains and cupping to warped boards and deeper moisture damage, we use proven restoration techniques and premium materials to deliver results that last. And if you’re already wondering how long does hardwood floor refinishing take once the repair is done, most projects wrap up in just 2 to 5 days, so you won’t be without your floors for long.

                    If you’re planning hardwood floor refinishing in Calgary, the first question on your mind is probably simple: how long will this take?

                    It’s a fair question. You need to plan around it. Maybe you’re hosting a family event, selling your home soon, or just want your floors back so you can move around your house normally again.

                    The short answer: most hardwood floor refinishing projects take 2 to 5 days, depending on the size of the space and the condition of your floors.

                    But the real answer has a lot more detail in it, and that detail actually matters. It affects how you plan your week, where you sleep, and what you should expect from your contractor.

                    In this guide, we’ll walk through the full timeline step by step, what speeds the process up, what slows it down, and how to plan your project in Calgary and nearby areas like Airdrie, Okotoks, Cochrane, De Winton, Priddis, and Chestermere.

                    Average Timeline for Hardwood Floor Refinishing

                    Let’s start with the numbers, since that’s usually what people want first. To help you visualize the week, here is how a typical project breaks down day by day.

                    Project Phase

                    Estimated Duration

                    Key Homeowner Takeaway

                    Furniture Removal & Prep

                    Half a Day

                    The area must be completely clear; high noise levels begin.

                    Sanding

                    1 to 2 Days

                    Loudest and messiest phase; dustless systems recommended.

                    Staining (Optional)

                    Half a Day

                    Required only if you are changing the floor color.

                    Applying Finish Coats

                    1 to 2 Days

                    2 to 3 coats are applied; strictly zero foot traffic allowed.

                    Drying & Curing

                    24 Hours to 2 Weeks

                    Safe for socks in 24 hours; wait on rugs and pets.

                    Add it all up, and a single room usually takes 1 to 2 days. A full main floor or an entire house can take 3 to 5 days.

                    Bigger homes, homes with detailed inlays, or floors with heavy damage sometimes take longer. It’s not a race. A floor done right the first time saves you money and stress down the road.

                    The Full Refinishing Process, Step by Step

                    It helps to understand what actually happens during those days. Here’s the process broken down.

                    Step 1: Inspection and Prep

                    Before any sanding starts, your contractor checks the floor for loose boards, nail heads sticking up, gaps, or water damage.

                    If there’s damage, that needs to be addressed first, sometimes through hardwood floor repair rather than a quick fix. If the damage is from a leak or spill, it’s worth reading up on how to repair water-damaged hardwood floors so you know what to expect before work begins.

                    This step also includes removing furniture, rugs, and floor vents, and sealing off the work area from the rest of your home. This stage usually takes half a day for an average room, longer for a full house.

                    Step 2: Sanding

                    Sanding removes the old finish and any surface damage. It’s usually done in a few passes, starting with a coarse grit and moving to a finer one.

                    This step is the loudest and messiest part of the job, though dustless systems cut down on the mess significantly. Sanding a single room usually takes about a day.

                    Technician operating floor sander

                    A full house can take two days or more. This is especially true if the old finish is thick or the floor has deep scratches.

                    Step 3: Staining

                    If you’re changing the color of your floor, staining happens after sanding.

                    This step needs to dry fully before the finish coats go on. This usually adds half a day to a full day, depending on humidity and the type of stain used.

                    If you’re keeping the natural wood tone, you can skip this step entirely and move straight to the finish.

                    Step 4: Applying the Finish

                    This is where the floor gets its protective finish coating, which protects the wood from scratches, moisture, and everyday wear. Most floors get two to three coats.

                    Each coat needs to dry before the next one goes on. This is usually the longest part of the whole project, because you can’t rush drying time without risking a poor finish.

                    Oil-based finishes generally need a full day to dry between coats. Water-based finishes dry faster, sometimes in just a few hours, which can shave a day or more off your total timeline.

                    If you’re unsure which is right for your home, our breakdown of oil vs water based floor finishes in Calgary covers the trade-offs in more detail.

                    Step 5: Curing

                    Consultant reviewing floor plan 

                    Drying and curing aren’t the same thing. Drying means the surface feels safe to walk on. Curing means the finish has fully hardened.

                    Most floors are safe to walk on in socks within 24 hours, but full curing can take up to two weeks. This is why contractors usually ask you to avoid rugs, heavy furniture, and pets with sharp nails for a little while after the job wraps up.

                    🛠️ Planning a refinishing project in the Calgary area? Let’s map out a timeline specific to your home’s unique square footage and needs. Get a local expert consultation here.

                    What Affects How Long Refinishing Takes

                    A few factors can add real time to your project. Knowing these ahead of time helps you set the right expectations.

                    • Size of the Area: This one’s obvious, but worth repeating. A small bedroom refinishes faster than an open-concept main floor. More square footage means more sanding passes and more drying time between coats.
                    • Condition of Your Existing Floors: If your floors have deep scratches, dark stains, or years of old finish buildup, they need extra sanding passes to get down to clean wood. If you’re dealing with actual water damage, that’s a different kind of repair altogether, and it’s worth handling that separately before you book a refinish.
                    • Type of Finish You Choose: Oil-based finishes take longer to dry between coats, sometimes a full day each. Water-based finishes dry faster, which can shorten your total project time. Each option has its own trade-offs beyond just speed, including durability, smell, and how the final color looks.
                    • Number of Coats: Most floors get two to three coats of finish. Higher-traffic homes, or homes with kids and pets, sometimes need an extra coat for durability. Each additional coat adds drying time to the schedule.
                    • Weather and Humidity: Calgary’s dry climate actually works in your favor here. Low humidity generally helps finishes cure faster compared to more humid cities. That said, during winter, indoor heating can dry the air out even more, which sometimes affects how evenly a finish sets. An experienced contractor knows how to adjust for this.
                    • Dustless vs Traditional Sanding: Dustless refinishing systems contain the dust with a vacuum attachment connected directly to the sanding equipment. This keeps the mess down and often keeps the whole process moving faster, since there’s less cleanup needed between steps and less dust settling back onto wet finish.

                    Can You Stay Home During the Refinishing Process?

                    This is one of the most common questions homeowners ask, right after “how long will it take.” The honest answer depends on the size of the job and your comfort level.

                    Sanding is loud and can create dust, even with dustless systems. Finish coats also have a noticeable smell, especially oil-based ones, while they’re drying.

                    Many homeowners do stay home during smaller jobs, especially if only one or two rooms are being done and the rest of the house stays livable.

                    For full-house refinishing projects, some people choose to stay elsewhere for a couple of nights. This is particularly helpful while finish coats are drying, just for comfort and to avoid walking through wet or tacky floors by accident.

                    Can You Speed Up the Process?

                    A little, yes. Here’s what actually helps:

                    • Clear the room of furniture, rugs, and small items before the crew arrives.
                    • Choose a water-based finish if drying time matters most to you.
                    • Confirm the number of coats upfront, so there are no surprise delays mid-project.
                    • Avoid last-minute layout or color changes once work has started.
                    • Keep pets and kids out of the work area during sanding and finishing.

                    What Slows It Down

                    • Old, thick layers of finish that need extra sanding passes.
                    • Sudden humidity swings during the finishing stage.
                    • Adding stain color changes midway through the project.
                    • Skipping proper dry time between coats, which can ruin the final result.
                    • Hidden water damage discovered partway through sanding.

                    Common Mistakes That Extend the Timeline

                    Rushing the process is one of the most common mistakes homeowners run into. It usually costs more time and money to fix later than it would have taken to just wait it out the first time.

                    Walking on floors too soon, moving furniture back too early, or choosing the cheapest possible finish without asking about dry time are all small decisions that can lead to bigger delays or redo work.

                    Another mistake is skipping the hardwood floor polishing option when it’s actually all your floor needs. Not every floor needs a full sand-and-refinish.

                    If your floor just looks dull but isn’t damaged, it might only need a polish, which takes far less time. It’s worth reading hardwood floor polishing vs refinishing before you commit to the longer process.

                    Planning Your Project in Calgary and Nearby Areas

                    If you live in Calgary or nearby communities like Okotoks, De Winton, Priddis, Airdrie, or Cochrane, your timeline will look about the same across the board.

                    Local weather, home age, and floor condition play the biggest role in how long your project takes, not your specific neighborhood. Calgary’s dry climate is generally a plus for curing time, no matter where in the region you’re located.

                    If you’re not sure whether your floors need a full refinish or just a polish, it helps to get a professional opinion first. It can save you both time and money, and it changes your whole timeline.

                    And if your existing hardwood is beyond saving, it’s worth asking about custom hardwood floor options instead of refinishing an old floor past its prime.

                    How to Maintain Your Floors After Refinishing

                    Once the work is done, a little care goes a long way. Avoid placing rugs or furniture back for at least 24 to 48 hours, longer if your contractor recommends it.

                    Use felt pads under furniture legs once you do move things back. Sweep or vacuum regularly, and avoid wet mopping for the first couple of weeks while the finish fully cures. This keeps your new finish looking sharp for years instead of months.

                    A Simple Way to Think About the Timeline

                    Refinishing isn’t a rushed job, and that’s actually a good thing. A floor that’s sanded properly and given the right drying time between coats will last for years without needing attention again.

                    Think of the few days of inconvenience as an investment in a floor that won’t need touching up again for a long time.

                    Final Thoughts

                    Refinishing your hardwood floors is a short-term inconvenience for a long-term result. Most projects wrap up within a week, and the wait is worth it once you see the finished floor looking new again.

                    If you’re ready to get a timeline specific to your home, our team serves Calgary and surrounding areas including Okotoks, Priddis, De Winton, Airdrie, and Cochrane, and we’re happy to walk you through the entire process from start to finish.

                    A single average-sized room usually takes 1 to 2 days, including sanding, staining, and finish coats.

                    A full main floor or whole house typically takes 3 to 5 days, depending on square footage and floor condition. Larger or more damaged floors can take longer.

                    You can usually walk carefully in socks after 24 hours, but full curing can take up to 2 weeks. Avoid heavy furniture or rugs until your contractor gives the go-ahead.

                    It can. Dustless systems reduce cleanup time and mess between steps, which often keeps the overall project moving faster.

                    Oil-based finishes need more drying time between coats, sometimes a full day each, while water-based finishes can dry in just a few hours.

                    Yes, for smaller jobs many homeowners stay home comfortably. For full-house projects, some people prefer to stay elsewhere for a night or two while the finish dries, mainly for comfort.

                    Not dramatically, but Calgary's dry climate generally helps finish cure faster than in more humid regions.

                    How to choose a hardwood flooring contractor in Calgary

                    How to choose a hardwood flooring contractor in Calgary

                    How to choose a hardwood flooring contractor in Calgary Learn how to choose a hardwood flooring contractor in Calgary by checking experience, insurance, past projects and written quotes before you hire. Contact Us Your floors will be under your feet for 20 years or more. The person you hire to…

                    Hardwood Flooring Cost Calgary: 2026 Price & Installation Guide

                    Hardwood Flooring Cost Calgary: 2026 Price & Installation Guide

                    Hardwood Flooring Cost in Calgary: What You’ll Actually Pay Planning your project but unsure about hardwood flooring cost in Calgary? This guide explains installation, refinishing, and repair expenses to help you plan your flooring budget. Contact Us If you’re planning to install, repair, or refinish hardwood flooring in Calgary, understanding…

                    Matte vs Gloss Hardwood Flooring | Arbutus Hardwood

                    Matte vs Gloss Hardwood Flooring | Arbutus Hardwood

                    Matte vs gloss hardwood flooring: which finish is right for your home? Matte vs gloss hardwood flooring, see which finish suits Calgary homes best for durability, style & upkeep. Get expert advice from Arbutus Hardwood. Contact Us Matte vs gloss hardwood flooring feels like a small decision until you’re standing…
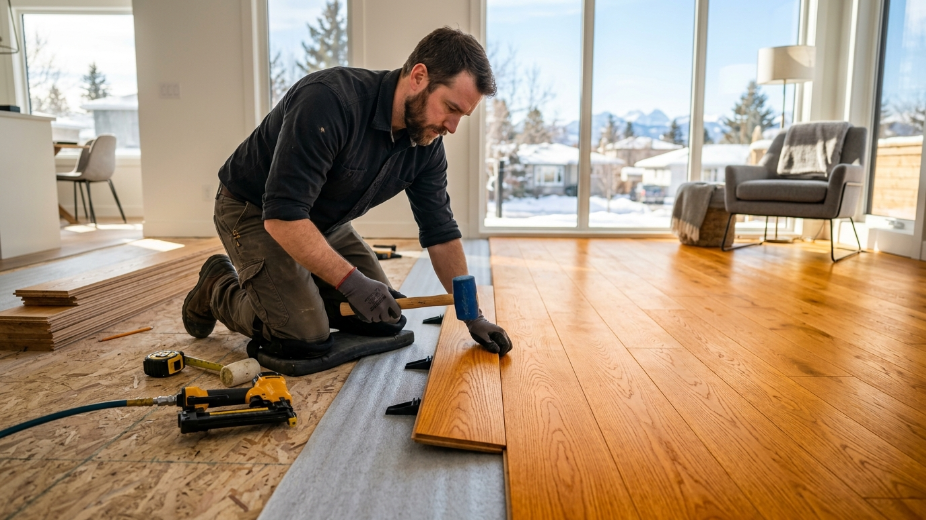
                    Dealing with water damage doesn’t always mean replacing your entire hardwood floor. Our water damaged hardwood repair specialists can assess the extent of the damage, recommend the most effective repair solution, and restore your floors with lasting results. Whether you’re facing cupping, buckling, stains, or warped boards, contact us today for expert repairs that protect your investment and bring your hardwood floors back to life.

                      How Long Does Hardwood Floor Refinishing Take? 39